
So, you’re in the market for the high-quality soldering iron to repair a guitar cable yet still uncertain which to invest in? No biggies – we’re here to help! Read on our reviews of the best soldering iron for guitars along with our buying guide and other important related-content, so keep reading!
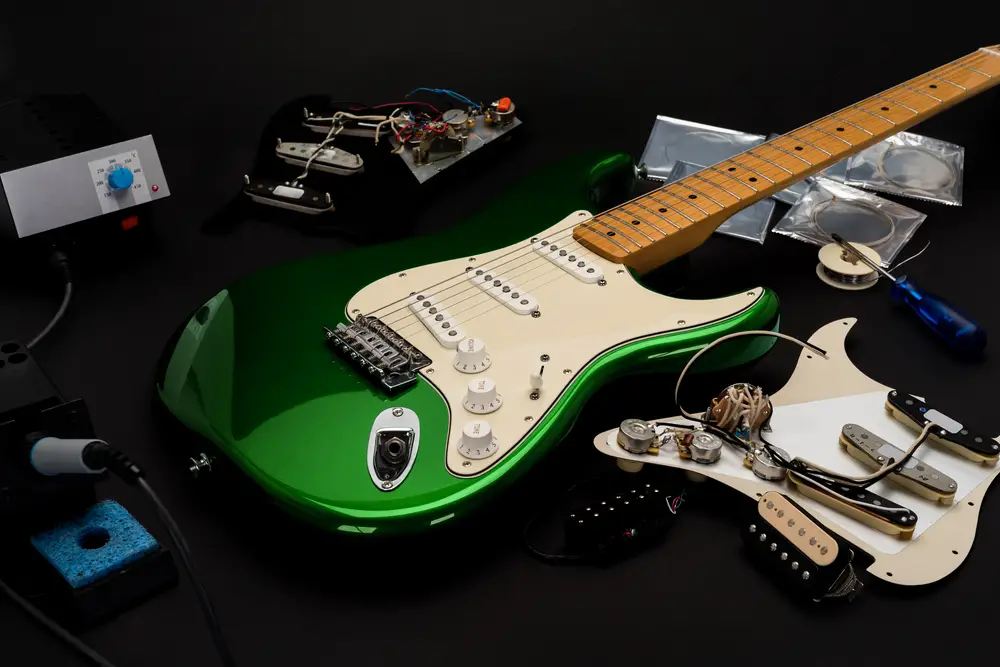
A soldering iron is not only designed for jewelry and electronic works. Even guitarist players benefit a lot from using this tool to either upgrade the pickups of a guitar or repair certain components, or both. Many guitarists choose to do soldering projects on their own because it saves them plenty of time and money. Mainly because you no longer need to buy a brand new guitar or go to a local repair store (unless your guitar is heavily damaged).
Looking at your soldering iron’s effectiveness, its use in various workshop jobs and repairs has gradually increased over time. These days, it has now become an integral tool for particular repair works. Its excellence is being utilized both in domestic and commercial chores. It offers optimal and faultless use for tradespeople and DIYers alike, which makes it a valuable tool.
We know how overwhelming it is seeing the extensive list of products available in the market today. This is why we have created this review for your reference. Each is thoroughly tested with lots of satisfied users as well as guaranteed to be budget-friendly. We hope you find the right tool after reading our review. Enjoy!
Why Soldering?
Some guitarists may ask why to try soldering if you can allow a professional to do the repair for you or buy a new model. Not to mention, the process seems delicate.
Just as soldering is not meant for everyone, so as getting a new model or hiring a maintenance specialist. Those with limited budget can relate. Take this scenario for instance:
Some keyboards of your laptop are not working. If you compare the price of getting a professional repairer to do the job and carrying it out on your own, the latter is quite a good option. You have the knowledge and tools at hand, which are an added advantage.
In a similar case, it is also an excellent option to repair certain parts of your guitar by yourself if you know the entire process and have the proper set of tools. You’ll save more bucks in the future. Plus, you have control over it. You have the peace of mind knowing no other parts of your guitar have been changed.
Best Types of Soldering Iron for Guitars
You don’t need to settle for limited choices because fortunately, there are various types of soldering irons also intended for guitarist buffs.
- Simple Iron – the traditional form of the soldering iron. Its power rating range from 15 to 35 watts. Ideal for handling most basic soldering tasks, which include repairing of guitar components. Included is an uncontrolled temperature that’s determined by thermal equilibrium.
- Cordless Iron – this is a small iron heated either by gas or battery. If electric power is not available in your area or you need a cordless tool for your operation, you can significantly depend on this form of soldering iron. You can adjust its temperature utilizing controlling the flow of gas. Interchangeable tips of various sizes and types are available too.
- Soldering Station – this refers to the temperature controlled electric power supply that comes with control circuitry. At the tip, your soldering iron or head features a temperature sensor while the circuitry includes a temperature display and adjustment. Other components could be a hot air gun, vacuum pickup tool, and a desoldering station with a vacuum pump, among others. Soldering station combines all the essential parts required for successful soldering.
- Soldering tweezers – generally used for elements between two terminals like diodes and capacitors. Tweezers can either be connected to a soldering station or free standing. A pair of it has heated tips which you can control manually. You can separate it through clasping against a spring.
- Soldering torch – much like a cordless hand drill. A soldering torch has a wire looped tip that is fast to cool. However, the use of holsters is not necessarily needed. Using this type of soldering iron means being less prone to fire accidents, thanks to its quick cooling rate. It is easy to hold and only activates once the trigger is pulled, so even Do-It-Yourself enthusiasts can also make use of a torch to repair or upgrade their guitar.
Soldering Iron Buying Guide
Just because you know that you need a soldering iron for your guitar doesn’t mean you already know what you’re looking for a product. The choices are tremendous, not to mention there are nearly thousands of stores (both local and online) available to customize your needs.
One of the first things to keep in mind while in the market for a soldering iron is its use for your certain guitar project. To further help you out, here are some essential factors you should take into account to be a happy buyer!
Types of Soldering Iron
We’ve already discussed the five different types of soldering iron available in the market today. Each has its pros and cons, and your decision merely depends upon your personal preference or financial status.
The soldering station type could be a great option if you want everything that you need in a single location. If we are talking about portability, the cordless irons are definitely what you’re looking for. Assess your requirements first before making a decision.
Tip Shape and Size
The size and shape of a soldering iron decide the kind of task you can carry out. Tips come in broad to super fine. These days, most soldering irons have interchangeable and additional soldering tips. Choose one according to your project requirements.
Wattage
Wattage is the amount of heat an iron can be able to produce. Though, bear in mind that more power is not always a practical option. It is not a true indicator of the iron’s performance. Soldering irons usually use between 20 and 60 watts.
What kind of wattage do you need? Well, that also depends. An iron with 5 to 25 watts is the best ideal for thin wires, circuit boards, and micro components. Tools with 25 to 40 watts can be used for soldering different guitar components including cables, volume pots, and input jacks. Lastly, 40 and more watt soldering iron is suitable for bigger parts and more audio cables.
Temperature Control
The best soldering irons today come with temperature control. It is adjusted and monitored as per your need. It is best to purchase a soldering iron with a temperature control adjustment. Mainly because it is capable of regulating the temperature and drop as well as crank the heat up to maintain a constant temperature.
Element
When it comes to soldering irons for guitars, there are commonly two types of elements: Nichrome wire element and ceramic element.
- Nichrome Element: A resistant wire which makes use of electrical resistance for conducting heat. Nichrome is usually larger and heats a larger metal body. This huge body can keep more heat plus the tip temperature tends to reduce quicker.
- Ceramic Element: Typically available in smaller sizes and heats up the body much closer to the tip. It then translates to much faster heating times, however, expect for less sustained heat.
So, which is right for your soldering needs? That is a bit tricky question, but fortunately, both work well when it comes to guitar repair. Consider the type of soldering you’ll do to help you narrow down your choice.
Portability
Are you going for corded or cordless?
The portability of the soldering iron is based on how you intend to use it as well as the amount of power it should have. If you only tackle small projects, then cordless models could be the right option for you. While for larger projects, it might be better to opt for a corded model; otherwise, you would have to fill up the reservoir every ten minutes once it runs out of fuel (e.g., butane).
Brand
Don’t fall into the conclusions that only popular brands offer high-quality products. That is not always the case. There are also other brands or companies that could meet or even exceed your expectation. Just thorough research is what you need.
Other than making sure it is a branded product you’re looking forward to purchasing, the soldering iron’s performance is also imperative. Hence, scan and read through long-term and short-term customer reviews to get a clearer idea of the reliability of the tool.
If you are also after better warranties, look for a well-known brand. Especially for first-time buyers, you want to ensure that the product is fully covered to prevent loss of money due to certain defective parts.
Accessories
Also, it is good to have some accessories on hand when buying a soldering iron for guitar purposes. For instance, a brass coil or cleaning sponge is a must to keep the tips newly tinned and clean. Otherwise, an iron stand helps to keep the soldering iron easily accessible, besides protecting the hot areas from accidental injuries.
Maintenance
While some of the components of irons work for numerous years, it is still necessary to change them at daily intervals. You want a product that won’t give you pain when cleaning the parts and maintaining them. You can ask the sales staff about this matter.
What Type of Solder Should You Use?
The solder you’ll use makes a difference, too. First of all, what you should know is that solder is available in different forms: wire, pellets, paste, and bar. Lead-free and lead-based are the two types of solder.
Lead-free Solder: The melting point is higher, although quite difficult to work with.
Lead-based Solder: This is made from a blend of lead and tin. The melting point ranges from 180 to 190 degrees Celsius.
Comparison Chart
Detailed Soldering Iron Recommendations and Reviews

1. Weller WLC100 40-Watt Soldering Station

Whether you’re a hobbyist or beginner, this soldering iron is mostly recommended to use. The Weller WLC100 40-Watt Soldering Station is one of the best sellers in Amazon. From durability to functionality to price, you won’t question at all.
It has an ST3 tip, soldering iron, and base unit with built-in iron stand. The lightweight pencil iron is the core of Weller WLC100. A cushioned foam grip is included to ensure a comfortable work as well as a replaceable heating element so you can continue using similar iron for a more extended period. Also features safety guard iron holder, good temperature range, and adjustable variable power controls.
What We Like
- Pencil iron is easy to control and sturdy
- Excellent temperature range and entry level soldering iron
- Has a cushioned foam grip with a heating element you can easily replace
- On/off switch with power indicator light
- Budget-friendly
- Up to one-year manufacturer warranty
What We Don’t Like
- Temperature info not included
- The iron takes a little bit to heat up
2. Tabiger 60W 110V Soldering Iron

This is another best-seller soldering iron we have on the list. Tabiger is super-efficient and convenient. Adding to your excitement are some solid features and a good number of accessories that come along with it.
Worth the penny!
The Tabiger 60W 110V Soldering Iron is equipped with the newest technology. That means made for perfection! Enjoy faster soldering job with its best heat dissipation. Included in the package are desoldering pumps, solder, soldering tips, stand, and cleaning sponge. So, if you’re aiming for a complete soldering kit for any guitar soldering needs, this one won’t disappoint. The solidly built handle ensures long-term use.
What We Like
- Heats up quickly
- Easy to use and store
- Temperature control
- Comes with a 6-in-1 complete kit
- Cost-efficient
- Variety of tips
What We Don’t Like
- The specified temperature numbers are very small and difficult to read at times
- The stand is quite poor in terms of quality
3. OMorc Soldering Iron Kit

The OMorc Soldering Iron is equipped with excellent versatility to solder various items, including guitar components. Since it is lightweight, bringing it along with you is not a real headache. The 5 pieces of replaceable tips help you carry out numerous types of jobs. Carrying the iron is just easier thanks to its comfortable and secure grip.
Adding to the smooth soldering operation is the quick cooling and heating aspects of OMorc soldering iron. Certified by FCC, CE, and ROHS, hence, ensures the highest safety level. The handle maintains cool even at the hottest environment since the handle is heat-insulated and slip-resistant. Besides soldering some parts of guitars, this iron is also ideal for soldering remote controlled cars, computers, mobile devices, jewelry, etc. Features an on/off switch and LED indicator alerts.
What We Like
- Durable construction and versatile
- Instant cooling and heating
- Better heat dissipation
- The LED indicator helps prevent accidental burning
- Easy to control and energy efficient
- Available in five unique tips
What We Don’t Like
- Tiny stand
- Quite poor quality solder

4. Stahl Tools SSVT Soldering Iron

If you’re looking for a soldering iron that can be able to pull out the precise temperature for soldering tasks (other than for guitars), then this SSVT Soldering Iron by Stahl Tools could be your best pick.
Choose from 302 degrees F up to 842 degrees F. Using the tool means being comfortable all through the entire work since the pencil is equipped with a rubber grip. Furthermore, it also serves as a heat insulator for protecting you from potential burns.
Aside from temperature adjustability, Stahl Tools Soldering Iron is also available at a price that won’t hurt everyone’s wallet. You can easily accomplish any soldering projects with the adjustable five to forty watts adjustment of SSTV. The pencil is lightweight and has a rubber grip that offers a comfortable, smooth work throughout.
What We Like
- Versatile and affordable
- Has power-on indicator
- Great value
- Adjustable temperature
- Durable stainless steel pencil stand
- Comfortable handle
What We Don’t Like
- Heavy
- The overall build quality is not quite impressive
5. 16-in1 Soldering Iron Electronics Kit Toolbox

If you’re in the market for a compact yet multifunctional iron kit that is sure to blow up your expectation, the 16-in-1 Soldering Iron Electronics Kit Toolbox is here to save your day! It consists of all sorts of accessories and tools to meet any of your soldering needs. A must-have tool for enthusiasts, learners, hobbyists, and soldering experts.
Since all the tools you required for completing soldering works are already contained within, you don’t need to run errands to purchase added accessories. For instance, it has a stand you can use for holding a gadget or component or even once temperature runs high. It heats up fast and cools instantly as well.
What We Like
- Compact, multipurpose kit
- Features a Chip Fixed Resistor
- Instant heating
- Great value
- Affordable
- Also ideal for novices
What We Don’t Like
- The soldering iron doesn’t greatly fit in the stand
- While good for newbies, pros might need more innovative tools
How to Solder Guitar Components
Here, you’ll get to know how to properly solder different components of your guitar using a soldering iron. But first of all, you should familiarize yourselves with the tools required for completing the job.
What you need:
Soldering iron – it’s a relatively simple and cost-efficient devices. Most recommend getting an iron ranging from 15-45 watts. If it goes past that, then it is not a good idea because you’ll only run the danger of generating a huge amount of heat. This eventually causes the electronic components of your guitar to burn up.
Solder – you may consider getting a rosin core solder, 60 to 40 tin & lead. It serves as the industry’s standard when it comes to electronic soldering.
Wet cleaning material – ideal material used in cleaning the iron’s end as well as keeps it from burning up electronics (e.g., guitar switches or pots) and overheating. A damp sponge could be utilized as well.
Wire strippers – these are used for removing the protective, external coating or insulation around the wiring. A small gauge wire stripped is enough to use since you’re only dealing with tiny wires, like pickup wires. A 22 gauge smaller wire stripper might be good for extra small wires.
Now, let’s start with the basic one!
Soldering Guitar Electronics
- Strip the exposed wiring or strip it anew. Other pickups already have exposed wire ends of the wiring, and others require it to strip. Stripping the wiring means extracting the rubber coating or insulation just about the wires. Do it with the use of a wire stripper. Make sure the wiring is in the wire strippers’ hole. Now, crack down on the wiring. Pull off the insulation afterward to expose the wire – only around 1/4 inches for soldering.
- Tin the solder’s tip, no matter whether it is old or new. When we say tinning, this means covering the tip using a thin solder coat. Used tips should be cleaned, and new tips require solder. Hence, it is suggested to plug in the soldering iron and allow it in heating up for some minutes. After that, wipe off the tip on a paper towel or wet sponge. This will clean off the aged oxidized tip. Get a solder’s pin and then melt a shrill coat onto the iron’s tip. Use a damp sponge in wiping it off. Doing so will ensure the flux and solder will not harden.
- Tin the bare wire. Or else, you can start twisting the wire as one as well as tinning it. This will help in keeping the wire from the possible break and keeping it hustled together. To start with, get your soldering iron and use it to heat the exposed wire. Melt a few amounts of solder onto it. Then, wipe off on your sponge instantly.
- Allow the joint to heat up before paying a solder on it. There are various steps you can follow depending upon on where and what you’re soldering.
Soldering Electric Guitar Pots
The soldering pots or potentiometers of an electric guitar is a bit different to that of guitar jacks and switches. Also called the volume knobs and tone, electric guitar pots have wires that are directly soldered to its post themselves as well as have wires that are soldered to its pots’ three lugs.
- Start by heating the pot using your soldering iron in making a robust solder joint upon the pot’s back. Move the area in which you plan to solder the wires to. Just an important precaution: Do not overheat the guitar’s pot and do not leave the soldering iron in a similar place for a long period. When it gets very hot, the electronics may get burned.
- Ensure the wiring is tightly held against the back of the guitar pot. Hold your solder stick using your same hand and the iron unto the pot with your other hand. Press your solder against the hot pot. You’ll notice the wire is slowly melting and covering.
- Now, remove the solder and the soldering iron. Start warming the pot to apply the solder for it to flow around the wiring and on the pot. Hold the wiring properly for a second or two once you remove the iron and solder have been removed. Allow the solder to dry and roughen.
- Assuming your solder is already dry, the next thing you have to do is check the joint or connection utilizing waggling the wire a bit. For loose connection, try heating the pot till your solder gets loose.
Soldering Printed Circuit Boards
- Prepare the surfaces and your components. Clean oily fingerprints, dirt, or oxidation to prevent solder from moistening the solder pad. Use an adequate amount of isopropyl alcohol to wipe them down. Using a pair of pliers, make a bend within the legs of your components. This allows every edge to secure the right angle. Push the legs through the board holes and then push them all way down. Afterward, turn over the board and slightly crook the legs to lock the component properly. Make sure the components lay evenly against the non-traced side before proceeding.
- You are now ready to prep your soldering iron. Heat it first before cleaning the tip of the iron to get rid of excess flux and solder residue that could be there. Tin the iron subsequently.
- Apply solder and heat. First, apply heat onto the pad for a second or two and put the solder in contact with the pad. Be sure the solder begins melting and flowing on the pad. Feed for around a second. Surround the lead and coat the pad, however, be careful not to apply too much. Leave the soldering iron on the pad for another second while taking away the solder. Now, remove the soldering iron from the pad.
Soldering Electric Guitar Input Jacks and Switches
- Both electric guitar jacks and switches have lugs, and a small prolongs that jut out from the side. Heat the lugs first using an iron.
- When warmed up, attach the crumpled wire within the lughole. Then, grip the wire so that it will hook around its lughole.
- Take hold of the solder with a similar hand. Get the soldering iron and put it upon the lug. You have to keep pressing the solder set on warm lug for it to melt.
- Just hold the wire to allow the solder to dry and harden for some seconds. As soon as it gets dry, test the joint. Start over if it’s slack or muddled.
Changing Guitar Pickups with a Soldering Iron
One easy way to customize an instrument as per your needs and get a better tone is changing the pickups of your guitar. It might be a good idea to hire someone to do the job; it is a great skill to learn. As long as you have a soldering iron at hand, the entire work is just easy peasy.
To help you out, we’ve gathered the important steps to make your task successful.
First of all…
Why do you need to change the guitar’s pickups?
Any guitarists determine the importance of good quality guitar pickups. It can give you cheap or quite low-quality guitars a cool tone. There are various reasons why you need to change your guitar pickups, though. For…
…low-end guitars. First of all, we want to start by saying there is no wrong with playing a low-end guitar. After all, everyone cannot afford a guitar that is more than $3000 the price point. Plus, I’ve known some new guitarist players who begin with the low-end type of guitars. However, it is not also wrong to desire for a better tone as low-end guitars likely use the most inexpensive pickups out there. So, with high-quality pickups at hand, you are sure to provide yourself and your audience a serious tone development.
…mid-range guitars. Depending upon the manufacturer, the pickups in mid-range guitars could be a miss or hit. Some companies invest the money in the quality of build and wood. Meaning to say they tend to cut corners with guitar pickups. While they make use of the Duncan name of the brand, they are outsourced to a foreign company or manufacturer. There’s a difference in terms of quality.
…high-end guitars. Typically, high-end guitar pickups come with superior quality. Some guitarists consider changing pickups due to the demand of various tone types. Whether you’re a professional singer or just someone who loves playing guitars, your tone preferences might change over time.
Choosing Your Guitar Pickups for Upgrade
Now that you know the significance of changing the pickups of your guitar, the next concern you might come across with is how to choose some properly. The thousands of options available in the market these days leave you confused.
Let’s start with the type of tone you usually prefer. Don’t fall into the trap of what’s the most popular or what’s the advertiser offers you. What will matter most is thinking about what you want from pickups. You can start by pondering about the type of tone you generally use as well as the music you listen to.
The last, and certainly not the least, is taking a look at the popularity and reviews. As much as possible, only the trusted brands should you lend your trust to. We do not generally say quite popular, or new brands are not worth the try. This is where scanning through the reviews about the company and their products would come to help.
Are people talking about them and happy with their purchase? How about the complicated reviews? Take a thorough look before making a final decision. Some guitar pickups are still well-known even after some years. Let’s say after five to ten years.
We recommend buying one of those pickups since they have a proven excellent track record. Just put it this way, a product or service won’t last if it is not highly sought-after among consumers. It means reliability. So, your hard earned dollars are entirely safe!
Upgrading Guitar Pickups with Soldering Iron
Before everything else, preparing all the tools you need to tackle the job is highly critical and necessary. Aside from soldering iron, you will also need solder, screwdriver, knife or any sharp blade, a rag or cloth (big enough to protect your guitar when needed), and wire cutters.
Step 1: Set up a good working area
Since you are going to access both the guitar’s sides, you must ensure the area in which you plan to work on is banging-free. This means, a clear desk or table. You may consider working on a carpeted floor to get rid of the possible chance of rubbing the body of your guitar.
Step 2: Wiring
Let’s say you’re currently happy with the new pickups of your guitar. What if you suddenly decided to change it? Either change back to the original pickups or sell the guitar through the stock pickups. Hence, it is recommended to take a picture and write down notes.
This is specifically vital when dealing with wiring. Take a photo of the wiring so that you keep a record of the existing wire. Also, jot down a simple diagram of your guitar wiring. By doing so, you’ll immediately find out what is wrong or keep track of the process.
Step 3: String removal
Now, it is time to remove those strings. You can do this by unwinding them using your bare hands until they are slack. Then, cut with wire cutters.
Step 4: Clean the guitar
You have a great chance to clean the body and fretboard of your guitar. Clear out the headstock and bridge, eliminate any buildup of dirt and grime, and polish the frets. All of these play a large role in the playability of your guitar.
Step 5: De-solder the wiring of your guitar pickup
Once your guitar is tossed over, look for the points in which the wires of your pickups are linked to. Heat first the iron and then press against the point where you want the wire to be extracted. After some seconds, you need to see the solder converting into a liquid form. Now, tug the wire and get rid of it from the solder.
Step 6: Pickup removal
It’s high time to remove the pickups as soon as the wire is free. Mostly, you will have removed a few screws that hold the pickups properly.
Step 7: Install the new pickups in your guitar
If your guitar has pickup rings, you can start by mounting the new pickups inside the rings. Then, feed the wire of your pickup with the hole to the back cavity. Pull the wire as gently as possible from the back as you put the pickup in the right position. To make sure the pickups are held in a good position, it is suggested to interchange the mounting screws.
Step 8: Wire up the guitar
There are numerous ways to wire up the guitar, so as wiring the pickups for you to have access to various tone selections.
Step 9: Connecting new wires
Bear in mind that a connection that is poorly soldered can cause tone problems, so it is imperative to take enough time doing this process. Just some important tips, do not breathe in fumes and use a stand for your soldering iron. Moreover, remove the tone or volume pots if you’re not able to reach them and of course, make sure that your guitar is always safe. Use a rag or cloth. Practice makes perfect, so it won’t hurt doing so.
Step 10: Test!
Here, use a screwdriver in terms of wire testing. So, restring is out of the context.
Step 11: Restring the guitar
Assuming you have done wiring your guitar successfully, now’s the time to restring your guitar and close the cavity. Adjust the height of the pickup as per your individual preference. Newbies might get amazed at the level of improvement they hear in their guitar’s tone. Enjoy getting full access to more tones and share the same music sentiments to everyone!
Conclusion
There you have it – our pick of the top five best soldering irons for guitar. Each caters to the needs of electronic technicians, hobbyists, guitarist players, and more. They can prove to be worthy of the investment, though of course, there’s still one that stands out the most.
Brilliantly designed, the Weller WLC100 Solder Station is by far the best product we think would feel you no regrets upon buying for your next guitar soldering projects. It is lightweight, very handy, reasonably priced, and packed of rich features. There’s nothing you shouldn’t love about Weller soldering iron.