
You must have experienced an electric shock or have heard someone else talk about it. An electric chock is a vibration your body senses every time you come into contact with an electric current. In most cases, unless one is too daring, no one will want to touch or come into contact with electricity. It can burn or cause death in the extreme.
Safety Check
Human bodies, just like copper wires and water, are good conductors of electricity. This is why you feel the vibration of a rough feeling every time you come into contact with electric power.
If you get a shock when you hold, touch, or when handling an electrical appliance like the electric kettle, the electric iron, a television, or a fridge, this article is for you. This shock happens because these appliances are not well-grounded, or you are using a faulty connection.
Here safety comes first, and a multimeter assures your safety. A multimeter is an electric device whose primary purpose is to measure voltage, resistance, current, and continuity in electrical connections. This device is not hard to understand. It will look complicated at first sight, but after I take you through this, you will get to know it is just as easy as to plug in your home appliances in the socket.
What Is a Multimeter?
A multimeter is used to measure both AC (alternating current) and DC (direct current). In our case, we are on AC, and on the screen, you will see a wavy sign after the knob is adjusted to measure AC. It has three ports on its face.
We have one labeled COM, and this is where to fit your negative probe and another one labeled mAVΩ, and this is where to fix your positive probe and the last one labeled 10A, which we don’t intend to use in our case. If you interchange the positive and the negative probe, what you get on the screen will have a negative sign in front of the value. To avoid this, port the probes correctly. When measuring AC, we don’t have to select a range.
How to check ground/earth using a multimeter
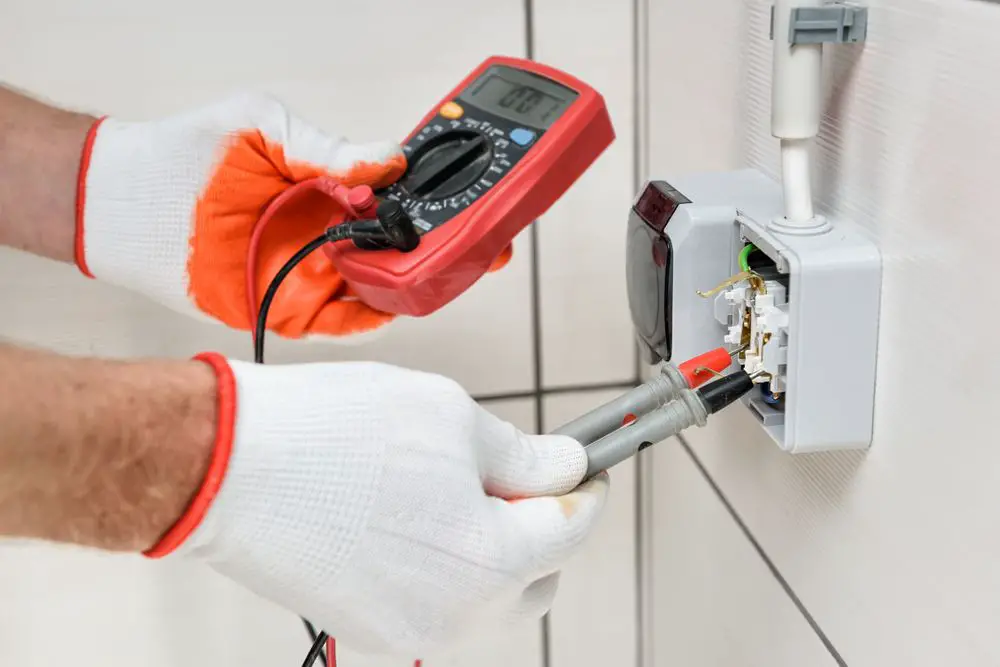
On the outlet socket, place the probes in the neutral and live ports. Place the positive probe (denoted by the color red) in the neutral port holding on the insulated part to avoid being electrocuted. Also, place the negative (indicated by color black) probe in the live port of the same outlet.
The live, neutral, and earth ports on the socket may differ depending on the type of socket. We have an M and D type of plugs. It is advisable to note your kind of plug to avoid taking misleading measurements. Switch on the socket and record the readings on the multimeter.
Still, on the same outlet, place the probes in the live and the earth port. This time you will shift the red probe from the previous port, which was neutral to the earthing port. It’s done when the socket is off and carefully not to damage the probe or the outlet.
Check the readings on the multimeter record, which are in voltage. In this case, if the system is earthed, the first reading you got when the probes were in the neutral and live port should be close to the reading when the probes are in live and earth.
Now test the voltage between earth and neutral port of the same outlet. Shift the black probe from the live port to the earth port and the red probe from earth port to the neutral port. Note the readings on the multimeter and write them down. In this case, the readings should be lower than in the first two readings. Now you have the record of voltage flowing through the ports.
Calculations
The last step is about calculating, so if you not good with numbers, you will need a calculator. With the recorded reading, we can get the total leakage on your outlet by subtracting the readings you got from live and neutral (first reading) from the readings in the earth and neutral (second reading). Add what you get to the reading from the earth and neutral (third reading).
Here are some practical examples
example 1
If Your first reading was 233 v
The second reading was 234 v
The third reading was 0.5
The leakage will be equal to (234 v -233 v) + 0.5 v
Total leakage of your outlet will be 1.5
Example 2
If your first reading was 233 v
The second reading was 240 v
The third reading was 0.7 v
The leakage in this case will be (240 v – 233 v) + 0.7 v
Total leakage of your outlet will be 7.7
Note the above examples are not a real measurement or the measurement you should get if you conducted the test, but are for guiding you. In the examples, you can note the difference in total leakage. The difference is what will tell you if your outlet is grounded.
Theoretically, when an outlet is properly grounded, the leakage should be zero, but practically the leakage should be less than 2.0. You should note the closer you go to zero, the more the grounding. Anything else greater than two, like in our second example, need to be looked into as it’s not properly grounded.
There are things that you should note when using a multimeter, such as the measurement range is higher. Computer-assisted translation rating makes the digital multimeter safe for use. The voltage between two points being one volt doesn’t mean the ground voltage is one. It might be 150 volts or 200 volts.
Safety Tips
It is not safe to touch the earth with your bare hands. Multimeters are professionally fair to use but exceeded limits, e.g., volts to 1000 require thick installation. Be careful when handling the probe; they have sharp edges. When you find out that your outlet is not grounded, do not take action, remember you are not an electrician. Call an electrician if you are not comfortable testing your home wiring for grounding alone.