
Laser engraving is an excellent way to customize glasses, bottles, mugs, etc. From printing a company logo to engraving a meaningful photo, engravings can help you save your most precious memories or advertise your business.
This article will discuss how to laser engrave glass. Plus, we’ll provide valuable tips and tricks to get the best results.
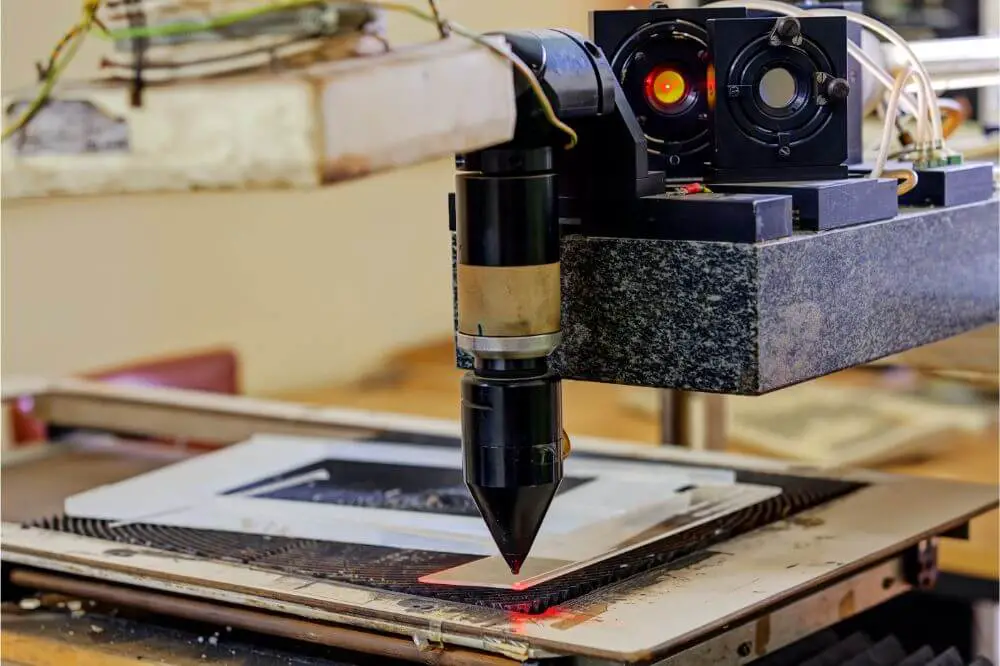
How to Laser Engrave Glass
Although many consider laser engraving complicated, it’s a straightforward process if you have the right equipment.
The first thing you need to do is develop a design you want to engrave on the glass. This can be a logo, image, name, pattern, or anything else you have in mind. Then, use a program of your choice to create the design or hire a graphic designer to do it for you.
Keep in mind that some laser engravers come with their own software for creating designs, while others are compatible with particular programs. Check the compatibility of your laser engraver with the program you’re using before starting the process. The user manual should have all the necessary information. Plus, you can use the manual to adjust the laser for engraving glass.
Depending on the glass object you want to engrave, you may need to set up the rotary attachment on your laser engraver. Since laser engravers fire straight down, you need this attachment to rotate the object and engrave along its sides and/or bottom. This attachment is essential for rounded objects like glasses, bottles, or mugs. Keep in mind that the object you want to engrave should be symmetrical. Otherwise, you risk asymmetrical engraving or damage to the object.
Another thing you should pay attention to is the existence of handles on the glass object you want to engrave. Again, the trick is to position the object correctly and avoid moving the handle into the engraving field.
Once you’ve set up the rotary attachment, it’s time to ensure your device is connected to the engraver and double-check the settings. After that, you should find the design you want to engrave, pull it on your software and send it to your engraver as if you intend to print it on paper. The laser engraver will now transfer the design to the glass.
After the engraving process, you should clean the glass. We recommend using a nail brush to remove glass shards and rubbing alcohol to get rid of oil residue. You can also use 8,000-10,000 grit micromesh sanding pads.
How Does Laser Engraving Work?
Laser engravers use high temperatures to transfer your designs to glass. This is possible because of the composition of glass objects. Glass is made by heating and melting silicon at high temperatures, turning it into a thick fluid, and trapping moisture and air. Laser engravers take advantage of these trapped elements, which react and expand when in contact with the beam’s heat. This creates microscopic fractures on the surface, which is what we see and feel as engravings.
Best Glass Type for Engraving
The success of laser engraving largely depends on the glass you’re using. It’s best to avoid using glass with a higher lead content. Lead and other metals can make the laser skip a beat, resulting in uneven engravings. Plus, glass with metal components tends to break more easily when exposed to the laser beam’s heat.
Crystal glass tends to contain lead. If you have to work with such glass, you need to be extremely cautious because lead expands faster than the rest of the crystal. If possible, test the glass before exposing it to the laser engraver. Moreover, adjust the laser settings to avoid breaking the glass.
For laser engraving, cheaper glass (price and quality) is almost always better. Such glass typically has a low lead content and a more homogenous structure. In contrast, expensive, hand-blown glass often contains components that don’t react well to heat and increase the risk of breaking.

Advantages of Laser Engraving
Numerous technologies can be used to transfer a design to a glass object. These include sandblasting, glass reflow processes, and wet etching. So, why would one choose laser engraving? Here are a few advantages of this method.
Speed and Precision
Laser engraving takes significantly less time and is much more precise than sandblasting. Thanks to the laser’s precision, you can engrave intricate details and pictures onto the glass.
Consistency
Laser engraving is fully automated, meaning you can replicate your design as many times as you want and get the same quality and identical patterns.
Cost
Laser glass engraving is one of the most cost-effective techniques for customizing glass. Compared to sandblasting, laser engraving is several times more affordable, and the result is very similar.
Convenience
You don’t need high-end gear or protective equipment for laser engraving. For example, there’s no need for masking, which isn’t the case with other glass marking technologies.
Easy to Maintain
Laser engravers are relatively easy to clean and don’t require much attention or special care.
Tips and Tricks for Laser Engraving
Laser engraving isn’t complicated, but it can take a bit of practice. Here are several tips and tricks to help you get the best results possible.
Use a Damp Paper Towel
The glass breaks during engraving because of too much heat, especially if you’re using glass that contains lead. You can minimize the risk of breakage by placing a damp paper towel over the engraving area before beginning the process.
The paper towel will help with heat dissipation, thus protecting the glass from breaking. The paper towel can help you get more precise, higher-quality results. Keep in mind that the paper shouldn’t have any wrinkles or bubbles when placed on the glass.
You can use a damp sheet of newspaper if you don’t have paper towels. Some even apply dish soap to the surface before the engraving process. Although dish soap can be just as effective, remember that it will dry out after some time. So if you want to use it, don’t forget to reapply it constantly for the best results.
Use Lower Resolution of Dots per Inch (DPI)
By using a lower resolution of dots per inch (DPI), the dots will be engraved farther away from each other. This results in a better frosting effect and a high-quality end product. Plus, it prevents rough etched glass. The recommended DPI value for engraving glass is 300.
Use the Right Grayscale
By manipulating the grayscale rasterization, you can reduce the amount of heat applied to glass and minimize the risk of breaking. Reduce the grayscale rasterization to 70-80% black for the best results.
Reduce the Speeds
Flat glass usually has the same hardness throughout, making engraving much easier, with no inconsistent areas. On the other hand, curved glass objects like bottles, glasses, or mugs require the adjustment of engraving parameters. These objects have both hard and soft spots, and not using the right parameters could lead to inconsistencies. It’s best to use high power and minimum speeds to compensate for these discrepancies.
Use Jarvis Dithering
Jarvis dithering scrambles the dots engraved on the glass. You can use it to shorten the time required for laser engraving and create a high-resolution image without difficulty.
Create Personalized Items With a Laser Engraver
While other technologies may offer better results, laser engraving remains one of the most popular methods for marking glass objects. Laser engraving isn’t complicated, but it requires specific skills and knowledge. In addition, it’s important to remember that not all glass acts the same when exposed to laser beams, and in this case, the cheaper the glass, the better.
We hope this guide helped you learn how to laser engrave glass and what tricks you can use to get the desired results. Even if you’ve followed all our tips, the glass can still break. Keep in mind that laser engraving takes time and practice. You’ll need a few tries to figure out the best settings for engraving glass.