
Electrical issues can arise in any home at any time; the precaution to take is to do tests early to prevent possible damages to appliances. Do you know how to carry out outlets power tests safely? Don’t worry if you don’t, I have got you covered in this article.
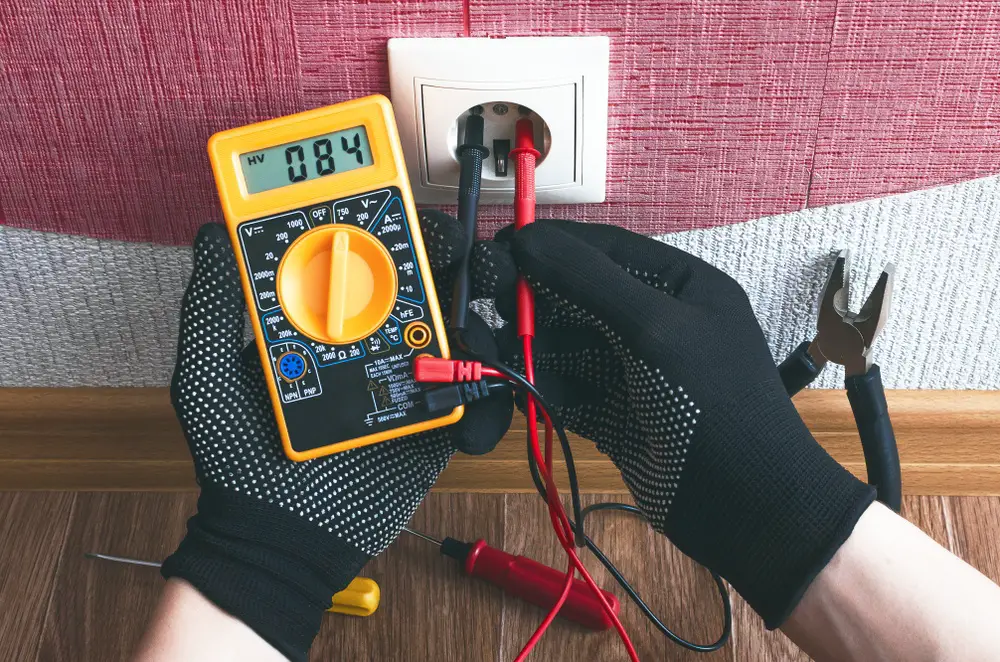
To perform outlet tests, you need to have the go-to tool used to diagnose electrical problems called a multimeter. It is a device that gives quick and automatic, readings on VAC (volts alternating currents). When used on an outlet, it checks alternating current (AC) voltage to identify, tripped circuit breakers, if the outlet is leaking, whether it’s functioning properly, if it has proper earthling, as well as electric shocks. Outlet tests should be done once or twice annually. Outlets can easily get affected during the winter. In this guide, we have outlined all the steps on how to use a multimeter on an outlet.
- Equipment & Safety Gear Needed.
- Prepare Your Digital Multimeter
- A multimeter's main uses on an outlet include:
- Understand Your Power Outlet Before Testing.
- Checking the Voltage Supply to Determine If the Outlet Has Power.
- Checking a Blown Fuse Or Tripped Circuit Breaker.
- Checking If the Outlet Has Reversed Wiring
- Checking for a Properly Grounded Outlet
- Checking If the Outlet Has Current Leak
- The Take-Away
Equipment & Safety Gear Needed.
Here are the things you need to take accurate outlet readings safely.
- A digital multimeter
- Hand gloves – if they are available.
- Sandals or shoes – wear them to avoid contact with the floor.
Prepare Your Digital Multimeter
Below is how you should prepare your multimeter
- Use a digital multimeter; it is preferable over an analog multimeter as it takes more accurate readings and its easier use
- Before carrying out any tests, ensure that you test your multimeter for any faults or battery issues.
- .
- Always read the instructions that came with your multimeter because different models may have minor differences even in how they are operated.
- Another important thing is to check whether the multimeter can be able to test the range of voltage of the outlets in your house. In the United States, an outlet voltage is 120V while in Asian countries, it is 220-240V.
- To start using your multimeter, insert the red lead into the millimeter’s connector labeled “volts” and then connect the black lead to the “COM” label.
- Next, switch the multimeter dial to Alternating Current Voltage (ACV): Alternatively, it may be signified with a V ~. Or a ~V symbol. This setting is the one used for measuring the voltage from alternating current i.e.the power originating from the electrical outlet. The reading, as of now, should be 0.0 VAC, VAC, or only 0.0 depending on the model.
A multimeter’s main uses on an outlet include:
- Checking the voltage supply to determine if the outlet has power.
- Checking if the outlet wiring is reversed.
- Determining whether the outlet is properly grounded
- Checking the case ground/earthing connection
- Checking if the outlet has current leaks
Safety Tip: When carrying out the tests above, avoid using heavy electronic appliances in other outlets.
Understand Your Power Outlet Before Testing.
It is important to understand how a power outlet is designed before testing. Below are details of an American designed power outlet
- A small hole (on the right) – it is the one with voltage. It is called ‘live.’
- The larger hole (on the left) – it is called the neutral
- The third hole (below)– it is called an earthing, case or common ground
Having understood the above points, here’s how each of the tests mentioned earlier is done on an outlet using a multimeter.
Checking the Voltage Supply to Determine If the Outlet Has Power.
- Hold the two probes on the same hand and insert each into a vertical slot on the outlet.
- Ensure the red enters the smaller slot (live) while the black one gets into, the larger one (neutral).
- Take note of the reading
- If the outlet has a reading of between 110 to 120 volts, then it’s getting voltage and working properly. For those in Asian countries, the voltage reading should be around 240V.
- If there is no reading (0.0), the outlet is probably faulty or has a bad connection. The wiring needs to get checked.
Note: A similar connection to the live (small right hole) and earthing (third)holes should read the same value since the earthing is a neutral point.
Safety Tip: Holding the two probes on the same hand will prevent shock from passing through your body.
Checking a Blown Fuse Or Tripped Circuit Breaker.
- Remove the black lead from the left slot
- Please insert it into the oval slot (third hole).
- Check the voltage reading, if there is no reading, the fuse is blown, or the circuit breaker is tripped.
Checking If the Outlet Has Reversed Wiring
- Insert the red probe into the large left hole (neutral )
- Insert the other black probe into the third hole (ground)
- Don’t forget to do it using one hand.
- Observe the reading
- If there is a reading, the outlet has reversed wiring.
- If there is no reading, the wiring of your outlet should get checked
Safety Tip: Reversed wiring won’t affect simple appliances such as lamps, but it can cause issues for more advanced appliances.
Checking for a Properly Grounded Outlet
- Insert the red lead into the large left slot (neutral)
- Insert black lead into the small right slot (ground) all while using a single hand for safety
- Observe the reading.
- If there is no reading, the outlet is not grounded. If there is a reading, the wiring is reversed.
- If the voltage reading has a –ve symbol, the outlet has a reversed polarity.
Checking If the Outlet Has Current Leak
- Place the red probe to a screw or metal around the outlet. Make sure there is no paint on the screw or metal.
- Insert the black into the earthing hole (third hole) to test ground to ground
- Observe the reading
- If the display shows zero, there is no current leak
Safety Tip: Do not allow the metal portions of the black and red probes to touch each other during these tests. It can result in a dangerous short circuit.
The Take-Away
A multimeter is a very important tool in a home. As you have seen, it is very easy to use it to test outlets and ensure a safe home. All you need is to set it up by connecting its leads (red and black) to their respective connectors, inserting the probes into the required holes in the outlet, and taking readings.