
Soldering copper jewelry is an easy task because it only follows the soldering basics. Copper metal can generally be soldered using other metals with lower melting points; compared to its relatively high 1983 degrees Fahrenheit. Lead alloys were initially used to solder copper but have since ceased due to lead-poisoning concerns.
For jewelry, lead alloys alongside other metals such as silver and tin are acceptable. Procedures for soldering remain constant for any metal. It is vital to assemble all the metal parts to be soldered as the first step to avoid laying the extremely hot soldering iron down.
Make sure to have the protective gear that primarily protects your eyes.
Follow the following steps to solder:
- Plug in the soldering iron and allow it to heat up whilst placing it on the stand. Preparedness is vital when doing this to avoid unnecessary fires or burns.
- Dip a sponge in water, such that it is wet, not soaked.
- Clean the soldering iron’s tip by placing it onto the wet sponge. Cleanliness is very imperative in soldering for effectiveness and longer tip life. Flux is not entirely necessary, but when dealing with a large amount of copper, it is vital to apply solder flux. The flux could be commercial, or the homemade alcohol and rosin combination.
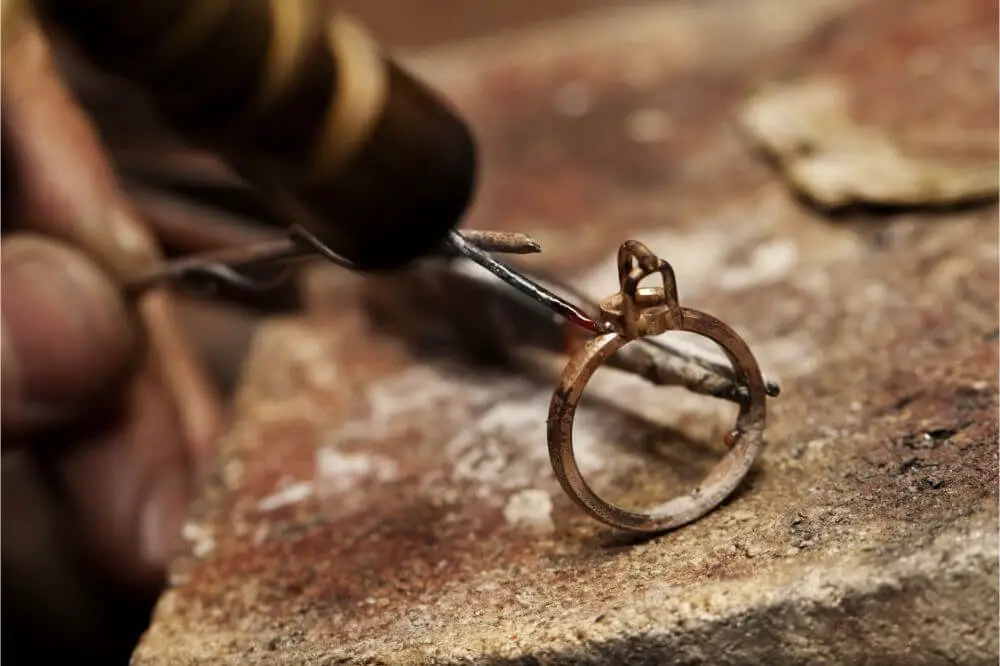
- Hold the soldering iron as you would a pen or pencil and apply it to the copper sheets you want to join. Be careful not to touch the heat shield or the tip because they are proven to exceed 200 degrees when heated up.
- Place the solder on that position until it starts to flow. Hold it in an angle that ensures a steady flow.
Remove the soldering iron before it becomes too hot.
- Make sure to inspect the soldering joint as you go. The joint becomes shiny and looks like a small copper dome. If not, repeat the soldering process until you achieve the desired results.
- Use the damp sponge to regularly clean the soldering iron tip to ensure the copper joints are void of contaminants.
For a seamless, neat output of jewelry, sweat soldering is the best option.
What is Sweat Soldering?
Sweat soldering is a process of joining two metals together. The solder is melted on one surface, cleaned, placed and reheated on the other to form a joint. Reheating the metal makes the solder “sweat” w to create a neat, strong joint. It provides an immaculate output because the solder bulk is seemingly hidden.
Before beginning the process:
The surfaces to be soldered must be flat and grease clear using a mallet and emery paper, respectively.
The metal pieces must fit perfectly, clean them a final clean by rubbing them through an emery cloth.
Apply a layer of flux on the underside of the smaller copper piece. With the flux applied side up, put onto a heat proof surface.
Put tiny pieces of hard solder on the surface using tweezers, towards the edges.
To Sweat Solder:
- Heat the metal gently, ensure to keep the flame moving for even temperature spread until the solder begins to flow.
- Let the piece cool and then pickle it.
- Rub an emery cloth over the piece to flatten to ensure the part sits nicely on top of the second piece.
- Apply flux to the two surfaces to be joined.
- Place the two pieces on a heat proof surface with the solder in between them.
- Gently heat the pieces for the flux to melt.
- Place the flame directly on the pieces, keep it moving for even temperature spread. When the color of metal turns to red, the solder begins to flow.
- The solder flows towards the heat, guide it towards any visible gaps.
- Check if the gaps are filled, well joined then remove the flame.
- Wait for the piece to cool, quench, and then pickle.
Copper and silver sheets can be soldered together to create a great piece of jewelry. The disparity in colors and the different textures are the right amount of creativity one requires to beat competitors. Soldering copper and silver can be difficult because of their differences in melting temperatures.

How To Solder Silver To Copper
Keep your metal sheets clean.
Clean the sheets after cutting out relevant designs for the jewelry you wish to make. Softly brush the metals with a brass brush to clean any fingerprints or residue left during the cutting out of designs. It is crucial to mainly keep the copper sheets clean because copper is too prone to oxidation. Always use new flux before soldering.
Knowledge of the different melting temperatures of silver and copper.
It is essential to be aware of melting temperatures when working with different metals. In this case, the melting temperatures for silver and copper are 956°C and 1085°C respectively. Failure to keep this in mind attracts undesired results. Copper’s higher melting point can melt the silver sheet or silver sinking into the copper. Keep a close eye at the silver, any signs of melting is a call to move the soldering iron away.
Sweat Solder
- Clean the silver piece.
- Holding with a tweezer, heat a small amount of silver solder that is flux coated.
- When the silver solder balls up, put it on the underside of the silver sheet such that it flows across.
- Apply flux on the topside of the copper piece and then place the silver piece on top of it.
- Move the flame above the silver sheet in a circular motion until its color turns to a dull cherry red. Remember to use a large flame to heat the silver faster, avoiding its sinking to the copper. A much smaller flame only lengthens the process allowing oxides to form in turn, making it difficult for the solder to flow.
- Allow it to cool, quench and pickle.
- For an accurate solder joint, employ the flux.
Flux provides a good flow of solder and positions the silver sheet. The circular motion during the heating of the silver, so the solder flows to its designated place.
