Taking the journey into woodworking opens up a world of creativity, craftsmanship, and satisfaction that few hobbies can match.
To genuinely appreciate this pastime, it’s important to master essential skills such as taming the timeworn challenge of flattening a tabletop with a hand plane.
This multifaceted process requires a broad understanding of different hand planes, comprehensive knowledge of the flattening technique, and the maintenance know-how to ensure your hand plane is always in top form.
Whether you’re a seasoned carpenter looking to fine-tune your hand planing technique or an absolute beginner willing to roll up your sleeves, we’re about to maneuver you into the rewarding world of woodworking.
Understanding Hand Planes
Discovering the Key Features of a Hand Plane: A Deep Dive
Ready to immerse yourself into the wonderful world of woodworking? Don’t overlook the essential hand plane.
This comprehensive guide reveals the integral features of this venerable tool, providing all the insights necessary to take your craftsmanship to the next level.
Stay tuned as we cut to the chase on all things hand plane-related!
-
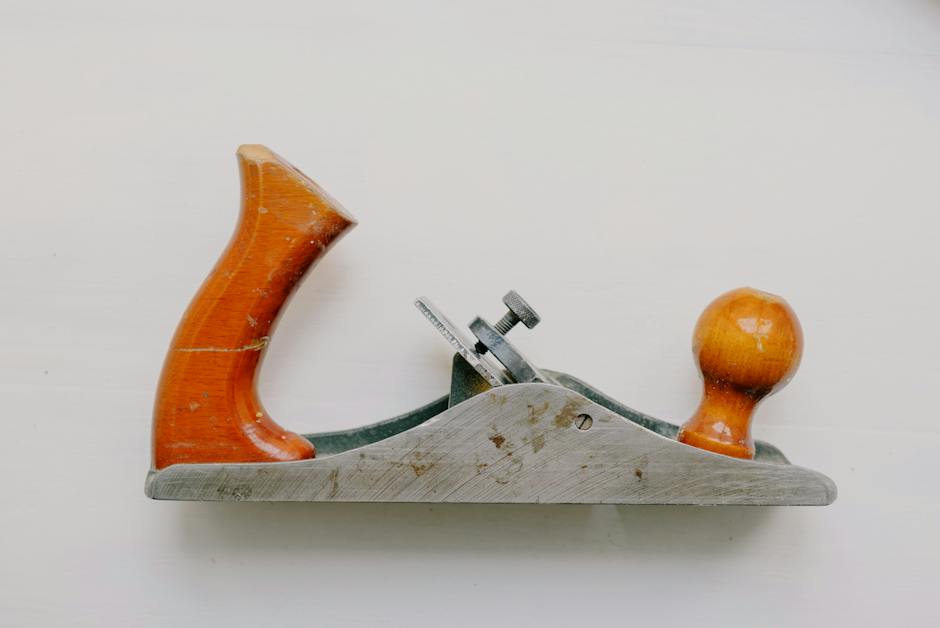
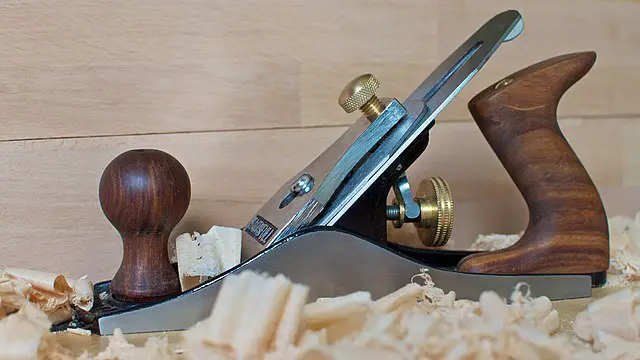
Handle (aka Tote): This is the part you grip when using the tool. It needs to be comfortable for long use and should allow for a firm grip. Some models offer adjustable handles for better control and comfort.
-
Knob: Located at the front of the plane, the knob provides additional stability and control. When choosing a plane, make sure the knob feels comfortable and easy to handle.
-
Frog: Crucial to the functioning of a hand plane, the frog is a stationary part that supports the cutter. A hand plane with an adjustable frog allows for different widths of shavings, enabling more versatility in woodworking applications.
-
The Blade (aka Cutter/Iron): Perhaps the most critical feature, it requires frequent sharpening to keep the tool efficient. Different plane types have different shapes and sizes of blades. The blade is also adjustable, which impacts the thickness of shavings.
-
Cap Iron (aka Chip breaker): Attached to the blade, it curls the wood shaving and breaks it, thus preventing clogging in the throat. It also provides extra rigidity to the blade.
-
Lever cap: This is a metal cover over the blade and the cap iron. It ensures these parts remain securely locked in place.
-
Throat (aka Mouth): The space between the blade and the sole where shavings exit. The width of the throat needs to be suitable for the type of wood being worked — a wider throat for rougher wood, for example, and a narrow one for finer, more detailed work.
-
Plane Sole: This is the bottom of the plane that slides over the wood. It should be flat for better performance. Some high-end planes have adjustable soles for different applications.
-
Depth adjustment knob: This adjusts the cutter’s position. A slight turn can drastically affect the shavings’ thickness. Having a depth adjustment knob that is easy to maneuver can significantly improve your woodworking experience.
-
Lateral Adjustment Lever: This lever, found behind the blade, adjusts the cutting edge alignment. Proper adjustment means that the blade protrudes through the mouth evenly and ensures an even cut across the plane’s width.
Getting to grips with these core features of a hand plane will provide a firm foundation for your woodworking prowess.
Dive in, and may each shaving add a notch to your craftsmanship journey. Remember, each hand plane has its own personality and learning to handle it adeptly is part of the joy of this fulfilling hobby!

Learning the Flattening Technique
Hand Planing a Table Top to Perfection
Accomplishing an impeccably flat tabletop via hand planing is a test of one’s woodworking skills, mightily rewarding when executed correctly.
It is not just about the grip and stroke, but the settings, upkeep, and accurate adaptation to the wood piece’s character.
Before we proceed, ensure the plane is well-tuned with the blade sharpened to its finest edge. Now, let us dive right into it, the captivating process of crafting a flat table top with a hand plane.
Maintaining Consistent Downward Pressure
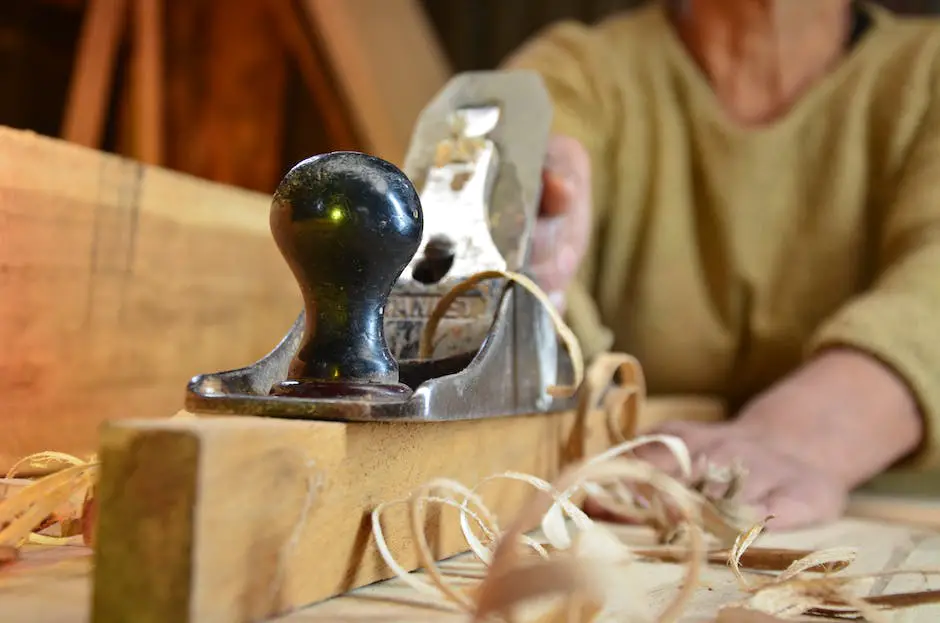
When you have a hand plane, the first action is to maintain a constant downward pressure on the forward knob.
You see, as you push forward with even strength, the rear or heel of the plane lifts slightly, accounting for a truly consistent surface.
Working Grain Direction
In woodworking, understanding your lumber plays an essential role in plaining perfection. With a table top, always plane “with the grain”.
This method reduces tear-outs, resulting in a silky smooth surface. The trick is to notice the grain pattern: lines sloping downwards? Your hand plane follows suit.
Layout Lines
An old school strategy that never fails! Draw pencil lines across the table top width and start planing. Once the lines disappear, you have a flat plane — simple!
Smooth in Sequential Passes
For a tabletop, opt for a low angle jack plane or a No. 6. or a No. 7. bench plane. Your task is to create overlapping and linked cuts — not intermittent scratches.
Being patient with steady, smooth strokes ensures a completely leveled surface.
Minor Twists and Warps
For minor defects like warping, you may opt for a lightweight smoother plane to directly shave off the bumpy surface, avoiding the laborious process of deconstructing, milling, and gluing again.
Dealing with Dips and Hollows
In case of noticeable dips or hollows, don’t panic! Use a scrub plane or a jointer plane. Its long sole extends across dips, retaining the high points while trimming the valleys till you find an even surface.
Finishing Touch
Once the tabletop is flat to your satisfaction, it’s time for finishing. Switching to a smoothing plane or cabinet scraper will remove those tiny ridges and tear-outs.
Achieve that final, glass-smooth finish by diagonally planing across the grain, especially in figured boards to counter tear.
Remember Safety
Always remember to secure your tabletop solidly to avoid wobbling or shifting that might lead to mishaps. Practice safety first – hail the push stick and hold the workpiece securely.
Practice Makes Perfect
Hand planing a flat table top is as much an artist’s job as it is a woodworker’s. It’s a pious journey that unfolds with the incessant dance of shavings and whispers of lumber.
As you gradually master the art of planing, you will be more than just a hobbyist but a conductor in the symphony of woodworking.
So, pick up that hand plane and let the shavings fly! After all, there’s no glory greater than a well-planed piece of wood emerged from your workshop.
It’s time to transform amateur handicraft into professional artistry, one stroke at a time. Happy planing!

Maintaining your Hand Plane
Diving deeper into the toolbox of maintaining your hand plane, the subsequent parts to ponder upon are the Back Iron, Winding Mechanism, Iron Width, Mouth Opening, and the Breaker Gap.
The Back Iron, as fine as it can be, can be susceptible to rust. A valuable tip is to periodically apply a fine layer of machine oil, inhibiting the formation of rust. This tiny step can add years to your hand plane’s lifespan.
The Winding Mechanism, an integral part of any plane, can be kept in excellent condition by applying graphite powder.
It lubricates the gears, ensuring smooth operation without gumming up the mechanism.
Next, we come to the Iron Width. Over time, the blade of your plane might show signs of wear, especially if it’s used frequently.
Sharpening it periodically will not only maintain its width but will also improve its function. But remember, re-sharpen it at the same angle, as it’s crucial to maintaining its balance.
At the same time, have a look at the Mouth Opening. If there’s any debris stuck which might hamper the plane’s functioning, use a thin bladed tool to gently pry out the obstruction.
The Breaker Gap is another important aspect. When fitting the cap iron, ensure the gap between it and the cutter is no more than 2mm for ordinary work.
Here, achieving a perfect fit is likely to require some ‘fettling’ or fine adjustment.
Last, but by no means least, make sure you store your hand plane in a dry, cool place away from heat sources.
Extreme temperatures and moisture can lead to warping, rusting, and damage to vital components.
Speaking of grains, when working cross-grain, it’s always recommended to keep a sharper iron, while for straight grains, a less sharp iron is optimal.
Remember, the straighter the grain, the lesser the resistance.
Next in line, dealing with minor warps and twists is pretty much a test of skills. These finer aspects come with practice.
But one valuable tip is to use a winding stick, which will work wonders, especially when dealing with any minor warps.
And, for dips and hollows, a more aggressive blade setting might be required to remove these depressions.
Finally, as much as we love working with hand planes, keeping things safe is essential. Try using a push stick or a birdsmouth when working on the edges, which will keep your hands safe and provide excellent control too.
Pursuing the artistry of woodworking, remember, patience, practice, and meticulous care will help in maintaining your hand plane – an asset that reflects your passion and skill.
As the old adage aptly says: “Take care of your tools, and they’ll take care of you!”.

Whether you dream of creating functional furniture or crafting artistic pieces for your home, knowing how to correctly flatten a tabletop with a hand plane is both an essential skill and a testament to your finesse as a woodworker.
Like the craftsmen of yesteryears, let’s honor the age-old tradition of woodworking by mastering hand planes, their usage, and maintaining them in their rightful glory.
The journey is equal parts challenge and fulfillment, but with every shaving that falls and every tabletop flattened, you’ll be one step closer to your masterpiece. Happy planing!

