
Unleashing the fullest potential of your tools is an essential part of every hobbyist’s journey. Wielding a sharp hand saw not only simplifies your woodworking tasks but also enhances the quality of your craft.
This comprehensive guide will take you on a journey through the nitty-gritty of hand saw sharpening.
It will uncover the intricacies of your hand saw blade’s anatomy and the importance of each part when it comes to sharpening.
Coupled with the right selection of tools, your sharpening skills will dramatically improve, affecting your overall woodworking competence positively.
Eventually, you will be led step-by-step through the sharpening process, unfolding the art and science behind each stage.
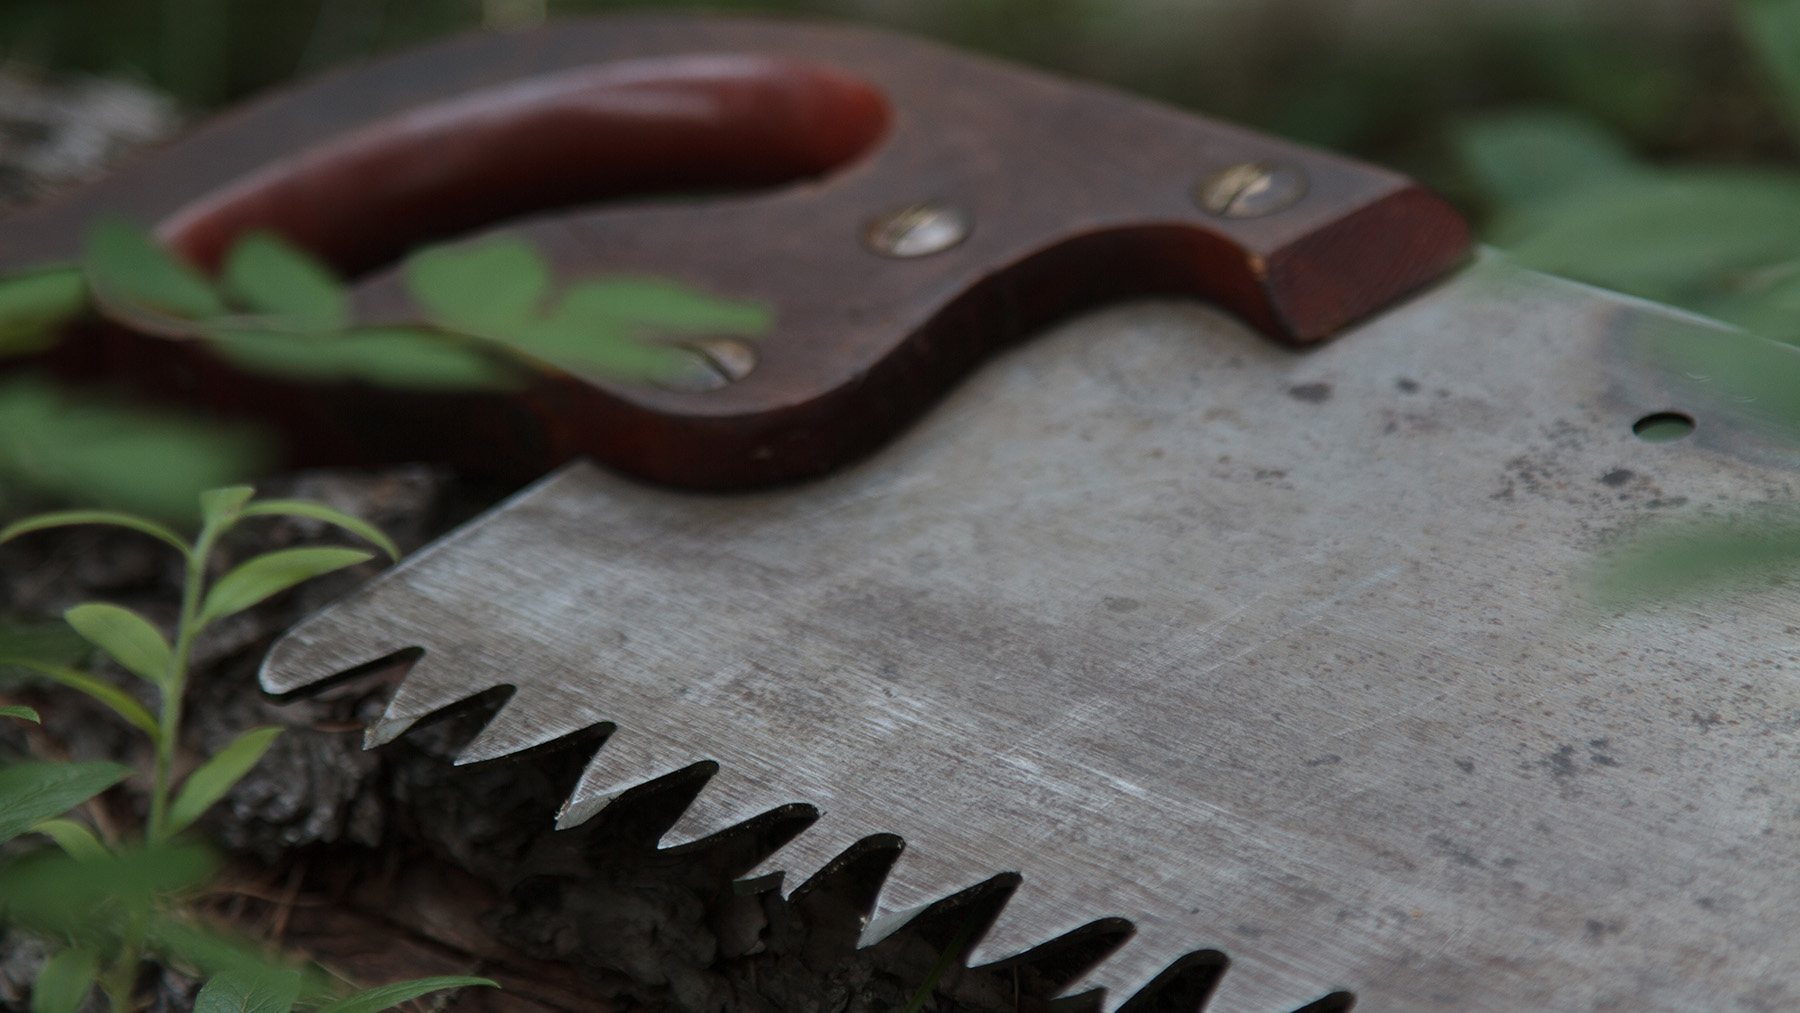
Understanding the Anatomy of Your Hand Saw Blade
Whether you’re a seasoned woodworking enthusiast or a curious newcomer, understanding the core structure of a hand saw blade takes you a step further into the heart of this amazing craft.
It’s akin to a chef knowing the intricacies of their knife, or a painter recognizing every bristle on their brush.
Knowing your hand saw blade not only elevates your craftsmanship, but also aids in the selection of the best tool for each task, promotes seamless maintenance, and enhances safety during use.
So, let’s dive right in without further ado! A hand saw blade is primarily composed of three core elements: the material, the tooth configuration, and the number of teeth per inch (TPI).
Firstly, the material of the blade plays a pivotal role in its toughness, flexibility, and longevity. High carbon steel is a popular choice due to its ability to maintain sharpness and resist wear.
Many modern high-quality hand saw blades are made of this material, given its durability and efficiency.
Next comes the tooth configuration, which directly impacts the blade’s cutting capabilities. Three common configurations include rip, cross-cut, and combination.
Rip saw teeth are designed to cut parallel along the grain of the wood, while cross-cut saw teeth cut across the grain.
The third type, combination, as the name suggests, has both rip and cross-cutting teeth, making it a versatile option for diverse projects.
Finally, take a good look at the number of teeth per inch (TPI). This measures the fineness of the cut, with greater numbers equating to more precision, but potentially slower cutting speed.
For example, a saw blade with a high TPI is best suited for cutting thin materials with clean, precise cuts.
Conversely, a lower TPI is advantageous when speed is the priority over a smooth finish.
Each of these elements contributes to the functionality, strength, and durability of the saw blade, making it perfectly suited for carving out those masterpieces from raw wood.
Understanding these aspects ensures that hobbyists and professionals alike can select the right tool for the task, hence maximizing both their safety and their efficiency.
As much as woodworking is about creativity, it’s also about coherence with tools. Understanding your hand saw blade isn’t merely an act of technical comprehension, but also a key facet of becoming a better craftsman.
After all, the bond between a craftsman and a tool mimics that of an artist and their paintbrush.
When the understanding deepens, so does the craft. So, embrace the saw, grasp its nature, and let the crafting journey begin!

Selecting the Right Tools for Sharpening
Let’s delve into the fascinating world of sharpening hand saw blades, with a focus on the essential tools required to effectively hone your trusty utensil.
The longevity of your equipment, the quality of your cuts, and the overall satisfaction you get from mastering your craft relies heavily upon your ability to maintain your tools.
Don’t forget, great craftsmen and women understand that appropriate sharpening not only maximizes their saw’s performance, but also improves safety!
Firstly, one of the primary tools in your sharpening arsenal will be a suitable file. The file plays an instrumental role, providing a roughened surface to abrade and thus refine the teeth of your saw.
Depending on the tooth configuration (rip, cross-cut, or combination) and the TPI of your hand saw, you might necessitate a different type of file. For rip saws, you can utilize a mill file, and for crosscut saws, a taper file is more appropriate.
Next up, a file holder or a saw vise is indispensable. This tool will help to keep your hand saw blade stationary and secure while you accomplish the painstaking task of sharpening each tooth.
Quality saw vises will have protective pads to prevent scratches or other damages to the blade – a factor that underscores the ever-present concern for build integrity and durability.
Similarly, a saw set, used to adjust the set of the teeth – that is, the degree to which the teeth are bent outwards – is a must-have tool.
This is essential to maintain an optimal cut width and prevent the blade from sticking in denser material. It also helps to extend the life and functionality of the blade by ensuring it stays sharp longer.
Additionally, a specialized tool known as a saw jointer is crucial for ensuring that all the teeth on the saw are at an even height.
This is vital; if the teeth aren’t even, some will do all the work while others sit idle, which results in the blade wearing unevenly.
Finally, understanding the saw blade anatomy and the variation in tooth styles isn’t complete without considering the critical role that light plays.
Good lighting is not exactly a tool, but an indispensable component for effective saw sharpening.
A flexible task light can literally shine light on the fine details, ensuring you get every tooth sharpened to just the right angle for the best possible cut.
It seems like a lot, but consider this: the art and craft of maintaining your hand saw is as gratifying as the sense of accomplishment that comes from a clean, expert cut.
The tools for sharpening a saw blade combine to form a finely-tuned orchestra, whose symphony is the perfect harmony of form and function, turning simple tasks into a labor of love.
From the humble file to the dependable saw vise, each tool has its part to play, optimizing the performance of your hand saw, and turning every day into a masterclass in craftsmanship. Happy sawing!

Step-by-Step Sharpening Process
Sharpening a hand saw blade is a process that requires precision, care, and a little bit of know-how. Ready to find out the ins and outs of this all-important process?
Follow these precise steps to ensure that your hand saw blade stays sharp, pristine, and always ready for action.
First, a crucial initial step is purchasing a quality saw file. Remember, each different tooth configuration requires a different type of file – make sure you get the one that corresponds to the tooth type of your saw.
Simultaneously, you’ll want to arm yourself with a file holder or saw vise, indispensable tools for this process.
The actual process of sharpening begins by securing the saw in the vise. The blade teeth must face upwards, reaching roughly halfway up the file. Make sure your blade is secured tightly to avoid any unforeseen accidents.
The role of a saw set is of vital importance here. It adjusts the teeth set, ensuring the blade cuts a kerf wider than its thickness to prevent binding during sawing.
Now, using your chosen saw set, adjust the teeth that bend diversely away from the saw, ensuring that the teeth operate at their full potential.
Next up is the saw jointer. This key tool ensures the peak of every tooth is at the same height. To use it, simply run the flat side of a mill file fitted with a jointer guide across the tips of the teeth.
This should transform an uneven toothline into a flat, even one, thereby contributing to a successful cut.
Once the teeth have been set and the jointer run over them, it’s file time. Start at the heel of the saw and advance to the toe, filing every alternate tooth with rhythmic, even strokes.
You’ll have to shift the saw in the vise to efficiently file the other side. The aim is to achieve a sharp edge on every tooth to blend with the others in a mutual harmony.
Good lighting is key to ensuring an effective blade sharpening. Ensure you’re working under a well-lit area so that no tooth goes unsharpened.
Remember, consistency is key, so take your time. Repeat the strokes for each tooth of the saw, maintaining the same number of strokes, ideally between 3-6, depending on the dullness of your blade.
A point often overlooked yet crucial at the finish of this process is cleaning up. Sharpening generates small shards of metal and file shavings, so take a moment to clean your blade before you put it back to work.
There you have it, detailed steps on how to sharpen a hand saw blade. With these steps, you ensure your hand saw remains optimally efficient while adding an enriching skill to your woodworking repertoire.
After all, your tools deserve as much love and attention as your woodworking projects do! Here’s to an even sharper hobby experience!

Embracing the art of hand saw sharpening is not merely about saving a few dollars from professional services; it’s about gaining knowledge, enhancing skills, and even discovering pride in your craftsmanship.
Mastering the process ultimately enables you to keep the cutting edge of your hand saw blade sharp as needed, providing you superior control over your work.
Remember to routinely check and maintain the sharpness of your blade to ensure consistent high-quality outcomes in all your future woodworking projects.
The journey to becoming a true hobbyist begins with the mastery of your tools, starting with the humble hand saw.
