
Arduino is convenient because you don’t need to worry about the technical aspects of programming. The major advantage of using Arduino is that it has made some of the processes less complex. .hex files, for example, may be challenging for beginners to use. In Arduino, the .hex files are in the AVR chips, so you only need a USB cable to run your programs.
A bootloader is an operating system that works in tandem with the memory of a computer. It is the middle point between the operating system and hardware.
If you want to burn the bootloader Arduino Mega 2560, read on.

What is the Arduino Mega 2560?
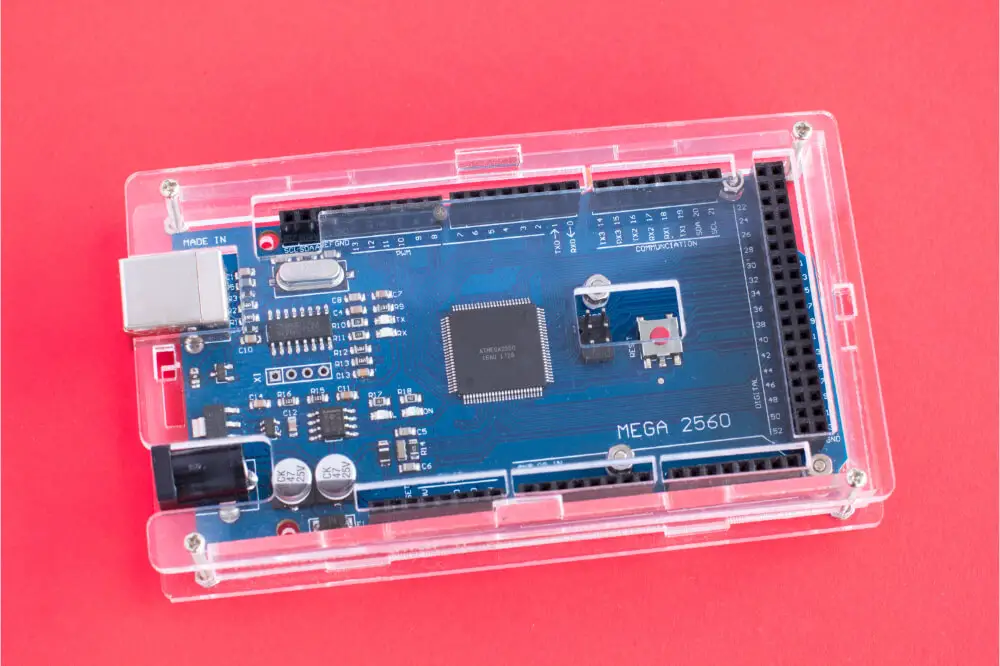
Arduino Mega 2560 is ideal for projects that require more memory, more I/O lines, and Ram. It is ideal for robotics projects and 3D printers. You get 16 analog inputs, 54 digital output and input pins, four hardware (UARTs), 16 analog inputs, and 16 MHz Crystal oscillator.
The kit also comes with a power jack, USB connection, reset button, and ICSP header. You get all the features you need to support your microcontroller. You continue to enjoy the effectiveness and simplicity of Arduino, without compromising on the space you need to finish your projects.
You can use it in isolation or combine it with other Arduino boards if you’re handling very complex projects. You can use more than one sensor, depending on what you’re working on.
The main software the Arduino mega 2560 uses is the integrated development environment (IDE). It is, therefore, compatible with most boards, including Uno, Diecimila, and Duemilanove.
Do not worry about overheating when using Arduino Mega 2560. It has a resettable polyfuse for that extra layer of protection for high current situations.
Burning a Bootloader on an Arduino Mega 2560
The most critical components for burning a bootloader is the In-System Programmer (AVR -ISP) and parallel programming. You create a connection with the 2 x 3 ICSP pin headers. Take note of the way you connect the pins to ensure a proper connection.
You will also need a power source that you can get via a USB port or external power supply. Once you connect the ISP to the ICSP and power it on, burning the bootloader is as simple as following the prompts.
You will run everything from the Arduino IDE through the Tools sections. Select the programmer and then click on burn bootloader to finish the process. We will highlight the step-by-step process for you below.
Step by Step Tutorial
What you will need
- AVR ISP compatible downloader
- The Arduino mega 2560/ADK
- AVR programmer
- AVR programming cable
- Arduino open-source programming language (you will need to download this)
- ROBOTC modified bootloader (MEGA 2560/ADK
Step by step process
- Have the Arduino Open Source software and the modified bootloader downloads ready.
- Transfer the modified Bootloader file to the Arduino file (/Arduino-1.0/hardware/arduino/bootloaders/stk500v2). You will essentially be overwriting the bootloader that you currently have.
- Using external power or USB cable, put on your Arduino MEGA 2560/ADK.
- Install the necessary drivers for the AVR ISP programmer and plug it on.
- Connect the programmer to the Arduino board. Use the ISP Header for the connection. You will find the pins at the top of the Arduino logo.
- Launch the Arduino Open Source software
- Now go to Tools > Board > Arduino Mega 2560 or Mega ADK
- Refer to the programmer documentation to change the Arduino software settings. It will show how to go about selecting the relevant ISP programmer. To do this, go to tools > programmer > AVR ISP
- To send the modified bootloader to your Arduino, go to Tools > Burn Bootloader. Be patient as the process may take more than a minute to complete.
When you finish the steps above, you will be able to download ROBOTC firmware, allowing you to use your Arduino Mega 2560/ADK.
Using Arduino as a Programmer
You also have the option of the Arduino as a programmer. You can, for example, use an Arduino Uno. It is a convenient option if you do not have any other programmer.
You should, however, not use it on production boards or those that require a lot of memory.
You may also have difficulties using it for boards other than ATmega 328.
Many microcontrollers have an ISP or in-system programming header. You find that most Arduino compatible boots have an in-circuit serial programming (ICSP) pin or pins you use to connect the programmer so that you can reflash your board firmware. ‘
In the case that you only have test points in your ISP header, you will need an ISP pogo adaptor. You must have it to establish the connection with the test pins when programming your IC.
After locating the ICSP pins, use the programming cable to connect your programmer to the board. You can also use jumper wires if you do not have a cable.
If you have the latest Arduino IDE. You can easily upload code with Arduino as the ISP. You must first upload there ArduinoISP.ino to access its programming capabilities. Follow the steps below.
- Open Arduino ISP > file > example > 11.ArduinoISP – Arduino ISP.
- Select the COM port for your ISP. You will need to go to:-
Arduino ISP > tools > Port: > Com32 (Arduino/Genuino Uno) > COM 32 (Arduino/ Genuino Uno)
- Upload code so that it turns into AVRISP. Leave the Arduino as the programmer. Now follow the steps below:-
Arduino ISP > Board Arduino/ Genuino Uno > Arduino/ Genuino Uno
- Selecting the programmer
Go to tools> programmer (in this case, Arduino) > Arduino as ISP.
In the case that you get more than one option for Arduino IDE, you can pick any one of them. You must make the selection for it to work.
- Now go back to:
Tools > Burn Bootloader.
- Give it a few minutes to complete. You will get a prompt showing you that the process is complete.
Final Thoughts
We have gone through the steps you need to take when you’re burning Bootloader Arduino Mega 2560. The steps we have shared are easy to follow and most importantly, beginner-friendly.
