
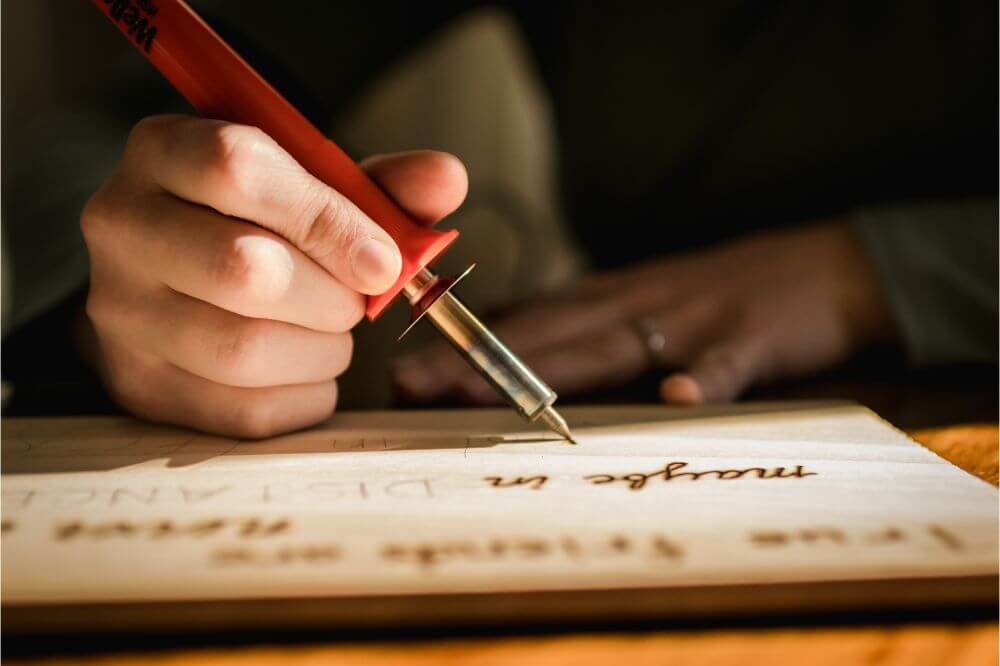
Writing with fire…
That is the meaning of the word pyrography, the term used to describe wood burning hobbies. That is almost what you are doing when you use a soldering iron to burn letters into wood. The heat replaces the fire and gives you a little more control over what you are doing.
To learn more about writing letters in wood with a soldering iron just continue to read our article. It has the information you want to know about in case you do not have a wood burning kit at home.
Writing letters in wood
There are many reasons why you would want to write letters in wood. You may want to advertise who lives in your home and putting your surname on wood helps do that. Or you want to make different decorations for the many holidays that occur in a year.
Whatever your reason, you will need the right tools for the job so that your letters come out picture perfect.
- Soft wood
- Sandpaper- medium & fine grit
- Bowl of water
- Sponge
- Soldering iron tip set
- Soldering iron- temperature adjustable, minimum 20 watts
- Stencil- for fonts and letters or other designs
- Pencil & eraser
The only drawback using a soldering iron is that you have to wait for the tool to heat up before you can work.

Steps to write letters in wood
When you have your tools and supplies assembled, it is time to get ready to work. This is not a fast project so block out a little extra time in your busy schedule and make sure you can work at your pace.
| Step | Activity | Description |
|---|---|---|
| 1. | Sanding the wood | Select a nice looking piece of wood and start with medium grit sandpaper. Once you are done smooth the face of the wood with the fine grit sandpaper |
| 2. | Create your design | Use your stencil to get the right look of the letters Trace the letters with your pencil as you can erase any mistakes before you burn the wood |
| 3. | Heat your soldering iron | Once the artwork is completed, select the right tip for your soldering iron and plug the iron in. The tip you will use depends on how you want your letters to look |
| 4. | Start burning those letters | Use the 20 watt setting for fine lines and small areas. Then increase the temperature for thicker lines and larger areas, especially if you want those lines to be deep |
| 5. | Clean as you go | You do not want any wood pieces to stick to your iron so place the sponge in the bowl of water and wipe the tip frequently to get those wood pieces off of it |
| 6. | Take your time | Patience is the key here as you cannot erase any mistakes once you burn it into the wood. You have no do overs when wood burning |
| 7. | Erase & sand the surface | When you have completed the letters, erase any pencil marks you did not cover with the iron. Then use the fine grit sandpaper to smooth out the surface and totally eliminate those pencil marks |
| 8. | Stain & varnish the wood | To make your work look great, add a few coats of stain and varnish to the wood. You will need rags for this |
| 9. | Clean up | It’s the dreaded chore but someone has to do it. |
| 10 | Display your masterpiece | Find the right spot so your guests and passer-bys can view your achievement |
Best wood for letter burning
All you are doing when you use a soldering iron to burn letters into wood is etching with a different tool. The concept is exactly the same and it may take less time than etching letters with a knife.
The easiest woods to work with as a beginner are the soft woods. These will help you develop your skill and get you ready to handle the hardwoods that also make your hobby results look like a professional did them.
Here is a list of some of the best pieces of wood you can use to make your mark on life:
Soft woods:
- Pine- all types
- Fir
- Juniper
- Cedar
- Spruce
- Redwood
- Yew
- Larch
Hard woods:
- Cherry
- Oak
- Alder
- Ash
- Birch
- Basswood
- Mahogany
- Walnut
Tips to consider
- For darker images you will want to use wood with a higher resin factor
- For lighter images you will want to use wood with a lower resin content
- Make sure to use sharp soldering iron bits to create a very distinct letter
- No matter what tool you use you will need to burn at a 20 to 30 degree angle
- Straight lines are the easiest to burn with the small ‘e’ one of the harder letters to get right
- Do some practice first and get the technique down pat. Pushing the iron may create burn spots or more mistakes. It is harder to control pushing the iron
- Use a stencil as drawing letters or designs on wood in the free hand style is difficult. Wood may make paper but it does let you write like paper does
- Clean your tips frequently to make sure the wood bits do not interfere with your work
- When not in contact with the wood, the tips will heat up. Be careful when you touch the wood
- Mistakes are permanent. They cannot be erased by burning more wood around the letter. Use a steady hand and make sure when you touch the wood, you are hitting the spot you want
Some final words
Wood burning is a lot of fun and can help build your confidence. But getting good takes time, practice and experience. Learn from your mistakes and when you start out, speed is not the critical strategy.
The motto to follow would be ‘first you get good, then you get fast.’ The other motto to remember is ‘haste makes waste.’ Take your time and enjoy your new hobby. It will help you release a lot of stress and give you a sense of accomplishment. Once you are done you can show the whole world your new talent and skill.
