
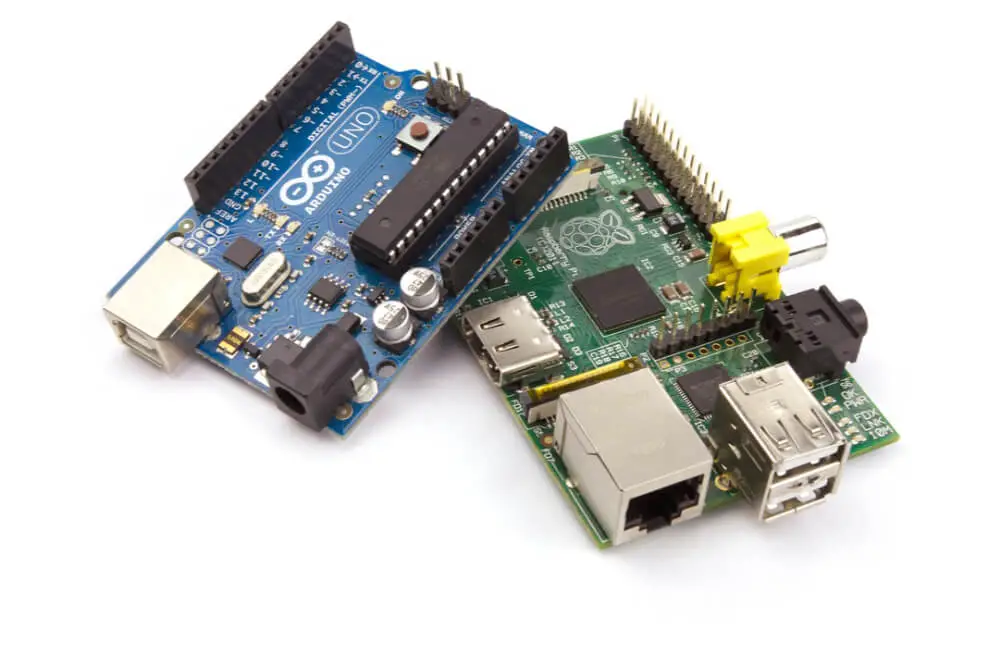
Sometimes you might want to connect a Raspberry Pi with an Arduino. Despite being two different products, Arduino and Raspberry Pi, both cater to eager makers and hackers.
What if you connect a Raspberry Pi with an Arduino and then use it like a slave device that reacts to input and sends an output to your Raspberry Pi through Python?
Well, there is no doubt that an Arduino, while not a full-fledged computer, is capable of doing some great things such as converting analog input into digital with the use of an in-built ADC chip.
When connecting an Arduino to a Raspberry Pi, you will require special software that helps the whole process relatively easy. We shall be discussing how to connect Raspberry Pi with Arduino in this tutorial with that in mind.

Overview
Connecting Raspberry Pi to an Arduino is ideal for both worlds. Instead of struggling with basic unprotected I/O pins on your Raspberry Pi and a lack of real-time performance in a Linux OS, the best setup for several real-world-interfacing projects is Arduino plus Raspberry Pi.
Once you have priced several combinations of a microcontroller board along with a Wi-Fi adapter, you will come to find out that Raspberry Pi, Arduino, and USB Wi-Fi are the best value for money whenever you require wireless internet access as well as easy sensor data handling.
Requirements
When connecting your Raspberry Pi with an Arduino, you will require the following vital tools:
- Arduino board
- Raspberry Pi
- Breadboard
- Four Jumper cables
- Three 220 OHMS resistor
- Three LEDs
You might consider LEDs with the same colors; however, LEDs with different colors are often recommended.
Different methods of connecting Raspberry Pi with an Arduino
When it comes to connecting a Raspberry Pi with an Arduino, there are four basic ways in which you can achieve this with the utmost ease:
- The first way you can connect a Raspberry Pi with an Arduino is by purchasing an add-on board such as Gertboard, which is equipped with an IC that is compatible with Arduino. However, this method is a bit pricey.
- The other way in which you can achieve this is by plugging in a standard Arduino such as Nano or Uno into a USB port of RPi. You should note that this is the easiest method and can be achieved even by a newbie. In addition to being the most straightforward method, it minimizes hassle and wiring. Nonetheless, it needs more expensive Arduinos.
- You might as well consider using a USB to Serial adapter along with smaller and much affordable Arduino such as the Self-made shrimp or Pro Mini. As a DIY enthusiast, this is by far the best approach you might consider taking, and it features some advantages such as powering your Arduino or shrimp using USB.
- Using serial pins on your Raspberry Pi and connect it to a smaller and relatively affordable Arduino. It is by far the most affordable method; however, it involves a lot of hassle, which you will be forced to adhere to. It is also reported to be the best method you can consider, especially when using affordable Raspberry Pi Model A while the single USB port will be used for Wi-Fi.
The methods discussed here are easy and relatively affordable, apart from the first method. As a DIY enthusiast, the third method will be best for you; however, the fourth method will be the best for you if you are looking for the most affordable method.
The second and third methods are plug and play, and they require no instructions. However, when it comes to the fourth method, it can be a bit challenging. To save from the hassle involved, here is some important note you should consider keeping in mind.
When connecting your Raspberry Pi to an Arduino board using the fourth method, you will connect a 3.3-volt pin, GND (Ground) pin, TX pin, and RX pin on your Raspberry Pi through a level converter to a 5-volt pin, GND (Ground) pin, RX and TX pins on your Arduino.
To avoid the need for a level converter, you should consider purchasing 3.3-volt Arduino. Power your Arduino separately to prevent overloading your RPi pins; usually, this seems to cause intermittent problems with RPi booting.
Connecting Raspberry Pi with Arduino
When connecting Raspberry Pi with Arduino, the circuitry is relatively simple and does not require any explanation. When installing and run your Arduino on a Raspberry Pi, you will have to key in these vital commands in LXTerminal sudoapt-getupdate&&sudoapt-getinstallarduino. You might as well consider downloading a Linux ARM file; however, you can get it open on your Raspberry Pi.
While doing this, ensure that you have a reliable internet connection. Once you have your Arduino connected to your Raspberry Pi, you will go ahead and key in the right commands, plug the Arduino in your Raspberry Pi through a USB port and upload your code.
Once that is done, it is time for you to make things fall into place. To do this, you will have to key in this vital code import serial and ser=serial.serial(‘/dev/ttyACMO’,9600). Once you have these critical commands keyed in, you will go ahead and start communications.
Since the circuit is equipped with three LEDs, you will connect a red LED to pin 3, while a green LED should be connected to pin 5, and a yellow LED to be connected to pin 6. You might consider using the same colors or different colors from these. Once the LEDs are in place, you will continue and type these commands:
- Ser.write(‘3’)- this command is used to turn on the red LED.
- Ser.write(‘5’)- is a command used to turn on the green LED.
- Ser.write(‘6’)- you will use this command to turn on the yellow LED.
Your LEDs will turn on and off within 2 seconds once you enter the commands.
Final verdict
Connecting Raspberry Pi with Arduino is relatively easy and tends to have lots of benefits. Arduino boards are the best when it comes to reading inputs as well as outputs of different things.
On the other hand, Raspberry Pi is a mini-computer, and connecting the two; you will have limitless options. As we conclude, we hope that you find this article helpful as you try to connect your Raspberry Pi to an Arduino board.
