Connecting an L293D motor driver with Arduino is one of the easiest things. However, it is crucial to consider doing it in the right way. Our DIY tips are focused on providing you with the right information to do things properly and avoid regrets later on.
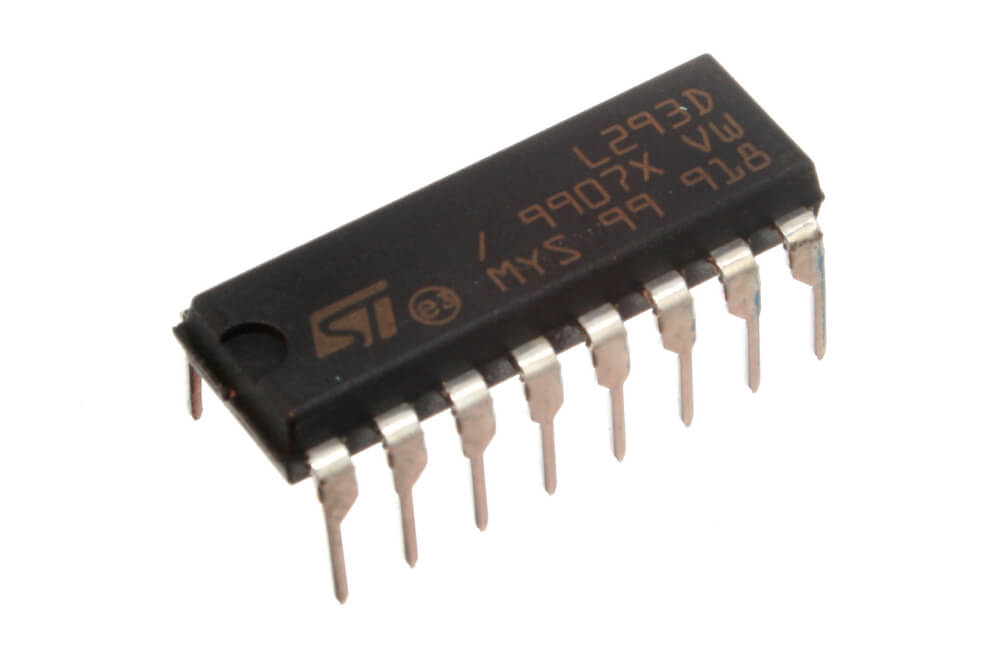
In this post/tutorial, we will look at how you can connect an L293D motor driver with Arduino. First of all, one thing you need to keep in mind is that the L293D has around 16 pins. Therefore, it helps you control up to two DC motors at the same time in your preferred direction.
Components Required:
Here are some of the things that you need:
- An Arduino board
- L293D motor driver
- Micro USB cable
- Jumper wires
- Arduino IDE
- Breadboard
- DC motor
Why Use Motor Drivers?
The main objective of the motor drive is to take low current signals and turn them into higher current signals to drive the motor. The L293D is just a typical motor driver that is able to drive two DC motors simultaneously with much ease.
Motor driver ICs are only used in autonomous robotics. It is essential to note that a lot of microprocessors use low voltages and only require low current to run, compared to motors which require relatively higher currents and voltages. This is one of the main reasons why using a motor driver IC is important.
Therefore, if you want to build a robot or rover using DC motors, you should consider the l293D motor driver.
How to Connect the Components
First we will look at the components included on the breadboard. When one looks at an L293D diagram, it’s important to check where all the pins are located. It is important to pay much more attention so as to understand such a diagram more.
When using just one motor, you won’t be required to use all the pins included in the motor driver. Below are the steps you need to take:
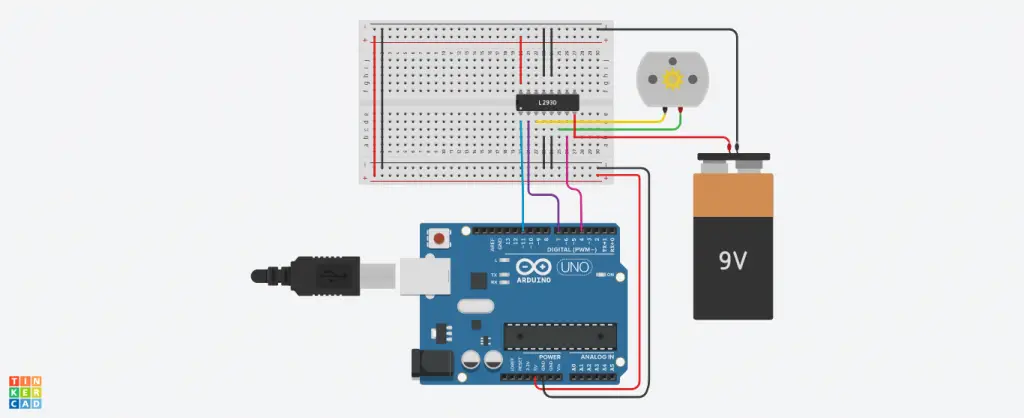
- Connect the 5V and GND on your Arduino to just one side of the breadboard.
- Extend the GND and 5V to the other side with jumper wires.
- Take the L293D and place it in the center of the breadboard, with only half of the pins on both sides of the breadboard.
- Connect the 5V to enable 1, Vs, and Vs on the L293D.
- Connect the digital output pins to the input 1 and input 2 on the L293D.
- Connect the GND of your Arduino to both of the pins included in the GND on both sides of your L293d motor driver.
- The last step involves connecting output 1 and 2 to the motor pins.
- The last step involves is to plug the Arduino into a power source. For instance, your computer.
Connect the components! 🙂

Point to Note
It is imperative to note that the Vs pin on your motor driver is used to supply the motor’s power. In case you happen to have a motor which requires more voltage and your Arduino is unable to provide it, you have the option of using an external battery. All you have to do is connect the GND situated on the breadboard, as well as the positive lead to the Vs pin of the L293D.

The Code
When it comes to the code, you should note that there are various factors to consider. If you don’t know much about the Arduino IDE we highly recommend you conduct more research to learn more about it before proceeding on anything.
What you need to do in the Arduino IDE:
- If you want to create a new sketch you can click on File > New
- Ensure that you select the correct port under Tools > Port
- Make sure that you also select the correct Arduino board under Tools > Board
Check out the code below and paste it, but if you are using output pins you’ll have to replace motorPin 1 and 2.
// Declare the pin numbers
Const int Pin1 = 6;
Const int Pin2 = 7;

Const void setup() {
// Make the pin modes of the pins to OUTPUT
pinMode(Pin1 , OUTPUT);
pinMode(Pin2 , OUTPUT);
}

void loop() {
// Also turn the motor in one direction
digitalWrite(Pin1 , LOW);
digitalWrite(Pin2 , HIGH);
}
If you want to upload this code to your Arduino you can go to Sketch > Upload
After you’ve uploaded the sketch successfully, you will see the motor turning in one direction, and if you want to change the direction you can reverse HIGH and LOW right in the Loop function.
The Circuit Connection
If you want to build the circuit you can follow the schematic, but you will need an Arduino UNO to help with controlling the motor driver.
Here is what should be done:
You have to ensure that all the enable pins are properly connected to the 5V pin located on the Arduino.
The Ground pins need to be shorted and you should also connect them to the GND on the Arduino.
The positive side of the battery needs to connect to pin 8 of the IC, while the negative side needs to be connected to Arduino’s GND.
In case you want to manually turn ON and OFF the motors, you’ll need to connect the Enable pins on both of the sides to the Digital pins on the Arduino.
Conclusion
Connecting the L293D driver with Arduino requires you to follow the right steps, such as the ones we’ve outlined in this post. The good thing about our guide is that it is easy to follow and understand. You can carry out more research to find other useful ways of doing it.
It is incredible how technological advancements have made everything much easier to accomplish. The ability to connect L293D motor drivers with Arduino is impeccable as highlighted in this article. Our guide is exhaustive and will help anyone to effectively connect their L293D motor driver with Arduino.
This is a process that is quite easy to execute, especially if one follows the right procedures as they are highlighted above.

