
Electrical resistance between 2 points of a conductor is measured in ohms, and you must always take note of the resistance that you are measuring. Typically, the test of oms is meant to measure not only the functionality of a resistor but also how accurate the resistor is.
Therefore, it is evident that running this test is very crucial when you are looking for either a broken or an open circuit. However, for you to do this test, you need to have a multimeter with you, with either the analog multimeter or digital multimeter useful. Both these versions are effective as they both essentially measure the voltage on the probes, thereby resulting in the flow of power in the conductor, thus generating resistance.
So what are steps to follow when testing ohms using a multimeter? Well, read through this article, and you will be taken through all the steps you need to follow during this test. Consequently, you will be in a position to establish the circuit’s status, and typically the lower the resistance, the higher the current flow, and the opposite is true.
Switch off the circuit power
When testing ohms using your multimeter, the power needs to be turned off before going ahead to use your multimeter. With the power off, you can now go ahead with your test by putting a minimal current across the probes to get the voltage that is being generated.
It is important to note that your resistance reading value will have no meaning if there is already the existence of voltage on the particular object you are running a test on. Thus, you should make sure you discharge your capacitor before you commence on noting the resistance reading value as displayed on your multimeter.
Subsequently, set the dial of the multimeter to either ohms or resistance and then and select the best testing range
Set the multimeter range
A component resistance ranges from one ohm to megaohms, that is, 1,000,000 ohms. Because of this, you should set your multimeter on its appropriate range to enable you to take the correct reading, hence be in a position to get an accurate reading value of the resistance.
However, some digital multimeters have already been automatically set for you, and they are ready for use, while others require you to set them manually. Thus, if you have a right range of resistance, set your multimeter on that range. Additionally, if you are uncertain about the range, you then need to commence with the middle range setting, which is 20 kilo-ohms.
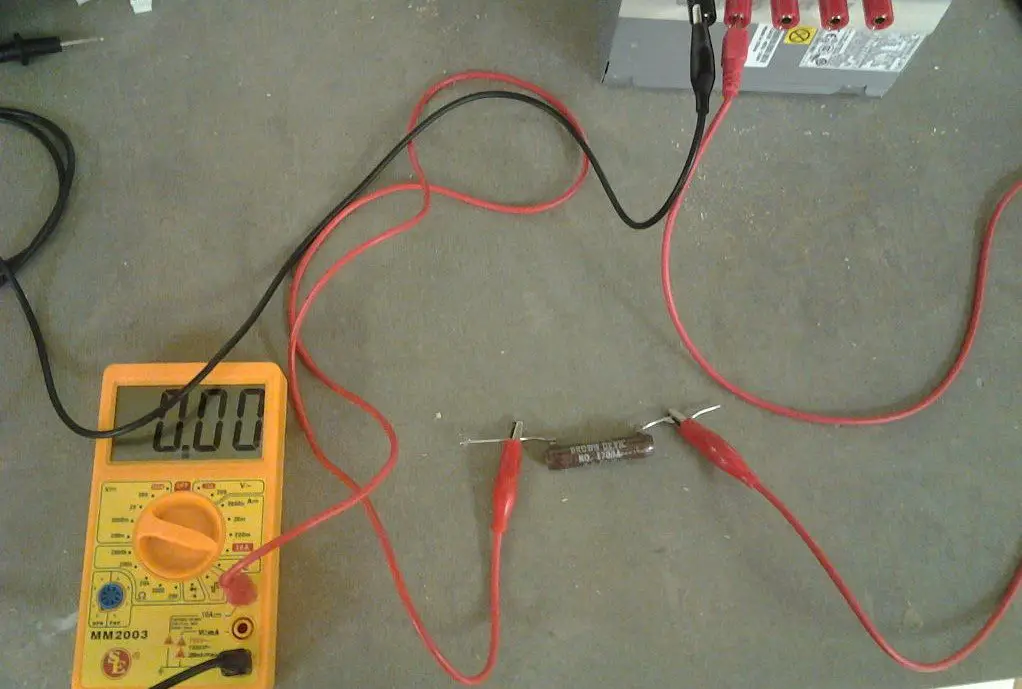
Connect the multimeter
You then should go ahead and touch one lead to the end of your component, and the other remaining lead to the opposite end, the number displayed on the screen will be the actual value of resistance or 0.00 (OL). Check if the reading value displayed on the multimeter is zero because the range shown might probably be high, and it needs to be minimized.
Nevertheless, if the screen reads OL, this means the range set is too low and needs to be boosted to the next highest level. After you have made changes, examine the component again with the new range of settings.
If the screen reads 58 (58,000 ohms), consider that the value of the resistor, remember to note the results down. When you get the right range, try minimizing it again to see if you can come up with an accurate reading. You can use the minimal range setting to find a precise resistance reading value.
Asses the data for interference
Several factors affect resistance, which you need to have in mind, and these include; foreign substances that might contain oil, solder flux, dirt, and parallel circuit routes. Typically, the human body is made a parallel resistance way that consequently reduces the overall circuit resistance.
Therefore, avoid coming into contact with any metallic part to prevent any possible hazards. Always make sure you read the measurements displayed on your multimeter correctly to avoid incorrect or inappropriate figures presented. Once you are done, remember to switch off your multimeter.
However, when you are using an advanced digital multimeter option, carefully press the orange button to select your specific fixed measurement range. Note down the number displayed on your multimeter.
Subsequently, push the hold button for you to retrieve the minimum as well as the highest measurement to get the stable measurement, and you can decide to check this value later, remember to note down the figure displayed. If you want to capture the lowest as well as the highest measurement, you are supposed to press the maximum and the minimum button, if your digital multimeter beeps every time, it is a sign that it is recording a new reading.
Measurement analysis
Resistance results are usually dependent on the component that you are testing. In short, the resistance reading of any element being tested varies from one element to another as well as when time passes. A minimal resistance change is not usually critical, but it indicates a pattern which you need to take note of.
For instance, if the heating element’s resistance increases, the current flowing through the component reduces, and the opposite is also true. However, if you are operating on the circuit board, you should take off one of your leads belonging to the resistor away from the board for you to be able to measure the appropriate resistance generated by the resistor. Whatever your digital multimeter displays are probably the overall resistance, that is between the lead probes being tested.
When you are dealing with a component that is a constituent of the circuit, you need to be cautious while measuring its resistance. Components connected parallel with the component you are running a test on usually have a resistance that impacts your resistance reading value.
This is through lowering it. Thus, all is required from you is always to examine the circuits representation of the paths that are parallel to each other.
Conclusion
Having gone through the detailed information above, you now have an idea on how to test ohms with a multimeter. As you can see, running the test is quite easy regardless of whether you are using either a digital or analog multimeter.
Therefore, with the right knowledge and skills on how to handle electrical devices, you are set to conduct this test. Furthermore, you should always have to make references from your manufacturer manual script even if you already are familiar with doing this test. This is to ensure you do not miss any crucial step and consequently end up getting incorrect results.
