
The process of joining two metallic parts or copper materials for an electric connection that is permanent on a circuit board is soldering.
Soldering on a circuit board is not a difficult task, but one that requires your keen attention and care when performing.
Tools you need
Below are some of the materials and simple tools you require for a successful soldering process:
- The soldering wire
- Soldering paste
- A well functioning soldering iron
- The circuit board
- A soldering wire holder to place the soldering iron in between the soldering process.
- Solder- they come in different thicknesses, and a thin solder is more convenient for work that is more detailed on a circuit board.
- It would help if you had clips to hold components in place, for example, clamps, tape, or alligator clips. They act as helping hands to hold onto items you are trying to connect.
- An exhaust fan is also a good addition if you intend to solder a lot more often. It helps with not breathing in the fumes emitted during the process, which may be detrimental to your health.
- Safety goggles help to avoid small bits of melted solder that may fly out from getting to you.
- A desoldering pump or wick also comes in handy for you in case you want to remove solder.
- A dump solder sponge for cleaning your soldering iron
Steps for soldering a circuit board
Step 1
First off is to plug in the soldering iron and let it heat it to correct temperatures. The tip of the soldering iron should heat up to 320-330 degrees centigrade; ensure not to touch it to avoid getting burnt.
Step 2
After heating up to the required temperatures, use your dump solder sponge to clean off the tip. Dip the tip into soldering paste to ease with cleaning if it is too dirty.
The cleaning process helps to eliminate any old bits of solder that may be stuck on it from a previous soldering process. Expect a little sizzling, which is typical while cleaning.
Note: if your soldering iron is new, you need to tin the iron by putting a small amount of solder on the tip of the hot iron before you begin to work.
It is also essential to clean your circuit board of any dust and debris using your cleaning pad to prepare it for soldering.
Step 3
Next is to pay attention to the part you want to connect.
Ensure they are well cleaned of any corrosion, dust, or dirt, then seat them in their holes on the circuit board where you want them. Apply some liquid or paste to the parts to be joined for stability while soldering.
You may also bend the leads to about 45 degrees to hold still as you insert your components in the holes they belong.
If need be, mount your circuit board on your alligator clips for a smooth soldering process.
Step 4
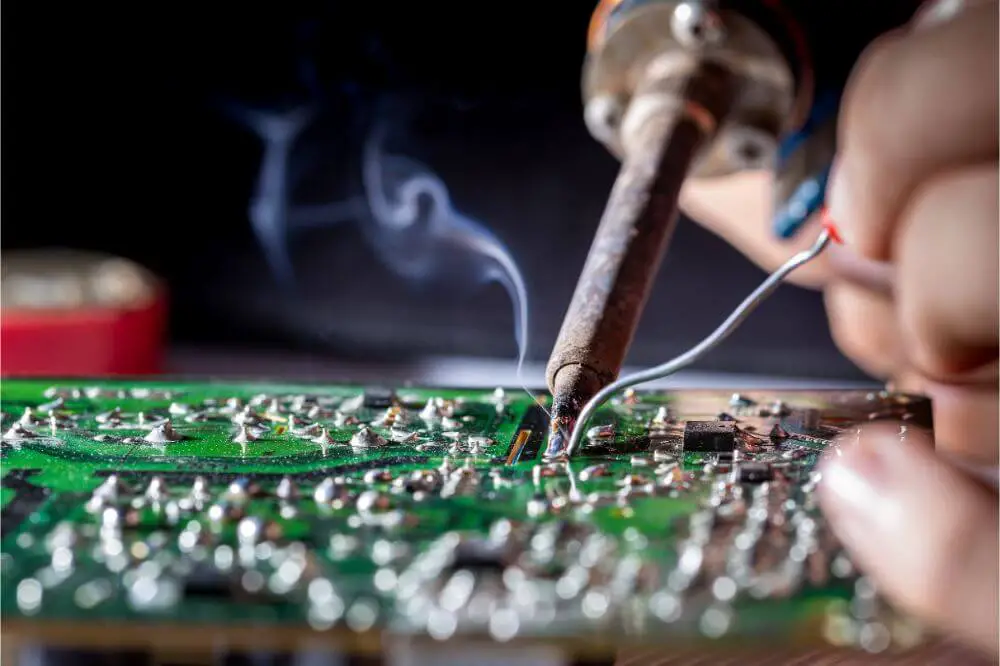
With your parts put in position, it’s time to solder!
Pick your solder and soldering iron each on their hand. Place the tip of the soldering iron in contact for a few seconds depending on how hot the iron is, then apply your solder. Ensure the iron is still on the joint when you feed your solder.
Avoid touching the solder to the tip of the iron directly while it’s hot as you may end up making a cold solder joint, which is not on your components and does not yield a good connection, which is what you want.
Ensure you introduce just the right amount of solder on your joint and not too much to have a big glob of solder on the bottom of the circuit board.
Inspect your joint to see if it has a cone-like shape as good solder joints have this shape.
Step 5
After achieving what you feel is enough solder on the connection, slowly pull the solder wire away first then remove your soldering iron last.
Place your soldering iron on the holder to cool down as it’s still hot.
Incase too much solder is applied, you can remove the excess with your solder pump or desoldering wick.
While using a pump to disorder, melt the solder entirely and ensure you do not damage your components, then suck up the excess with a pump.
While using a wick, place its tip on the solder you want to remove, malt it through the wick, and it will suck it up.
Step 6
After your components are correctly attached to the circuit board, you can cut off the excess leads using a sharp wire cutter for that smooth flat cut.
It is also advisable to cut the leads close to the circuit board to avoid creating a short. Cut them off as you hold onto them to avoid littering your working space with tiny ends of lead from the chop.
After completion of your soldering session, make sure to remove any extra flux on your board to have a clean finished product.

Points to note while soldering on a circuit board:
- The tip of your soldering iron should be small to ensure you get the solder just where you want it.
- Choose your solder wisely as too much heat on the circuit board can end up damaging the components. For example, a silver solder requires very high temperatures to melt while a low lead high tin solder requires lower temperatures
- If you apply too much solder, it builds up outside of the metal pad and can cause a short
- Too little solder may not make a good connection between your component and circuit board
Final Thoughts
Soldering is quite a straightforward process with all the steps and precautions observed, and you can get better at it with more experience and practice. For more training beyond what you can teach yourself, however, it is always advisable to reach out for professional soldering training.
Finally, researching online and watching tutorial videos is highly recommended, especially if you are looking to hone your skills. In case you are not sure about anything, seeking help from an expert is advisable instead of making mistakes.
