
Soldering is the process of joining together metal parts, and it entails using a metal referred to as solder to melt in the space between two metal components. Once the solder cools and solidifies, it creates a permanent connection between these parts. This process is relatively straightforward, but if you don’t know how to use your soldering iron, you’ll undoubtedly start having trouble.
If you’re also experiencing such an issue, this article is here to help you out. Here’s an outline of the steps you should follow when using your soldering iron. Consequently, you’ll be able to join two metal parts together with the solder acting as the metallic glue.
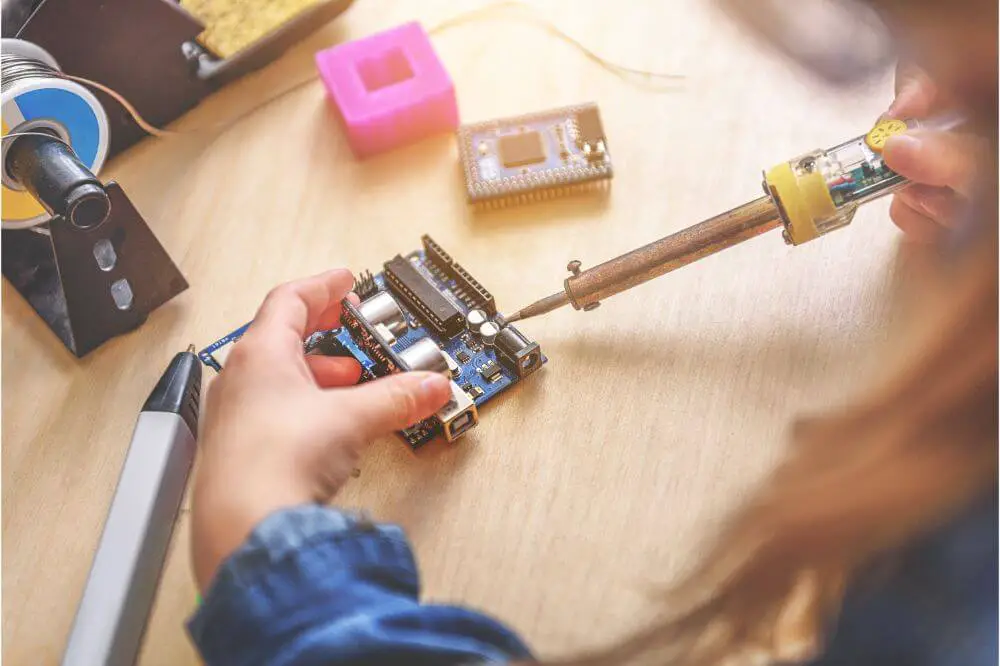
Steps To Use Your Soldering Iron
Step 1: Prepare Yourself To Solder
Before you can start soldering together two parts, the first thing to do is confirming you’ve assembled all the appropriate tools. This includes:
- Solder
- A soldering iron
- An exhaust fan
- Soldering iron tip(s)
- Cleaning sponge
- A soldering iron holder
- Safety goggles
- Clips to fasten your work
- Tools needed for working the wires
- The two items you want to be joined together
After having all these tools in one place, prepare your workplace to make sure it’s tidy and neat before you can start the soldering process.
Step 2: Connect Your Soldering Iron To Power
Once you’ve assembled and prepared your workstation, plug in your soldering iron to power and give it time to heat up. This shouldn’t take so long, and make sure not to touch it after it becomes very hot.
Whereas this sounds somewhat obvious, many individuals still end up burning themselves when using the soldering iron. If your soldering iron is new, add solder onto the hot tip before you can start working.
Step 3: Fasten The Items You’re Soldering
When soldering, it’s essential to make sure to have an excellent grip. You should do this by using a frame or vice to ensure everything is appropriately held in a suitable position.
Step 4: Clean The Soldering Iron’s Tip
After the tip of the soldering iron reaches the desired temperature, you now need to clean it using a wet sponge. You can do this either using a separate sponge or using the one found on the soldering base.
Regardless of the sponge, you opt to use, make sure to touch the tip of your soldering iron gently with the wet sponge. When doing this, you’ll hear a sizzling sound, but it will clean off any old pieces present on the tip until it starts shining:
Step 5: Apply Flux
When carrying out soldering, it’s necessary to use flux, which helps remove any oxides while you’re soldering. You need to make sure the melting point of the flux is lower than that of the solder.
This is crucial to ensure it performs its duty before you start soldering. There are many ways of applying flux, and the ideal method will depend on the items being soldered.
Step 6: Tin the Soldering Iron
Tinning your soldering iron is also a must learn when learning about the steps to follow when using the soldering iron. This process involves coating the tip of the soldering iron with a thin solder coat.
You should start by melting a thin layer of the solder on the soldering iron’s tip, promoting heat transfer between the tip and component being soldered. Moreover, this gives the solder a base from where it can start flowing.
You need to repeat this process when soldering. All that’s required on your part is touching the soldering iron’s tip to the solder while tinning. While doing this, make sure not to touch the soldering iron’s tip to the solder while soldering.
Step 7: Join The Parts
You should get the two components that needed to be soldered together using the solder. While doing this, you need to hold your soldering iron with the dominant hand while the solder is on the other hand. Maintain this position for a few seconds and then start sliding the solder below the soldering iron’s tip, placing it in between the PCB.
Hold it at this position for additional seconds while adding as much solder as needed. The ideal quality of solder to use differs depending on the solder’s diameter, the application, and the project being carried out.
Consequently, you should start by taking away the solder and maintain the soldering iron in the exact position for a few more seconds. Doing this allows the solder to have a few more seconds to melt and form a robust joint.
Once this is done, you can now take out the soldering iron, and this entire process shouldn’t take longer than five seconds. Give the solder a few seconds to cool, and this happens relatively fast without blowing or moving the joint as this will lead to its deterioration. You can tell a bad solder connection as it looks very dull, grainy, and extremely oxidized.
Step 8: Assess The Joint
The solder joint should ideally look even and smooth plus with concave sides. It should also look flat instead of looking similar to a raised ball. If the solder connection doesn’t look anything like this, you’ll need to reheat and then add more solder.
Step 9: Fixing Any Error and Desoldering
In case of any error, you shouldn’t be too critical of yourself since anyone can make a mistake. The most common mistakes done include placing something in an incorrect position or using excess solder.
If this does happen, you need to reheat the solder joint and melt the solder, thereby allowing you to position it in an ideal position. This error is forgivable simply because you can heat and cool the solder repeatedly, so don’t allow this to demotivate you so much.

Conclusion
The soldering iron is a vital tool that you must own either if you’re a hobbyist or professional who often performs soldering tasks. Nonetheless, you might know where to start when using this tool. If you struggled with such a problem before, this will no longer be the case after reading this detailed guide on the steps to follow when using a soldering iron.
