
Electrical safety is a paramount concern for every homeowner, enthusiast or hobbyist who desires to engage in any electrical installation. A crucial component of this safety setup is the grounding system, a requisite when setting up an electrical system.
This essay provides an in-depth insight into the fascinating world of the electrical grounding system, elucidating how vital it is for not only prevention of shock but also appliance protection.
The essentiality of keeping this system in prime condition is also explained in the article. The reader will be guided on the necessary tools and materials necessary for effectual installation, and a comprehensive installation procedure of the ground rod to the electrical panel.
Getting familiarized with and executing this installation accurately will empower you with one of the vital skills one needs to mitigate potential hazards that may arise from an electrical system.
Understanding the Grounding System
If you’ve spent any amount of time dabbling in the intricate world of electronics, you know just how important a good grounding system is. No matter if you’re a weekend DIY enthusiast, a model train enthusiast working on the layout’s wiring, or a budding electric guitarist setting up a new amplifier, a proper grounding system protects you, your equipment, and enhances the performance of your electronic devices.
In essence, a grounding system is a safety measure. It’s a direct, physical connection to the Earth, designed to prevent electrical shock should a fault occur in the electrical system. It’s the silent watchman guarding against potential electrical faults! Now, isn’t that exciting?
Here’s a fascinating fact: Electrical energy always seeks the path of least resistance to the ground. It’s like a hiker looking for the easiest path down the mountain. In the case of an electrical fault, if the equipment isn’t properly grounded, guess what becomes the path of least resistance? Yes, you’re right… you! That’s why it’s critical to ensure proper grounding – it diverts any stray electrical energy into the ground, keeping you safe.
Additionally, grounding contributes to the stability of voltage levels, resultantly aiding the overall operation of an electrical system. It effectively keeps those voltage levels within suitable parameters, enhancing the performance of the electrical appliances and machines.
Signal clarity in electronics is another area where grounding plays a significant role, especially within audio and video systems. Poor grounding can lead to hum, buzz, or static, right in the middle of that guitar solo you’ve been practicing! But with good grounding, the signals are clear, crisp, and free of any unwanted noise.
So, how does one implement a good grounding system? Glad you asked! It involves connecting metal parts, getting the right grounding rod, ensuring that your rod contacts the earth at the right depth, and checking local code requirements.
But remember: grounding systems involve high stakes (pun intended) and while a hobbyist can understand the principles, the actual installation process of a grounding system should be left to professionals.
In conclusion, grounding is a seemingly small yet incredibly crucial aspect of any electrical system. Irrespective of the size of your project or endeavor, its importance simply cannot be undermined.
When set up right, it provides a safe and efficient operation, and lets nothing interrupt the joy of your hobby. That, fellow enthusiasts, underlines the true purpose and importance of a grounding system!

Materials and Tools for Installation
As the lightning rod of an electrical system, ground rod installation is a critical skill for any electronics hobbyist. This article outlines the essential tools and materials needed for the task. Remember, safety should always come first when dealing with electricity, so even as we delve into this project’s necessities, do not forget to wear appropriate protective gear.
Starting with the most significant component, you’ll need the grounding rod itself. An 8-foot copper grounding rod is the standard choice. Copper prices may pinch your wallet, but its high conductivity and corrosion resistance make it a viable long-term investment in your electrical system.
To drive the grounding rod into the earth, you’ll need a sledgehammer. For a simpler insertion process, use a rotary hammer with a ground rod driver attachment. This will save you time, effort, and possible injury making it a vital tool for this installation type.
Not to forget, a copper grounding wire is essential for the grounding process. This wire should ideally be #6 AWG for residential use. You’ll need to measure the distance from your electrical panel to your ground rod position to determine the wire length needed.
A wire stripper and a pair of linesman pliers should be included in your toolkit for cutting and shaping the copper wire. These will help to provide a clean and precise connection between the grounding rod and the wire.
The grounding clamps are a crucial part of any efficient grounding system. They securely attach the grounding wire to the rod, ensuring that electrical currents are effectively transmitted into the earth.
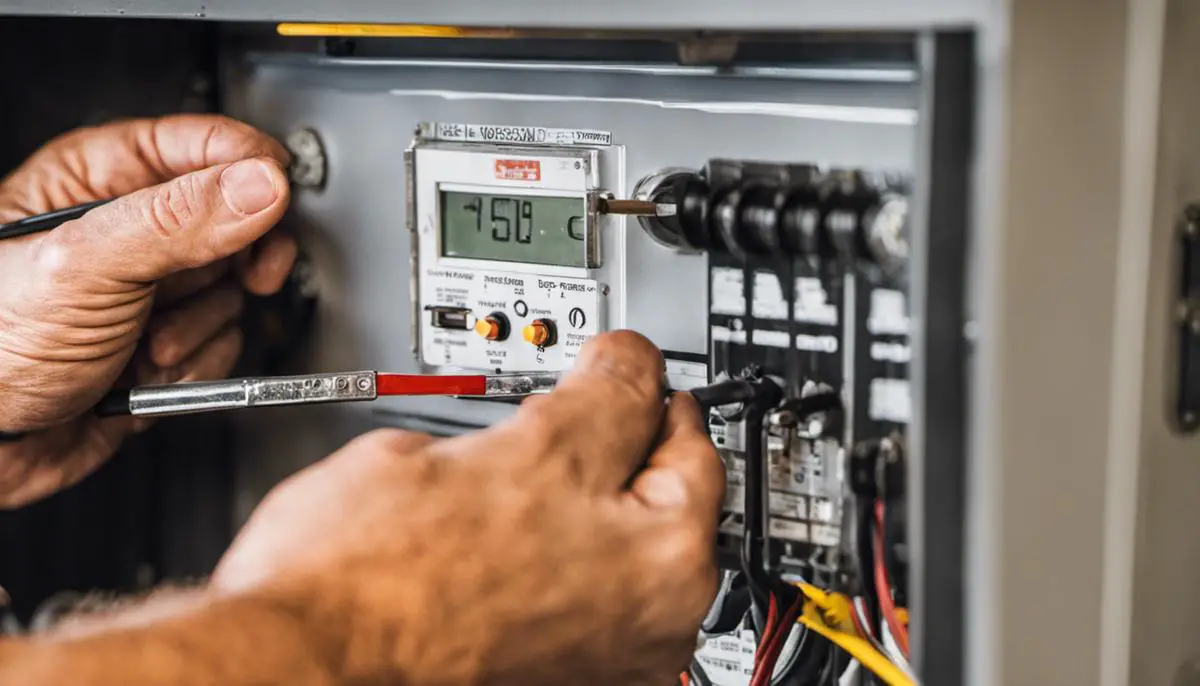
Since this job requires dealing with the electrical panel, you’ll need a circuit finder to help identify, trace, and separate circuits during the installation process. This tool plays a vital role in ensuring your safety during the project.
To complete the grounding process, you’ll need to connect the grounding wire to the electrical panel. In most cases, a specifically designed lug, often referred to as the grounding lug, is used for this connection. Ensure to select a lug that can adequately accommodate the size of the grounding wire.
Now, to wrap it all up, you’ll need electrical tape and wire nuts for securing and finishing all your connections. This not only keeps your wiring tight and neat but also adds an extra layer of protection against potential mishaps.
Installing the ground rod to the electrical panel efficiently and safely is the end goal. Admittedly, this is an intricate task, steeped in extensive knowledge and skill. But with the right tools, materials, and adherence to safety measures, one can ensure the grounding system’s successful installation.

Installation Process
Let’s dive into the specific steps you need to follow when installing a ground rod to the panel.
First, be sure that you’ve got all the necessary equipment ready. This means having a grounding rod, a sledgehammer (or a rotary hammer with a ground rod driver attachment if you desire a more modern approach), copper grounding wire (generally #6 AWG for residential use), a wire stripper, linesman pliers, grounding clamps, a circuit finder, a grounding lug suitable for your electrical panel, electrical tape, and wire nuts.
The first step involves positioning the ground rod vertical to the ground at the location where the electrical service panel is situated. Now, use the sledgehammer or the rotary hammer with a ground rod driver attachment to drive the rod into the ground. The process should leave approximately six inches of the rod above the ground surface.
Take your copper grounding wire, and using the wire stripper, strip about six inches of insulation off one end. Amply apply the grounding clamps at that stripped end. The clamped section of the wire is attached to the outcrop of the grounding rod that’s exposed above-ground. Make sure the connection between the wire and the rod is as tight as possible.
Now that your grounding rod and wire are securely connected, it’s time to connect the grounding wire to your electrical service panel. Always service the electrical panel with extreme caution. Begin by finding the main circuit breaker and turning it off. Despite this precaution, remain aware that specific electrical components within the panel can still be electrically live.
Utilizing the circuit finder will aid in confirming that the panel is safe to work on. The grounding lug needs to be attached to the grounding bar within the panel. Fix the stripped grounding wire to this lug, ensuring it’s tightly secured.
Finish this step by covering all bare wire areas with electrical tape and securing any exposed areas with wire nuts.
Be cautious when accessing panels, and be sure to replace any covers upon completion. This will aid in preventing accidental contact with live parts in the future.
Finally, here comes the most crucial part – inspection by a licensed electrician, who will check that the ground rod installation conforms with local code requirements and that everything is safely and correctly installed. Local building and electrical codes often vary, and inspection offers an extra layer of safety assurance.
Remember, working with electrical components involves a high level of risk. Always prioritize safety, hire a professional if in doubt, and double-check everything when you’re done. Happy hobbying, and always maintain respect for the electric world in which we live.

Understanding the grounding system’s importance and purpose, along with acquiring the necessary knowledge for its installation, will greatly enhance safety in your home’s electrical system.
By learning which materials are needed such as grounding wire, ground rod and clamps, and employing the right tools for this task, you will accomplish a successful installation of the ground rod to the panel.
Furthermore, being able to determine the rod’s installation location, its in-ground depth, and its connective method to the service panel, are also fundamental steps in ensuring a proper installation.
Lastly, always remember that safety should never be compromised. Learning to test if it is installed correctly guarantees you not only a job well done but also peace of mind knowing that your electrical system is grounded securely.
