
Knowing how to solder copper pipes is a handy skill when you have the right equipment. You don’t have to engage professional to fix leaky joints in your plumbing or other household piping systems. This guide provides a few pointers.
Tools Required
- Copper Pipe
- The fittings or connectors
- Propane torch
- Solder
- Flux
Procedure
Get the Right Copper Pipe
Copper pipes used for plumbing have a larger diameter than the size indicated. Most pipes are 0.125 inches larger, so one-inch copper pipe measures 1.125 inches in diameter. If you need to cut the pipe, use a tube cutter and clamp the pipe firmly, rotating it around the pipe. Make at least eight turns.
You also need to ensure the tubing has the right thickness. Most copper pipes are nominally sized, which means they are available in four weights, usually color-coded. For residential properties, the pipes are either Type L or M.
Those marked M have a red color and have the lightest wall and are used for pressurized systems while Type L pipes have a blue tag and are often used for commercial or residential installations.
Look for Suitable Connectors
You will have a combination of joints for the system, depending on the system you are building. It’s up to you to use the correct ones for your project:
- Male and female adapter: These connectors are used to connect a solder pipe to threaded tubing
- Tees and crosses: They are used to connect branch tubing to the main pipe
- Elbow joints: They help turn 90 and 45-degree bends
- Reducing adapters: They connect large pipes to small ones
Cleaning the Pipes
A range of tools are used to clean the pipes. The most common is emery or sand cloth. Roll the cloth on a small cylinder and rotate it inside the fitting; it should be clean within a few minutes. Experts also recommend using a wire-based tool to clean the outer part of the pipe.
You may also use small wire bristles to clean the inner part of the pipe. The wire bristles remove the oxide layer on the outer part of the tube until it is shiny.
Choose the Right Solder
Lead-free solder is ideal for portable water systems. It is an alloy of tin and copper with 95% of tin and 5% antimony.
Soldering the Copper Pipe
Apply Flux to the Joint
Flux is a prerequisite for solder application as the solder can’t be applied directly to the joint. It ensures that the solder creates a strong bond once applied to the joint. Skipping this step causes the solder to form a superficial layer at the entrance of the joint, which does not hold up long.
Flux also facilitate further cleaning of the components, prevents re-oxidation, and eliminates any atmospheric oxygen from the surfaces. Be sure to spread the flux on both sides of the fitting before sliding the parts together.
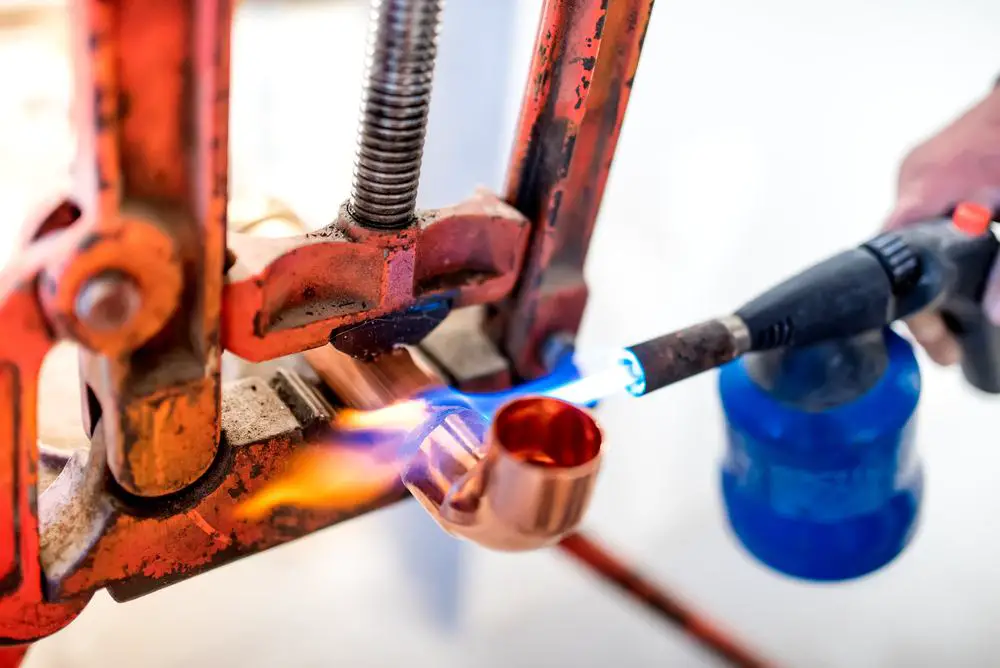
Heat the Parts
Soldering copper pipes demands relatively large amounts of high-intensity heat, usually 400-500 degrees Fahrenheit. A propane torch fitted with the correct size tip comes in handy.
Be sure to apply heat uniformly around the fitting for 8-10 seconds. Note that the amount of heat required varies depending on the project.
Applying Solder
Pull the torch away and apply the solder to one of the copper pipes momentarily. The solder should quickly melt, letting you apply more solder to fill the joint. A silver band should form around the joint when you have used enough solder.
Applying too much solder causes a small solder bubble to form on the lower part of the joint. Be sure to wipe it off, or the joint will look a bit messy. Also, excess solder is likely to flow into the pipe, interfering with the water flow.
Additional Tips
- Wrap a wet rag around the fitting to allow it to prevent the solder from melting
- Use MAPP gas torch to hasten the heating process. You only need 5-10 seconds of heating when using this torch
- Remove any wooden material from the working space. If it is not possible, avoid soldering close to the wooden material or other flammable surfaces
- Use new fittings. Old fittings are difficult to disassemble and clean
- Apply the right amount of solder, e.g., half-inch of solder for half-inch copper pipe. Excess solder restricts water flow and sometimes forms small balls that break loose and damage the faucet valves
- Wipe off any solder clogging the threads. Clogs make it challenging to create a good seal
- Use tinning flux instead of standard flux. It contains a small percentage of silver powder which melts when the heat is applied
