Can you connect the Arduino Mini to your PC? If this is a question you’re searching for the answer to, you’ve come to the right place. This process might sound complicated for most people, but it isn’t, and to prove it, we’ll take you through this detailed guide.
In this guide, the PC uses Windows XP. But before you can do this, you’ll need several useful tools, including:
- USB cable plus UC00A Rev2.0 to be used to load a program
- Arduino IDE
- Breadboard (optional)

All that’s needed on your part is to get a USB cable to the Arduino Mini and the computer through the USB port. Therefore, let’s go right ahead and take you through the steps to follow when connecting the Arduino Mini to your PC.

Steps To Follow When Connecting Arduino Mini To Your PC
After connecting the Arduino Mini to your PC, you’ll see a popup notification box at the screen’s right bottom corner, with a message stating, “Found New Hardware.” You should follow this up by installing a driver and, consequently, a Found New Hardware Wizard. However, you should click No, not this time. After this, click Next >.
The next thing you should do is choose the option Install from a list of precise locations (Advanced), which will show on the subsequent screen. Follow this up by clicking Next >.
You should then make sure to choose to Include this location on the subsequent scream and start browsing the downloaded and unzipped Arduino IDE folder. After this, choose the drivers -> FTDI USB Drivers folder, followed by clicking OK.
Doing this will begin the process of locating the appropriate files and the installation of the drivers. A click Finish window should pop up at this moment.
In some cases, you may get a popup warning message, but you should press Continue Anyway.
This will complete the installation process successfully. It’s recommended you restart or reboot your computer to ensure the drivers work properly.
Once your computer is done rebooting, confirm you’ve connected the UC00A Rev2.0 using a USB cable. This turns the green LED back on.
If you wish to verify the COM number where the UC00A Rev2.0 is connected, you should head to the Device Manager. The steps to get to this point are:
Start Menu -> Click settings -> and then Control Panel. Subsequently, double click on System, followed by choosing the Hardware tab. You should then click on the Device Manager.
Search for an entry in the Ports (LPT & COM), which is showing USB Serial Port (COM” X”), with X a decimal number between 1 and 100. X may be any number you like, and it must be unique since you’ll, later on, require it in the Arduino.
For our example, we’ll go with four as the COM number. You must pick a right COM number for loading a sketch/program, which you’ll later load into the Arduino Mini.
If there’s any USB Serial Port, disconnect the USB cable followed by connecting it again, and doing this will complete the installation of the UC00A Rev2.0 driver.
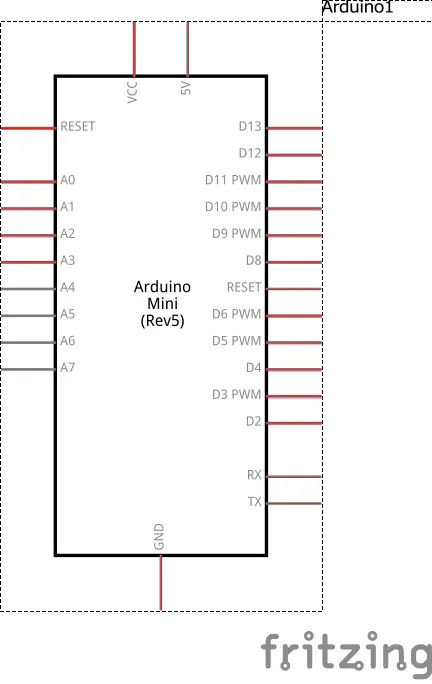
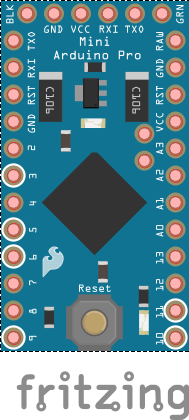
It’s at this point that you should connect the Arduino Mini to the UC00A rev2.0. When doing this, you’ll need a 6-way right angle pin header, which is usually available in 40 pins. You should then start fusing it to the Arduino Mini while confirming the label “GRN” is with the pin on the right having this mark, while “BLK” is on the left pin.

You also need to join the straight header pin to be used for I/O and start by getting a header pin 1×40. On every side of the Arduino Mini is a 12-pin, and you’ll have to use your cutter in cutting a header pin.
Connect the 6-way bootloader pin of the Arduino Mini to the UC00A Rev2.0 socket that’s just been fused. It’s important to take note that this connection has polarity. Confirm you’ve connected the green DTR to the Arduino Mini’s GRN pin and the UC00A to the GND (Black). Double-check this connection before proceeding to the plugin.
After connecting the UC00A to the Arduino Mini and the computer correctly using a USB cable, the Arduino’s Red LED at the center will turn ON. This is proof that the Arduino Mini has power, and since it’s already pre-loaded with the bootloader, go ahead and load the first sketch/program sample.
You need to start by connecting your Arduino Mini to the Breadboard, and the LED Blinking message that will be shown is Hello World In Arduino. Proceed to open the downloaded Arduino folder and unzip it. You’ll spot a file labeled arduino.exe and go ahead and double-click on it, and the Arduino IDE starts to load, and this won’t take more than ten seconds.
Since the Arduino IDE doesn’t need installation, you won’t need to install anything else from now on. However, you must confirm the UC00A Rev2.0 gets properly connected to both your Arduino Mini and your computer.
Connect the components! 🙂

The Arduino IDE works with different Arduino mainboards. Therefore, you should start by choosing the correct microcontroller and board. This needs to be done by heading to:
Tools -> Board -> Arduino Mini w/ATmega 328 and then click it.
As you do this, it’s crucial to confirm that the Arduino IDE identifies the COM Port connected to the Arduino Mini. The steps to follow when doing this are:
Tools -> Serial Port -> COM?
The COM number to enter depends on what you keyed in in the device manager, and it’s crucial to choose the exact COM number. The number is usually the same as the USB port, so you need to pick the appropriate COM number.
You should see the settings at the Arduino IDE’s bottom right corner.
Conclusion
While connecting the Arduino Mini to the computer is something that people think to be complex, it’s usually fairly straightforward. If you didn’t know where to start, reading this detailed guide has provided you with the proper steps on everything to do for this to be a success.


