
Have you ever thought of making your own action figures rather than buying these from the store? Now, you can do this, and I’m going to show you how. You see, even if you don’t have excellent 3D modeling skills, you can make your action figures.
One of the essential things you need to consider before starting your work are the following:
File Preparation
Helpful tips and tricks are essential so that making the action figures are successful. You can follow detailed 3D printing design guidelines (If any) in the manual of your 3D printer. (We’ll talk about how to make action figures with 3d printer later.) Keep in mind that the thickness of an action figure is essential and how you would support the fragile parts of the figure.
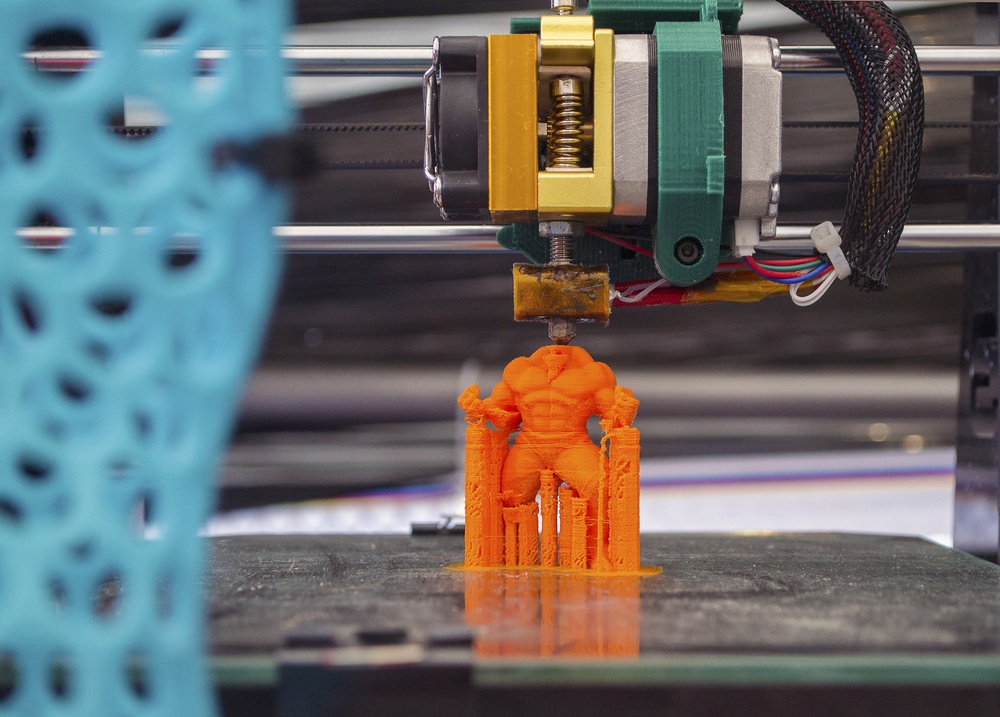
Choose Your 3D Printing Material
If you want to see a quality action figure model, don’t forget to choose the best material for your 3D printer. A 3D print you intend to create in multiple colors requires a multicolor material. Plastic material is a good choice for the action figure. But it’s best you choose gray resin or polyamide if you plan to paint the model yourself.
Take note: You can also include metal parts in the action figure. Examples of excellent materials you can use are bronze, brass, steel, and many more! The material choice is up to you.
Get a Pro 3D Print
Don’t forget an excellent 3D print before creating your favorite action figures. Choose legit and trustworthy 3D print services online and upload your file there. You can select other materials and finishes that would make your models awesome. Wait for your model delivered at your doorstep.
Now that you have an idea about the things you need to remember, let’s proceed to other important requirements.
Even if you’re not a pro in 3D modeling, you can create wonderful action figures by having the following:
- 3D printer
- 3D Scanning Software
- An Xbox Kinect (or another similar device)
Note: Don’t forget to include a software that allows you to construct then edit your 3D prints. The Xbox Kinect should have a normal USB port and not a proprietary Xbox port. (The USB port is crucial once you use your PC for 3D printing.
Making Action Figures Using A 3D Printer
You would ask – how to make action figures with 3d printer? Don’t worry if you’re a beginner, and you can make your own 3D printer by following the steps below:
Open Your Scanning Application
You don’t have to be an expert in 3D modeling to create an action figure such as Superman, Iron Man, or Yoda. Start the 3D printing process by opening your scanning application. Then, you’ll be going to use the Xbox Kinect.
The Xbox Kinect is an excellent tool for beginners because it allows them to scan and clean up their models. Hence, beginners can print their models because of Kinect. You wouldn’t need to use other skills.
But if you’re a pro, you can use Reconstruct Me because you get more details in your 3D model. But you need to do an additional cleanup before the scanning process.
Keep in mind: Make sure you set the scanning area close to the person (your model) in order to maximize the scan. You can turn the monitor around so that you can see the model when you’re scanning. Also, use a USB extension because this allows you to move inside the room freely.
Feel free to explore even the smallest part of your object so that you can capture each detail. Practice doing it so that you can from the top-down angle of the model. In doing so, you wouldn’t face hassles in scanning the upward-facing details of the object.
Use 3D Modeling Software
Alright, you’re done with the first scan, but you can see small errors in the model. (Don’t worry! You’ll clean that up using your 3D modeling software. You fill holes and colors to the model. (You can add a color or not depending on your preference.)
Then, you now crop the ground plane using the 3D modeling software. If you see many terrains in your model, a crop that out. You do this by orbiting around the model and choose the terrain you don’t want to see and crop it.
Now, you’ve modeled an action figure.
But wait – we’re not over yet. I’ll teach how to reconstruct my version. The reconstruct technique is very efficient when you want to emphasize the small details of the figurine. Also, you can apply these to action figures having tiny details.
Let’s say you want to add a 3D sword to your figurine, here are the simple steps you need to follow:
- Scan the object and hold the 3D sword perfectly. You do this for 30 seconds until you get the desired result. Note: You might experience shakes and wobble in holding the object. Don’t worry because it’s natural.
- Go to the vertices of the model, and then you can choose these or delete the ground plane. Some excellent advice would be to choose all the elements in the model then deselect the part you want — hit delete.
- Use the modifier in filling the holes. In this step, use a qualified modifier that would provide an awesome look to the model.
- Last, scale the model to the size you want. Note: You can use 1.5 Inches if you’re making figurines of Dungeons and Dragons.
Keep in mind: You wouldn’t need to use color and texture in the reconstruct method. You wouldn’t need that in the printing level you would do because you’re going to paint the model.
You can create a 3D action figure anytime as long as you have a 3D printer, materials, and steps to follow. If you want to build an action figure of yourself, it can be any size. But remember that the larger your figurine gets, the more expensive it would be. The 3D modeling process would also take a long time too!
Are you ready to create action figures using a 3D printer? Come now and follow the steps and tips above!