
While measuring current with a multimeter is not one of the most common applications of the device – compared to resistance or voltage measuring – it’s still a good way to troubleshoot issues with electrical circuits. Typically this measurement is done to identify a drain on a circuit.
Compared to other multimeter applications, measuring the current can be dangerous if you don’t know how to configure and use the device. The reason is simple: this measurement is taken from a powered circuit, in which even the smallest amperage can be problematic to the user.
Therefore, before we get to amp measurement, here’s a look at how you should configure your multimeter.
Multimeter Configuration
First, you’ll want to ensure that your multimeter can handle the maximum number of amps flowing through a particular circuit. For that, it’s best to check the maximum amperage of the battery or breaker you’re trying to measure. Simultaneously, look at the max dial setting on your multimeter.
If your multimeter has a lower rating than the maximum current traveling through the circuit, you can still use it for measurements. However, to make it work, you’ll need to extend its range by using a plug-in clamp accessory.
You’ll notice that most multimeters have a COM socket on them or a port marked by a negative symbol. To prepare your device for measuring a circuit’s amperage, you’ll want to plug the multimeter’s black probe into the COM socket.
The other probe, the red one, goes into the “A” socket on your device. Note that some multimeters offer multiple sockets that can fit the red probe, each one designed to take different measurements.
However, “A” stands for amperage, so the interface is quite intuitive that way. You might also notice an mA socket. You can plug the red probe into the mA socket when attempting to measure milliamps in a circuit.
For safety reasons, or if you’re simply unsure what setting to use, opt for the A or 10A sockets designed to handle a more powerful current. Otherwise, you risk overloading the device.
Depending on what you’re trying to measure, you could be dealing with an AC or DC circuit. Now, for most residential applications, you’ll only measure AC. But, if you’re trying to test the circuit in a motor or a battery-powered device, you might need to set your multimeter to the DC setting.
Of course, this only applies to multimeters that can switch between AC and DC settings. There are plenty of models designed specifically for one type of circuit. You should also be aware that while most residential circuits run on AC, that’s not always the case.
For example, you can have homes in rural areas that use a transformer to convert electricity to DC. Hence it’s important to know the type of current you’re dealing with and configure your multimeter accordingly.
The final step in preparing your multimeter to take measurements is to max out the amperage setting on your device. That’s usually done by turning the corresponding dial.
Here’s why: The idea is to enable your multimeter to handle more than the expected maximum currents of a circuit. This helps protect against potentially blowing a fuse, should the amperage you’re measuring be stronger than anticipated. In such a scenario, the current could destroy your multimeter.
It’s worth noting that this is a safety precaution, not necessarily the best way to configure your device. It’s possible that keeping the dial to the maximum setting might not give you a reading if the current flowing through the circuit is too low.
Measuring Amps
In order to measure the current in a circuit, you have to run it through the multimeter. Before doing that, make sure you shut off the power.
Why? Well, the moment you complete the circuit with your multimeter, the current instantly flows through it if the power is on. That means that it goes through the small tip of the probe and can cause overheating from the electrical load.
So, before putting the multimeter in series with the circuit and essentially turning it into a live wire, turn off the breaker switch or remove the negative lead coming from the battery if you have a circuit powered by one.
With the power off, you can connect the multimeter. The red probe, or red lead, usually connects to a point closes to the power source. The black probe connects to what’s known as the downstream or outgoing section of the circuit.
After integrating the multimeter into the circuit, you can restore power. As the current flows through it, you should notice a number on your device’s display.
If you see a number between 1 and 10, it means that you’re measuring amps. However, if you see something starting with zero followed by a decimal point, then you’re measuring milliamps.
Pro Tip: When the displayed number is under 0.400, you can swap your red probe into the mA jack for a more accurate reading. Of course, you’ll want to power off the circuit first and then change the position of the red lead.
Using Alligator Clips
Alligator clips, or clamps, are very useful accessories because one of the problems with using a standard multimeter is that it can keep both hands busy.
When using alligator clips, your hands are free, and you’re safely disconnected from the circuit should something happen. You’ll also have a much easier time switching the power on and off as you perform your measurements.
Safety First
Always exercise caution when attempting to measure the current going through a circuit. Finding the source of a parasitic drain could be important in various projects. However, it’s crucial to remember that you have to make your multimeter a part of the live circuit to take an accurate amp measurement.
Therefore, a poor configuration can do more than give you an inaccurate reading. It can blow a fuse, damage the device, or even cause electrocution. Apart from following the general steps presented in this article, don’t forget to check your multimeter’s manual to better understand how it works.

STOP!!!!!!
NEVER EVER ever ever ever put multimeter probes into a plug socket like that!
If the multimeter was set to AMPS (Which is the title of the page isn’t it) then it will either EXPLODE or, at the very least, it will blow the fuse, hopefully faster than you can say “is that the smell of burning electronics”.
Also be aware that when you put your multimeter into AMPS mode then that is basically a “short circuit” mode that can DAMAGE a huge range of electric and electronic devices.
Please heed this warning and help, from someone with many many years of experience.
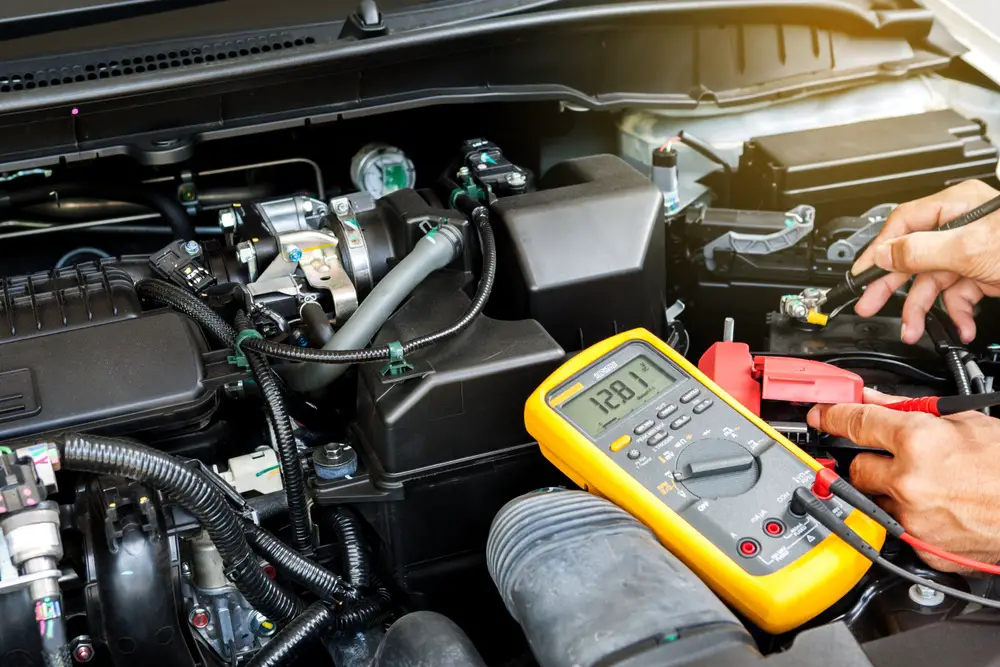
Thank you! That’s a random image an editor used. I’ll get that changed to a battery or something else. An editor and I will go through the article again and check for errors. Thanks.