
One of the most crucial parts of the soldering iron is the tip, and any defect on it has a direct impact on its performance. This is because any issue on the tip affects how well heat gets transferred to the connection point, thereby making the soldering iron less effective.

Because of this, it’s important always to implement proper tip maintenance to avert such problems. If not, you risk destroying the tip, thereby not only affecting the quality of its performance but also incurring more money finding a replacement.
It’s thus advisable to find a way of preventing this altogether. The best way you can do this is to make sure to always re tin your soldering iron. If you have no idea what this is all about, you’re in luck as here is a detailed article explaining what’s tinning and how to do it.
What’s Is Tinning The Soldering Iron Tip?
The tip of the soldering iron is mostly made of copper, which is a superb conductor of heat with this vital when doing soldering tasks. Usually, these tips are iron-plated to prevent them from hastily dissolving as you apply the solder.
However, the iron only comprises a thin layer, so it’s vital to remain cautious as you use anything that might be even slightly abrasive as you cleaning the soldering tip.
The accumulation of flux or oxidation of the tip reduces the effectiveness of the soldering iron. Furthermore, repeatedly cleaning the tip prevents the accumulation of clear deposits over time, which are harder to clear. As a result of this, the dirty soldering tip doesn’t “tin” easily, reducing its effectiveness when doing the soldering.
It’s due to this that tinning becomes essential. But before going even deeper, what is tinning? Tinning is the process of covering the soldering iron’s tip using a layer of solder.
This process is crucial as it prolongs the tip’s life since it prevents corrosion and oxidation. In addition to this, it promotes the melting and flowing of solder iron more quickly over the parts being joined together. Thanks to this, the entire soldering process becomes a lot easier.
Upon buying your soldering iron, you should make sure to tin its tips before even using it. This should always be the case when you aren’t using your soldering iron, and it is just positioned in its storage or holder.
Steps To Follow When Re Tinning Your Soldering Iron
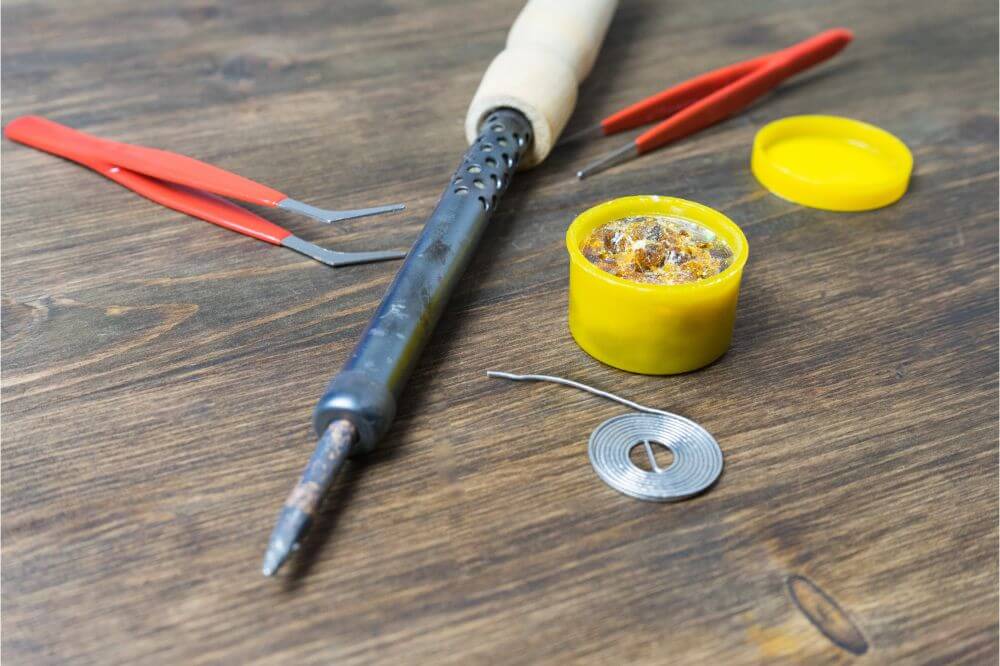
Now that you know the importance of re-tinning your soldering iron, it’s time to know how this usually gets done. These are the steps you must follow regardless of whether you’re an expert or novice at soldering. But before you can even start re-tinning, several essential tools must be at your disposal. These are the soldering iron that requires re-tinning, solder as well as water.
Once you have all these, you can now proceed to start re-tinning.
Step 1: Prepare The Iron
After clearing your workstation, you should connect the soldering iron to the socket and switch it on. Subsequently, soak the sponge which comes alongside the soldering iron with water and squeeze it lightly.
It would be best if you then used this sponge to clean the solder off the soldering iron’s tip. Once you’re done cleaning, change the temperature of the soldering iron to around 750 F.
Step 2: Clean The Soldering Iron’s Tip
Leave the iron to heat for around a minute or two, and it’ll have enough heat to steam when it comes into contact with the sponge. You should give the soldering iron more time to become hotter if it’s not yet hot enough or If the sponge is too dry. Once it becomes hot as desired, use the sponge to wipe each of the soldering iron’s tip to get rid of old solder.
Step 3: Tin The Soldering Iron’s Tip
Tinning usually entails adding a small layer of solder on another metal. You should thus hold the iron in one hand while holding the soldering iron the other. Consequently, get these two to come into contact with each for a split second on all the sides of the soldering iron’s tip.
Once you see the whole tip is covered in the metal, the tip of your soldering iron is soldered successfully.
Tips To Avoid Oxidation
The oxidation of the soldering iron’s tip is what necessitates you to re tin your soldering iron tip from time to time. Therefore, it’s best if you could find ways to reduce this from happening. Here’s a highlight of the different ways of doing this.
Ensure The Tip Is Always Clean
One of the best techniques for minimizing oxidation is by ensuring the tip is always clean. The ideal cleaning methods to employ are either using a wire cleaner or a wet sponge, with both methods effective.
As you clean the soldering iron’s tip using a wet sponge, make sure to give the iron adequate time to return to its set temperature before you can wipe it again. By doing this, you’ll maximize the sponge’s cleaning effectiveness, ensuring the tip materials keeps on flowing.
Use A Shielding Layer of Solder
The addition of a solder layer is the easier method of preventing your soldering iron’s tip from oxidation. Once you’re done cleaning your soldering iron, please keep it away safely and apply a fresh layer of solder on its tip.
Switch off The Soldering Iron When Not Being Used
You should always turn off the soldering iron whenever it isn’t being used. This is important because the natural process of oxidation is reduced at room temperature compared to at higher temperatures. For this reason, you should make sure your soldering iron is always switched off when you aren’t using it.
Conclusion
Your soldering iron needs to be well maintained for it to maintain its effectiveness and practicality. You can do this by re-tinning the soldering iron since this increases the rate at which heat gets transferred through the soldering iron’s tip.
If you notice your soldering iron isn’t working as effectively as before, consider re-tinning it, and you’ll notice a significant change in its performance.
