
Measuring current – also called amperage- is an important procedure since the electrical current is a basic electrical parameter that, when measured, gives valuable information about a circuit. It could be done to find out whether an electric circuit is operating correctly or to observe any other readings that are related to current consumption.
There are two types of current, Direct Current (DC) and Alternating Current (AC).DC flows only one way from a DC source such as a car battery while AC flows from one direction from a source, reverses, and flows the other direction. It happens multiple times a second, where the rate gets determined by frequency. A good example of an AC source is your home’s mains supply.
Taking current measurements is not as common as measuring voltage and resistance. However, it can be done with a wide variety of test instruments; we are going to look at how to do it with a digital multimeter. Digital multimeters are better and advanced than analog multimeters, making them ideal for taking accurate readings more efficiently. Besides, they are widely available as well as very affordable. Measuring electric current is an important ability that anyone should have, that’s why we’ve written you this guide on how to connect your multimeter and measure current.
Equipment & Tools Needed To Measure Current.
You will need the following equipment and tools for this project.
- A digital multimeter
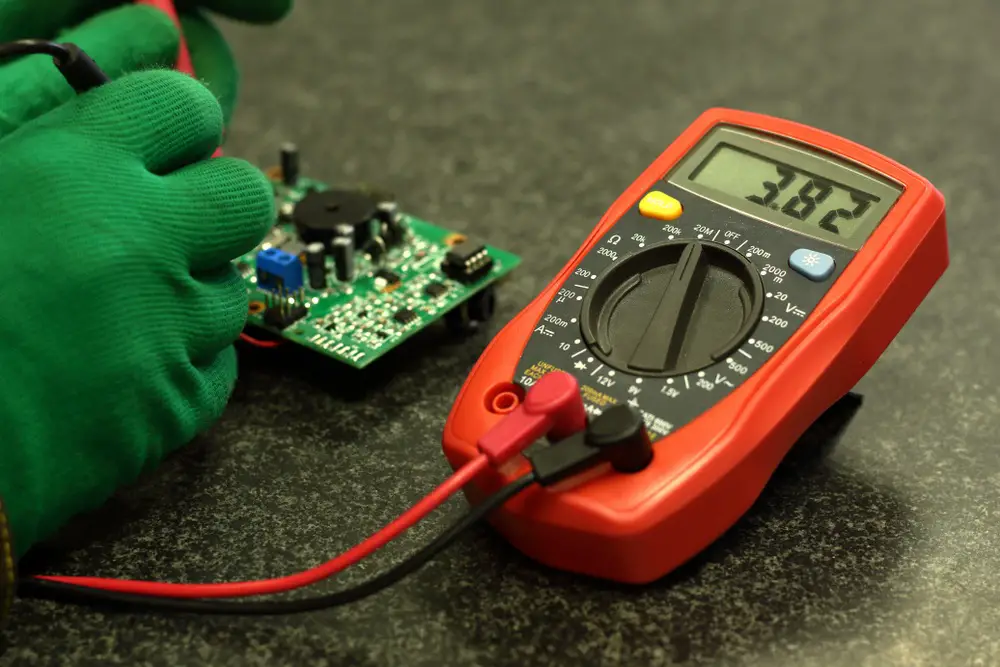
- Protective Work Gloves
Current Measurement Basics to Understand First
Below are some basics everyone should understand before taking current measurements.
Since the flow of current is attained by a steady flow of electrons, within a circuit, taking measurements is a lot more involved than measuring voltage and resistance. In a simple circuit, the basic way of monitoring the course of electrons is connecting a battery, bulb, and a control switch to form an electrical circuit.
The bulb shows the amount of current flowing in the circuit through its brightness. Now, to use a multimeter for measuring a current, you have to break the circuit for current to pass through the multimeter and readings to be taken. It’s not an easy thing, but it’s the best way to do it. In modern equipment circuits that require current to be monitored from time to time, there are terminals that entail a shorting link to aid this.
Another thing to note is that a multimeter doesn’t in any way affect the normal operation of a circuit if it’s added to the circuit. However, to take accurate current measurements with a multimeter, the aversion of your multimeter must be very minimal. As a matter of fact, for an amp’s measurements, the aversion of your multimeter should be below 1 ohm. That’s why the multimeter that is used by electrical professionals are made to have very low resistance
Steps for Measuring Current with a Multimeter
#1Turn off the power in the circuit that you are working on.
It is a safety precaution that helps to avoid the risk of electric shock as you are setting up and preparing your equipment. Wear insulated work gloves as an additional safety measure.
#2 Turn on your Multimeter.
Please turn on the device and set it to take current measurements. Do it by turning the dial of the multimeter on the meter to the highest current range. If it’s a 10A socket, set the range of the probe to 10A. The maximum range should be above the expected reading to prevent the multimeter from getting overloaded, which might blow up a fuse. If you are using an auto-ranging multimeter, set it to the “A” or mA setting.
If you want to be more specific on the type of current you are taking, you can set your multimeter to either AC or DC.
#3 Insert the Multimeter Probes Into Their Correct Connections.
Insert the black probe into the connection labeled common (COM socket). The red probe should get connected to the mA socket or the high current socket, which is usually marked 10A. The mA socket is marked with the maximum current.
#4 Connect the Multimeter in the Circuit
Now, break the circuit that you are taking readings on and connect your multimeter. The multimeter must be inserted in series in the circuit.
Use alligator clips rather than the standard pointy meter leads to complete the circuit. The multimeter probes have a small surface area, and when the power is on, lots of the circuit’s current immediately flows through the tiny tip of the probe lead, which can make them heat up fast and micro-weld themselves into what you’re testing. Since alligator clip leads have a larger surface area, they help to spread the electrical load preventing the heating up.
Safety Tip: When the meter is connected in series, remember that its probe leads are as live as any wire in the circuit.
#5 Turn On Power to the Circuit
Restore power in the circuit for there to be current flow.
#6 Observe The Readings On Your Multimeter.
When taking the reading, keen observation is required to be able to attain the correct figures. Tilt your multimeter to the desired angle, ensuring accurate reading of figures, after recording the current depicted on the circuit.
Safety Tip: After taking your readings, place the probes of the multimeter into the sockets used for taking voltage measurements and tilt to the maximum range. It is a precautionary measure that helps to prevent damage to your multimeter if the range used is not put into consideration.
Different ways of measuring currents
Breaking a circuit and placing the multimeter in the circuit isn’t the only way the current is measured. There is another alternative method used whereby it’s not important not to alter the circuit. As good as it may sound this method has some additional requirements such as
- It requires some special components to be already in place
- May also require different types of sensors to be used.
- Note: It may not be as accurate as of the first method
A Series Resistor
This method is used on circuits that current needs to measure from time to time. It involves and requires the following.
Put a relatively small resistor in the circuit
Make sure that the resistor has one end well placed at the ground. It helps to eliminate the danger of high voltages or having unplanned for shorts when doing current tests on the circuit.
Set your multimeter to take voltage readings and measure the voltage. The drawback of this method is that the value of the resistor must be precise for the correct, current measurements noted as displayed on the resistor. From the voltage readings, you can then use Ohm’s law to calculate the current.
