
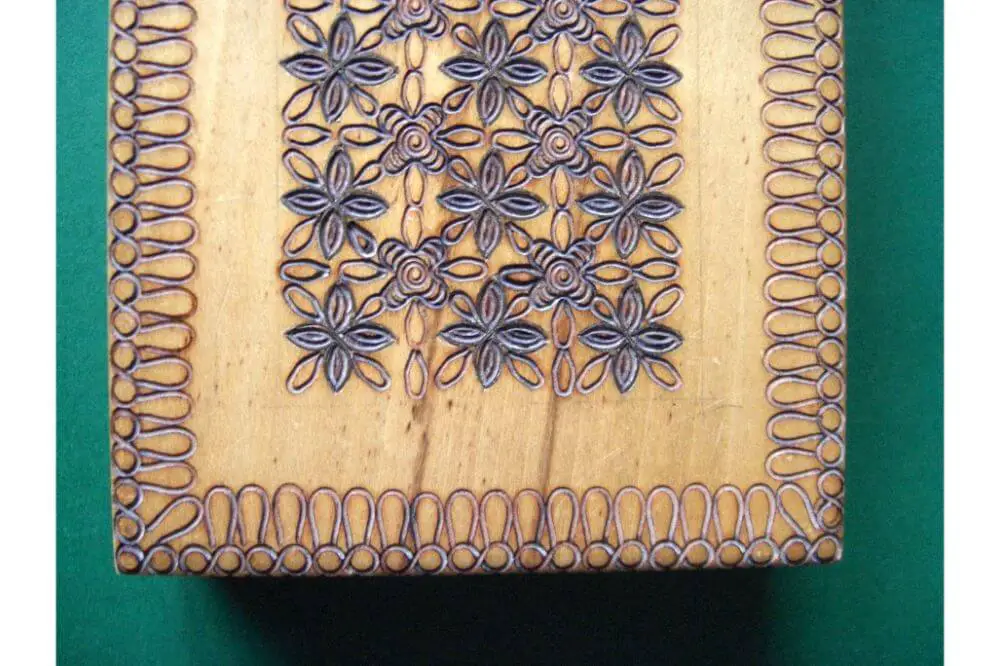
Designing unique gifts and items has become a favorite pastime activity for many people. One of these activities includes the engraving of wood using a soldering gun. There are numerous wood engraving styles you can create to use as customized keepsakes or as décor.
With that said, how do you go about engraving wood using a soldering iron? This is a question you mist likely are asking yourself as you also look to start partaking in this captivating leisure activity. If so, you’ve come to the right place, as here is a detailed article on the steps to follow when engraving wood using your soldering iron.
Basics About The Soldering Iron
Before you even learn about the steps to follow when engraving wood using a soldering iron, it’s essential first to know a few basics about this device. The soldering iron’s initial use was to fix two materials by burning them together to form a stable hold. As a result, this ensured you enjoyed extra security and strength.
However, this device has, over time, started to be used as a wood engraving tool. If you’re looking to use the soldering iron in this manner, patience and commitment will be crucial in determining whether you’ll succeed. It’s best to avoid this tool if you’re perfecting your engraving skills. In contrast, if you’re experienced at engraving, this is an ideal tool to achieve the perfect finish.
Steps To Engraving Wood Using A Soldering Iron
Now that you have a better understanding of what a soldering iron is and what it does, it’s time to know how the engraving process is carried out.

But before we can do this, you’ll need to learn of the things needed to make this entire wood engraving process a success. These items include:
- A soldering iron set with of at least 20 watts and adjustable temperature
- Soldering iron tip set
- Bowl of water
- An artists’ charcoal pencil set
- Sponge
- Fine and medium-grit sandpaper
After having all these items in place, you can now start showcasing your artistic skills. All that’s needed to ensure your engraving looks superb is sticking to these steps below:
Step 1 – Use medium-grit sandpaper to sand the wood surface, and once you’re done, use smooth fine-grit sandpaper for a more refined finish.
Step 2 – Get your charcoal pencil and start drawing the wished art onto the wood. As you do this, darken the big areas where you’ll use your soldering iron to engrave the wood. While doing this, you should draw fine lines to show the path as desired by your design clearly.
Step 3 – Put a sponge inside a bowl and fill it with water. While doing this, ensure the water line doesn’t cross the sponge’s bottom half.
Step 4 – Install the wished soldering tip so that you can start to engrave on the wooden surface. While doing this, make sure to modify the soldering iron’s temperature to 20 watts to etch small areas and fine lines. If you wish for bigger areas and deep lines, increase the temperature of the soldering iron.
Step 5 – Engrave the desired pattern on wood, and while doing this, quickly brush your soldering iron using the wet sponge after every two or three minutes. Doing this is essential in preventing the wood chips from hardening while still on the soldering iron’s tip.
Step 6 – Once you’re done engraving the wood, the next thing to do is erasing the lines on the wooden surface that aren’t engraved. As you do this, disconnect the soldering iron from power and give it enough time to cool down. After it does, clean the soldering tips as directed in the user manual.
Why You Should Use The Soldering Iron To Engrave Wood
The choice of using the soldering iron as the ideal tool to engrave wood is one that you won’t regret. If you have some doubts, here is an outline on the benefits of using the soldering iron when engraving wood:
- You don’t need to much heat during the entire engraving process.
- Using the soldering iron is safer, especially if you’re engraving wood while indoors, compared to other tools such as the pyrography pen.
- The soldering iron generates steady and low temperature, thereby ensuring your work’s quality isn’t destroyed due to excessive heat.
- Using a soldering iron is ideal when covering a vast area of wood that has one design, color, or line because the rounded tip gets to burn over the wooden surface uniformly.
Disadvantages of Using A Soldering Iron
Like any other item, using the soldering iron to engrave wood does have some shortcomings. These include:
- It can be relatively difficult to use the soldering iron to engrave wood. The reason for this is that the intended design of the soldering iron is to fuse materials firmly in place and not engraving wood.
- The tips of the soldering rod are blunt and rounded instead of being pointed. Because of this, you’ll not experience any challenge covering a big area, but achieving accurate cuts will be challenging.
- You can’t change the soldering iron tip to create different images, lines, or strokes.
Conclusion
Engraving of wood is a fun activity and one which many people enjoy doing since it’s fascinating. You can use many tools when etching wood, but one of the go-to options is, without a doubt, the soldiering iron.
However, how best to use this tool can be quite a challenge, especially if you still haven’t perfected your engraving skills. As a result, you end not designing something that’s appealing to the eye, which many people struggle to achieve.
Reading through this detailed guide on the steps to engrave wood with a soldering iron has undoubtedly offered you great insights if you also fall into this category. With this knowledge, you can now confidently start to engrave wood using the soldering iron. As you do this, you’ll be free of the constant concerns that you’ll not be able to engrave a neat and unique design on wood.
