
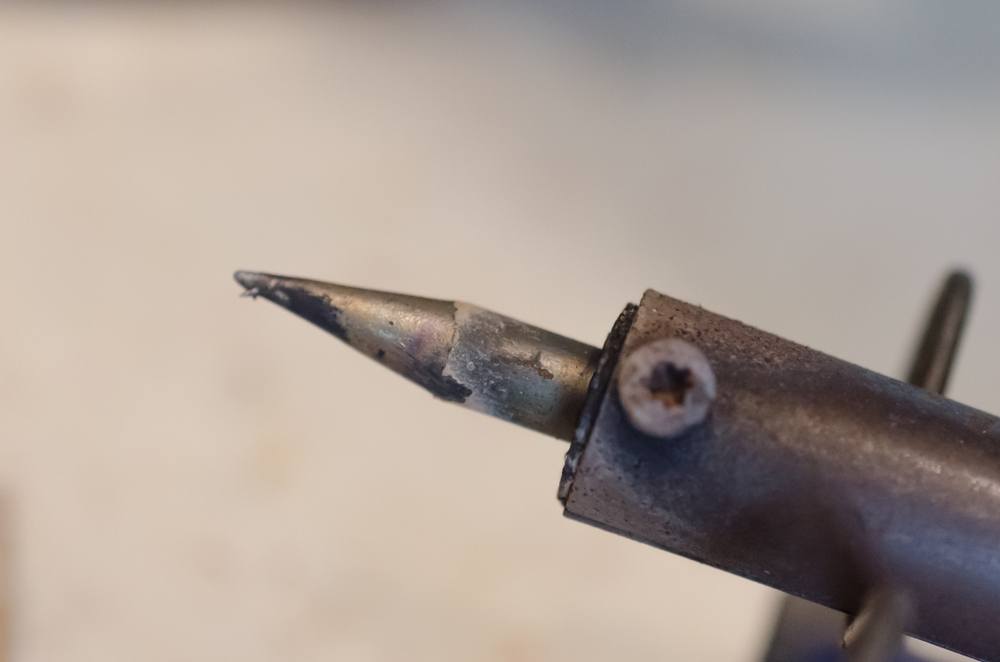
Soldering tips are delicate and prone to cracks, especially if you are applying excessive pressure on the surface. Inexperienced operators are known to press the tip hard on the joint surface when applying solder, causing cracks.
Cracks also develop as a result of dropping the iron on a hard surface. The cracks cause the tips to deform and bend, making the plating layers to exfoliate. Also, the surface of the tip becomes exposed to oxygen, moisture, and tin, which accelerates oxidation and erosion.
Causes of Cracked Tips
Temperature shock
Most lead-free soldering applications need high processing temperatures, which expose the tip to high temperatures. Wiping the hot tip with a wet cleaning sponge creates shock which may cause cracks to develop on the plating layer.
Wear and tear
Soldering tips may wear out prematurely, especially if you don’t know how to use it properly. Experienced operators are also likely to experience wear and tear too. The plating layer wears out, exposing the copper core leading to corrosion.
Corrosion
Soldering tips corrode when exposed to oxygen, excessive heat, flux residues, among other external factors. Operators using flux are likely to cause the tip to erode rapidly.
Effects of de-wetting
It is the most common indication of a worn-out tip or one that needs fixing. De-wetting occurs as a result of:
- Excessive tip cleaning
- Using a wet sponge to clean the tip during lead-free applications
- Wiping off the tip at the wrong time
Steps for Fixing a Cracked Tip
Prepare the Working Surface
Keep away any conductive materials from the working surface. Then, unplug the soldering iron from the power source to begin working on it.
Inspect the Cracked Surface
Inspect the tip and detach it from the iron using a screwdriver. Check if the cracked surface extends beyond the neckline, or it is located on the neckline. If the latter, you need to replace it with a new one.
Rework the Tip
Start by sanding the cracked surface to restore its shape. It also minimizes exposure beyond the surface of the tip. Then, tilt the tip and align it to the pointed part to restore its shape. Use set screws to re-assemble the iron. Fit the tip back to the heater assembly once you have achieved the desired shape.
Recondition the Tip
Plug it into the power outlet and wait for it to heat up. Once heated, dip the tip into the Plato Tip Tin TT-95. Roll it to treat the exposed copper surface and ensure the entire surface is reconditioned. It also ensures that the inner copper core remains isolated when soldering lead is applied during soldering projects.
Tips to Prevent Cracking
Choose the right tip for the job
Fine tips are ideal for soldering delicate surfaces and not heavy-duty soldering jobs. Broad tips are suitable for any given job. Experts advise using chisel-shaped tips and not conical-shaped tips. Also, when soldering lead on Gull Wing or J Led components use the GW tips along with liquid flux.
Use the right soldering tip iron support
Use the appropriate support for the iron and inspect it to ensure it does not have worn out or damaged funnel. If you fail to do this, the iron may bang against the funnel spring.
Ensure the Tip is Tinned
Tinning not only reduces oxidation, but it also increased the surface area over which heat is transferred. It also eliminates the need to press the tip hard on the surface.
Additional Tips
- Avoid using extremely high temperatures when soldering, i.e., 427 degrees Celsius or 800 degrees Fahrenheit. Higher temperatures increase the probability of the formation of iron oxides
- Apply rosin core solder to the working end regularly
- When wiping use sulfur-free sponges
- Use an adequate amount of solder: too much solder wears out the tinned tip surface and increases the exposure of the inner copper. It also shortens its life
- Avoid applying too much abrasive (solder wicks or dry sponges) to remove solder from the iron tip
- Look for tinning products that also function as cleaners when reconditioning the tip. It prolongs the life of the tip and keeps it well-maintained after each use
- Turn of the iron if it remains inactive for 3-5 minutes. It reduces the risk of oxidizing the iron
