
A multimeter is often used, especially if you have an urge to commence on the building of an electronic building or the repair of electrical devices as well as troubleshooting problems in your car or house. Therefore, if you own a multimeter, you can then count yourself since you will be able to know whether the voltage is at the right level, test if the circuit is working correctly or if it has been electrocuted.
Additionally, it also allows you to take the current measurement in amp while it is flowing through the circuit. So how do you read amps on a multimeter? Well, if you have been asking yourself this, you are in luck as in this article, you will be taken through the steps to follow when doing this. Furthermore, you will also learn of the precautions to observe as well as how best to make use of the multimeter.
Be safe when testing amperage
During storms, some older structures & places are usually prone to electrical issues; hence you can easily be electrocuted when trying to troubleshoot. This can cause severe injury or even death; thus, it is always good to examine the level of electricity that flows through the whole circuit. If the level of amperage is low, this can be too harmful to you since it can cause you to be electrocuted.
Typically, amperage readings that are as low as fifty milliamps can cause a heart condition known as arrhythmias, which can last for a very long term. Therefore, it is always advisable to familiarize yourself with the cautions displayed on your multimeter screen, manual script, books, or take the time and make the extra step and research on the internet for appropriate guidance.
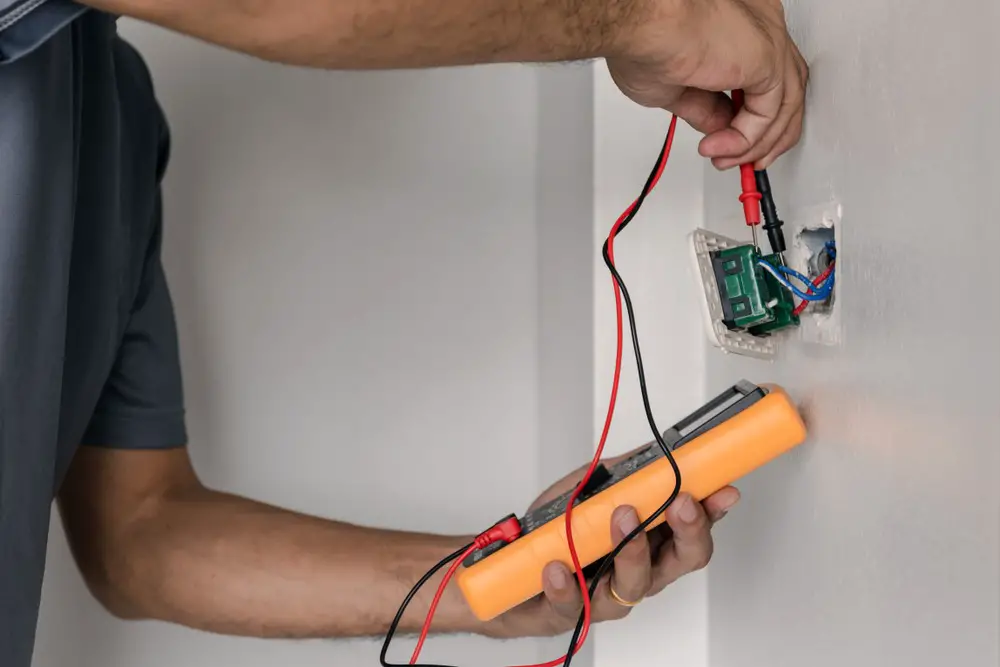
Familiarize yourself with the multimeter
Most multimeters, especially digital ones, have a similar appearance but are made in different models. When it comes to similarity, it has either a single blackjack that is negative or a common lead (COM) lead and three red jacks that perform different responsibilities.
One of these is meant to measure resistance and voltage, the other to measure amps and finally another one to measure microamps and milliamps. Integrated into a multimeter is a dial that carries out different functions such as testing resistance, AC, and DC voltage, as well as continuity. Moreover, the multimeter features numerous settings on the dial, specifically for the measurement of amps.
Set the multimeter’s range
The range refers to the amperage level you expect to be testing to obtain the correct value, and you should ideally start from the maximum settings. To do this, you will need to place the red probe of your multimeter in a 10A jack. Nevertheless, if your dial has only one amperage setting, you are required to set it there.
Most modern multimeters enable you to start your test as soon as possible without having to input any personalized settings. Place your black test lead on the blackjack with the label showing common (COM). However, if you have a multimeter that is not set automatically and instead has both low and high amperage settings, you then need to go ahead and put the dial of your multimeter at 10A setting.
Record the current measurement displayed by the multimeter
For you to examine current in your circuit, you have to use the multimeter. To be able to that, you must make sure that you cut off power from the circuit. Thus, find a convenient place to break the circuit either by disconnecting your wire or removing the energy connector.
Consequently, place the red lead on your multimeter to the circuit’s uppermost part and then restore the energy to the circuit, and your multimeter should show some figures. If it starts with 1 to 10, you should then know you measure amps, but if the begins with a number that is followed by a decimal, you then are measuring milliamps.
Moreover, if the number being displayed is under 0.400, then this means you can obtain an accurate reading value by simply changing the red lead to your mA jack and changing your multimeter settings to milliamps range. You should also know that a multimeter gives a reading value close to 3 decimal places.
Measure amperage with optional accessories
You should not hold in place both the red as well as the black lead when switching your power off or on as this might be quite tricky to handle. You should instead make use of change clips, which are designed to touch the leads hence safeguarding you from any harm.
Furthermore, the leads you have might also come with an in-built change clip and a clamp for testing amperage, which is usually a necessity. It is always built in a small multimeter, and by measuring a single terminal, you will be able to get the amperage.
This is, without a doubt, one of the best and safest ways of examining whether breaking your circuit is necessary. It would be best if you also took note that some clamps are meant only for DC and AC, while others are designed for both. Additionally, some clamps have a potential of returning voltage to your multimeter and have it plugged into its voltage jacks as well as common (COM). Contrary, others return the amperage and have it plugged in mA jacks and common (COM).
So, to examine the clamp’s open jaw, and make sure that you set your multimeter to basic Amp settings and then go ahead and read the reading being displayed on the multimeter screen. You must note clamps function properly when isolated away from other wires contained in the circuit far away with some good inches.
Conclusion
Having read through this article, you now know how to measure the amperage using a multimeter by simply reading the values being displayed on the multimeter screen. Therefore, thanks to this device, you will be able to tell whether or not the device being tested is working correctly or whether replacement or repair is necessary. Subsequently, you will save yourself the hassle of having to get an expert to do this on your behalf, not only saving time but also money.
