
If you are a car enthusiast who has a passion for music, having customized audio equipment is something that you have without a doubt considered. Moreover, regardless of whether you are installing better speakers or upgrading the entire sound system altogether, you will thus need to take a look at the wiring of your vehicle.
This is vital because the quality of the final audio usually depends on how properly the installation has been done. Typically, speakers continue to work after you mix up both the negative and positive wires, but the sound quality may not be up to the standards you want.
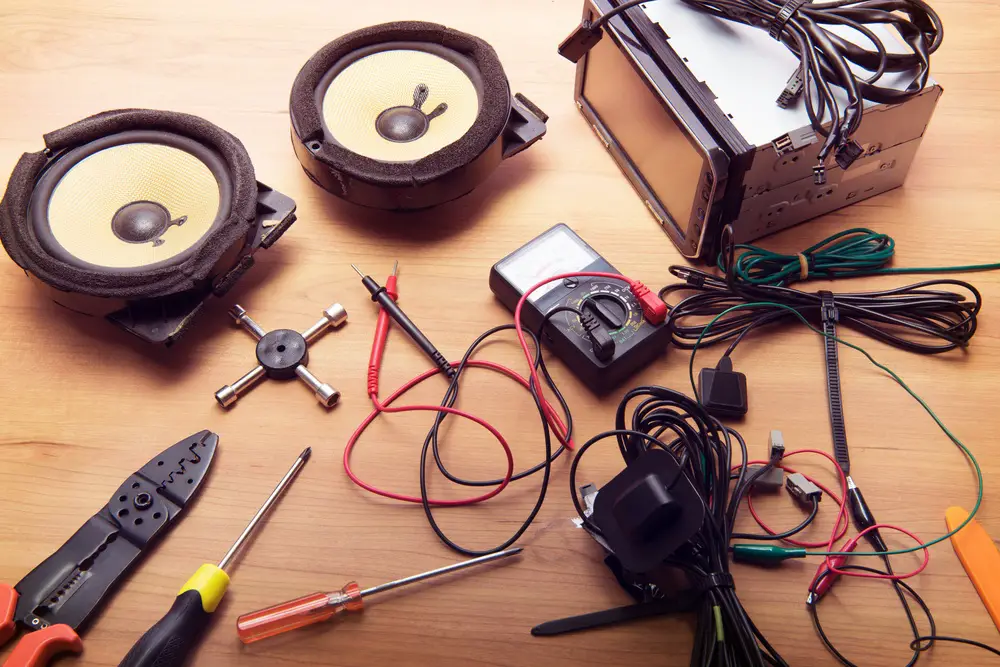
Therefore, you should always test the wires, and in this article, you will be taken through how you can test both the positive and negative speaker wires with a multimeter. Moreover, you also need other tools to conduct this test, and this includes a piece of tape as well as a simple 9V battery.
Understand the audio system setup
Before you even start to test the negative and positive speaker wires, you need to first familiarize yourself with the audio system setup, with the simplest system usually running its power to the amplifier. Most standard amplifiers are connected to the radio head unit, but some of the fancier audio systems have them located anywhere in your vehicle.
Additionally, amplifiers run RCA/phono cable to the radio’s head unit, incoming power cable, speaker wires to every speaker, as well as a ground cable that is far from the system. Usually, the more detailed the audio system in your vehicle, the greater the number of wires, but the system’s core principles remain the same.
After carefully inspecting the speaker wires, you will realize double wires in the speaker wires, with these the positive and negative wires. To make sure the speakers work correctly, you need to make sure that the negative and positive wire is connected to an appropriate position.
Use your multimeter to measure the DC voltage
To measure your vehicle’s voltage, you should always make use of the DC voltage setting that has been integrated into your multimeter. Because your car draws its power from batteries, which is always measured in DC, this is an important setting that you need to make sure is integrated into the multimeter.
Fortunately, measuring DC voltage is among the primary functions of the multimeter, so you can be almost certain that your digital multimeter had this necessary setting. Recognizing this is simple and straightforward, as all you need to do is to look for a double-lined symbol, which has a bottom line that is broken up and a solid top line, subsequently giving it a look of three dots.
To get a measurement of the DC voltage, you should have the standard test leads plugged to the multimeter, and you can measure the battery voltage of your vehicle to test the settings. Consequently, hold the place the leads to the battery terminal and check whether you get a reading that is approximately 12V.
Steps for testing speaker wires using a multimeter
Because you now have a basic understanding of the setup of the car’s audio system as well as how to make use of the multimeter when testing DC voltage, you can now start a test for both the negative and positive speaker wires. Therefore, here are the steps you need to follow to ensure your tests are successful.
Step 1 – Unplug everything
This step is crucial is it entails putting in place the necessary measure to safeguard your wellbeing as well as for practicality. You should start by preparing your workstation by making sure the wires have been disconnected from the outlet. Additionally, you can take a picture of everything before you start unplugging things to ensure you have an easier time connecting everything back in place.
Step 2 – Connect the wires to the battery
After you have everything unplugged, take out your 9V battery. Subsequently, detach the speaker wires for one of the speakers from the speaker as well as from the receiver. Wrap every wire around one battery end at the end of the receiver.
Step 3 – Place your digital multimeter on the DC voltage setting
Rotate the big knob at the multimeter’s center, with this the selector switch until it reaches the symbol marked with a capital “V” and a straight line on top of it. This is your digital multimeter’s DC voltage setting. However, you must never make use of a digital multimeter to test for polarity because of the slight confusion when connecting the leads can lead to it getting destroyed.
Step 4 – Connect multimeter after attaching one lead to each wire
At this point, it is not vital the lead that is connected to the wire. Therefore, you can, without any worries, attach the small alligator clip on the black lead across the end of one wire and the other red lead on the other extreme end. After that, confirm that you have plugged in the black lead on the multimeter’s front with a label “COM” and the red lead to the port having the symbol “V.”
Step 5 – Check for a negative or positive number
You can now go ahead and check the value being displayed on your digital multimeter after the wires have been clipped by the leads. This reading is your wire’s voltage, and it is usually either negative or positive. However, in case you cannot see any reading, inspect whether the alligator clips have been fastened to the wires tightly. If there still is no reading being shown on the screen, you need to replace your multimeter’s batteries or new leads if this problem persists.
If you see positive values on the screen of your multimeter, the leads have been connected properly, meaning the wire clipped by the black lead is negative, whereas the wire fastened to the red lead is positive. Furthermore, any negative reading means the leads are switched; that is, the black lead is hooked to the positive wire. To correct this, you need to switch the wires, and you will get a positive reading.
Step 6 – Return everything back in its original place
It is at this point that the tape becomes useful, and you should connect the positive wire to the speaker after marking it with the piece of tape. After that, connect back the black wire too, and once you confirm that everything is in place, you can switch on your vehicle’s audio system.
Conclusion
If you were looking to learn what steps you need to follow to test the positive and negative speaker wires using a multimeter, reading through this article has provided with all the valuable insight. Therefore, whenever you feel that the sound quality of your audio system is not crystal clear, you need to follow these steps mentioned above and you will be able to diagnose the problem.
