
One of the easiest ways of measuring resistance is by using a multimeter. A multimeter is not only used to measure the resistance accuracy and whether it functions appropriately but also measuring other measurements such as amperage and voltage. Therefore, you can use a multimeter to find the resistance of an indefinite component. Likewise, you can also choose to use it to examine electrocuted or open circuit, with this vital as it allows you to measure resistance which is very crucial.
The use of digital multimeters is a lot easier to use as well as to read in comparison to the analogue multimeter. This is because it has a screen that displays the reading value of resistance, which is usually a figure close to 2 decimal places on your measurement scale. However, it would help if you took note that digital multimeters vary from one model to another though not so much, so you should always make you make good use of your manufacturer manual script.
Furthermore, you are encouraged to exercise safety measures to safeguard your wellbeing and some of the tips you need to observe include:
- The circuit being examined should not be powered on as this could lead your multimeter to get damaged and also interfere with the reading value.
- Only test for resistance when the component you are running a test on is unplugged from the circuit.
- Keep your fingers out of the measuring sight as this could probably alter the reading value displayed on your multimeter resulting in an inaccurate measurement.
Reading the digital display
Look for a symbol ‘’M’’ or ‘’K’’ located next to the omega to come up with the scale of your reading value. Usually, the label on your digital meter shows the ohm level. If the reading value displayed on your multimeter ranges either in mega-ohm that is 1,000,000 ohm or in kilo-ohm that is 1,000 ohms, then you are likely to have an addition symbol of K or M particularly in front of your omega sign.
Read the resistance value
It is appropriate that you acquire basic knowledge and skills on how to handle the multimeter, especially when it comes to knowing the scale of your ohmmeter. Therefore, having a good understanding of the resistance reading value is a necessary thing in the readout procedure of the multimeter. On the digital multimeter, the numbers are usually displayed in front or at the centre of the multimeter screen, with this number typically close to 2 decimal places.
Resistance is a measurement that is based on minimizing the amount of energy passing through a material. In case the reading value displayed is high, then consider having a maximum resistance value, hence meaning you need to add more power to regulate the element in your entire circuit.
Check OL or 1 to show that your resistance range is too minimal
Some digital multimeter do not come set automatically, so it is upon you to set it the range. Thus, you should start by setting the maximum range as you head towards the lower ranges until your multimeter displays a reading. Apply this even if you are sure of the range of the element you are examining.
Switch on your multimeter
This depends on the kind of multimeter you are probably using. However, switching on the multimeter is usually easy since you press the switch that indicates turn on. For more detailed information on how to set the resistance, you should check out the user manual.
Select the resistance function
An ohmmeter is typically found the multimeter suite. However, there is a variation when it comes to choosing the resistance function since the multimeter also differs in terms of the model. Thus, you need to check for a rotating dial to alter your settings, and in case you experience any difficulty, you can always refer to your user manual.
Ensure you remove the components you want to examine from the circuit
When looking to carry out tests to measure resistance, you need to examine whether your component is faulty, and this will always lead to you removing it from the circuit. After that, examine your component by holding both leads to 2 poles of your component, and this will give you an appropriate reading.
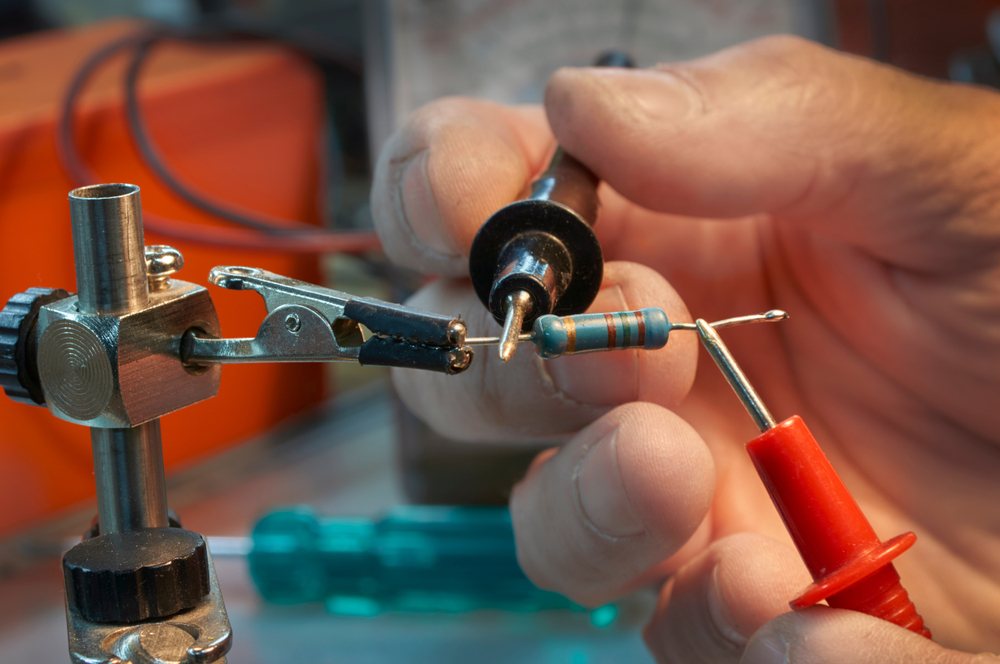
Examine the resistance of your electrical device using the leads.
Once you are ready to examine the resistance reading value of your component, hold the test leads of your device, you are examining. The leads are two thin silver wires coming out of your component. How you hold does not really matter as you will still find out the results. In case you find it tricky check your manufacturer script as mentioned earlier above
You can also choose to work with an auto-range setting if you want. Most digital multimeters have been set automatically, so there is no need for you to panic because everything is usually set. This has been simplified for the purpose of serving your time. However, it is typically inbuilt, or you can also choose to have it from your millimeter’s menu. You can decide to commence with the maximum range of your digital multimeter maybe you might get an accurate reading.
Therefore, hold your multimeter’s probes against the circuit’s side as you observe and take the readings. Your reading is likely to stay at zero on a maximum range. However, if your range is too minimal, it is likely to make the needle to move suddenly hence causing damage. So, for you to get an appropriate reading value, it is good that you use your range adjustment knob on your digital multimeter always, lower the range until you get the correct reading value.
Conclusion
The above information will guide you on how to read ohms on your digital multimeter. Whereas sometimes this seems to be somewhat challenging, with the necessary skills and knowledge, all this is usually very simple and straightforward. However, if you are experiencing any troubles, you can always hire a professional to help you out or refer to the user manual. Consequently, you will be able to diagnose what the possible issue might be.
