
If you are getting crumbled chips when drilling bits then it’s time you sharpened them. Sharp drill bits drill holes, creating long, spiral chips within a short time. As such, if you are taking an unusually long time to drill the holes, then it’s time you sharpened the bits. There are special tools for sharpening drill bits.
Professional woodworkers will use commercial drill bits, which is pretty effective at restoring the original sharpness of the device. However, if your workshop is not equipped with this machine, you can use a bench grinder as it works just as well.
Here’s a guide on how to sharpen a drill bit using a bench grinder:
Related: Best Quality Bench Grinders
Tools Required
- A bench grinder
- The blunt drill bits
- Leather gloves
- Vise
- A tray of water
- Safety goggles
Procedure
Prepare the Workspace
Clear the working space leaving the essentials you need for the task at hand. Be sure to wear safety goggles to protect the eyes and gloves to protect your hands.
Hold the Drill Bit Firmly
Also, use a vise or sharpening jig to hold the drill bit in place. The tools also come in handy when operating the grinder as they ensure the bit remains at a right angle during the process.
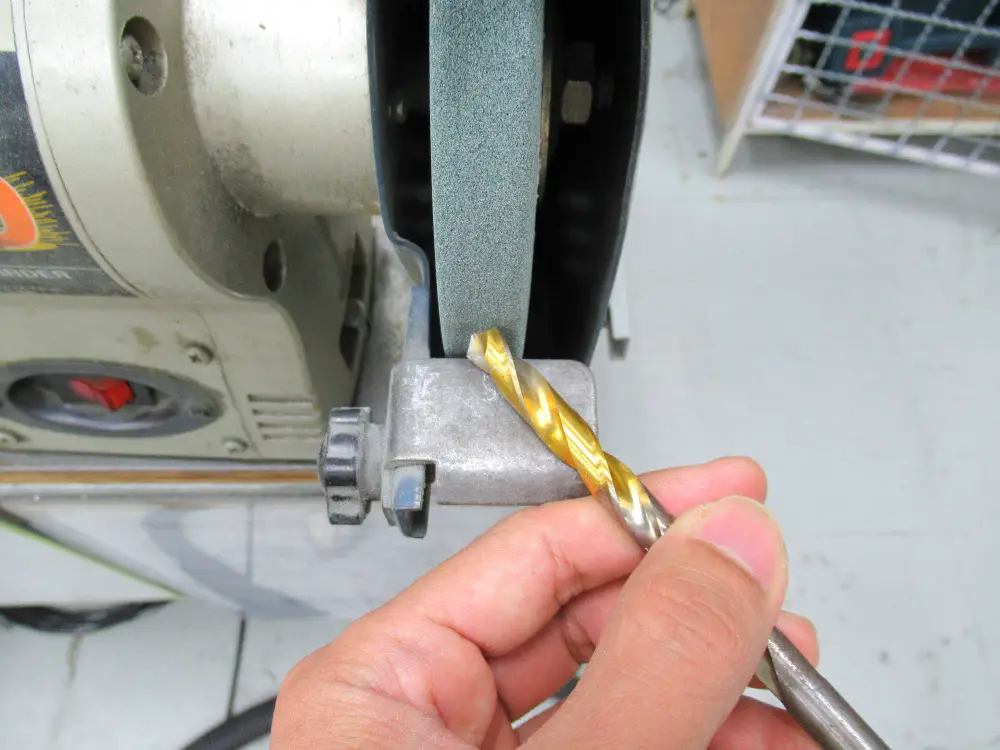
Experts recommend holding the cutting edge parallel to the front of the grinding wheel as you move to the bit until it comes into contact with the wheel. Also, avoid rotating it; hold it straight and maintain an angle of 60 degrees. You also need to inspect the bits to determine the extent of roughness.
If the bits are severely damaged, begin with the coarse wheel and finish off with the finer wheel. However, if the bits are not too dull, you can start with the finer grinding wheel.
Sharpening the Drill Bits
You should hold the bit in the 60-degree angle for 4-5 seconds. Remember, your primary objective is to grind the weak surface of the bit away, not to cause additional wear. Thus, you should focus on sharpening the bit where the tip comes into contact with the shaft to get the perfect angle. If the angle is too sharp, then the bit is likely to be extremely sharp.
Cool the Bits in a Tray of Water
When sharpening the drill bits, the metal is removed, causing the steel to start heating up. As such, it is important to cool the bit frequently (after every 4-5 seconds), especially if it gets too hot to hold with your bare hands. Once the bit is cool enough to touch, check if it is sharp or whether it needs to be sharpened further.
If you are satisfied with the sharpness, turn the bit 180 degrees and repeat the procedure. Set it at the same angle (60 degrees), pointing the same width on each side of the bit. This helps sharpen the tool straight and rid of any holes.
Also, to ensure uniform sharpness, you can sharpen the bit on both sides of the bit by flipping it at 180 degrees after each grinding session for a few seconds.
Test the Bit
Once you achieve the desired sharpness, test the drill bit. Hold it straight on a piece of scrap wood and twist it using your hands. If the bit is sharp, it should create a hole even when light pressure is applied.
If not, check the tip and re-sharpen the bit on the grinder setting it at the 60-degree slope on both sides. Repeat the procedure until you have obtained the desired sharpness.
If the bit is sharp enough, insert it into the drill to start drilling. It should hit the wood within a few seconds and with minimum pressure. Also, once you remove the bit from scrap wood, the bit should fling wood chips.
Recommended: Bench Grinders for Sharpening tools
Maintenance Tips
- Pull out the bit after every inch you drill and blow off any chips of wood. Otherwise, the chips remain packed into the flutes of the bit making it extremely hot and dull
- Always have two sets of drill bits. Use one set to drill the hole and the other to finish the task once the hole is formed
- When drilling on hardwood, use the stop and cooling technique. Dip the drill in cold water after every few inches of drilling