
One of the most typically used components in electronic circuits is the capacitor. It is the first thing you look for once your fan, washing machine, or any other household appliances stop working.
As a DIY enthusiast, It is important to know how to properly test a capacitor if you need to troubleshoot certain circuits. In this article, we will tackle how to test a capacitor using a multimeter – both digital and analog.
Capacitor: Functions and Types
An essential electrical component, the capacitor is utilized in filter circuits as well as stores an electric charge. It was originally called condenser. Televisions and washing machines are just some of the appliances that use a vast amount of capacitors. They tend to wear out over time, and this is where applying your knowledge about checking the capacitor is highly beneficial. You can simply replace the damaged capacitor instead of buying a brand new machine.
Picked for You: Top 5 Multimeters for Tech Work
The value of capacitors in a circuit have identified the way where they are connected. The higher the value of the capacitors is connected in a series, the lower the value of the capacitors are connected in parallel. Capacitors that are combined with inductors and resistors within a circuit are generally used in high-energy environments and consumer products (e.g. automobiles and fans) as well as in electrical event timing.
The capacitor has extensive functions:
- Electronic circuits – blocks the direct current while enables the alternating current to flow
- Analog filter networks – smooth the power supplies output
- Electric power transmission systems – stabilize the flow of power and voltage
- Resonant circuits – tune radios to specific frequencies
There are two types of capacitors – polarized and non-polarized.
1. Polarized Capacitors
These type of capacitor have unique negative and positive poles. Most forms feature pico-Farad and micro-Farad. They are also designed in two different formats – axial and radial. Examples of polarized capacitors include:
Ceramic (Disc) Capacitor: Made of over two shifting layers of metal and ceramic. The former acts as the electrodes while the ceramic acts as the dielectric.
Electrolytic Capacitor: Usually used when there’s a need for massive capacitance. Some are made of metal, while others could be either wet solid or nonsolid.
2. Non-Polarized Capacitors
Non-polarized is categorized into two types, namely the electrolytic non-capacitor (requires AC applications either in line with the power supply or signal or in the series) and film/plastic film capacitor (extremely reliable, have fewer tolerances, and long lifespan). The variable capacitor is another type of non-polarized. It can identify the capacitance through its fixed and moving plates. It is commonly used in radios, transistor, transmitters, and receivers, etc.
Capacitor Testing with an Analog Multimeter
You can also make use of analog multimeters for testing the voltage, resistance, and current. Though, you’d need to depend on the Ohms functions to perform this task.
- Detach the capacitor from the board. Then, disconnect.
- Put your multimeter in the position of ohm meter (only if it has several Ohms ranges). However, it is suggested to select a high range.
- Connect the probes to the capacitors’ leads.
- Observe the readings. The result is displayed through the multimeter’s needle. It determines whether the capacitor is good or not.
Good capacitor – if the needle displays a low value of resistance thenprogressively moves to the right.
Also Read: 5 Great Multimeter Recommendations
Open capacitor or dead – if the needle displays a high value and does not move or no resistance and does not move.
The capacitor needs replacement – if the needle displays a low value of resistance and does not move.
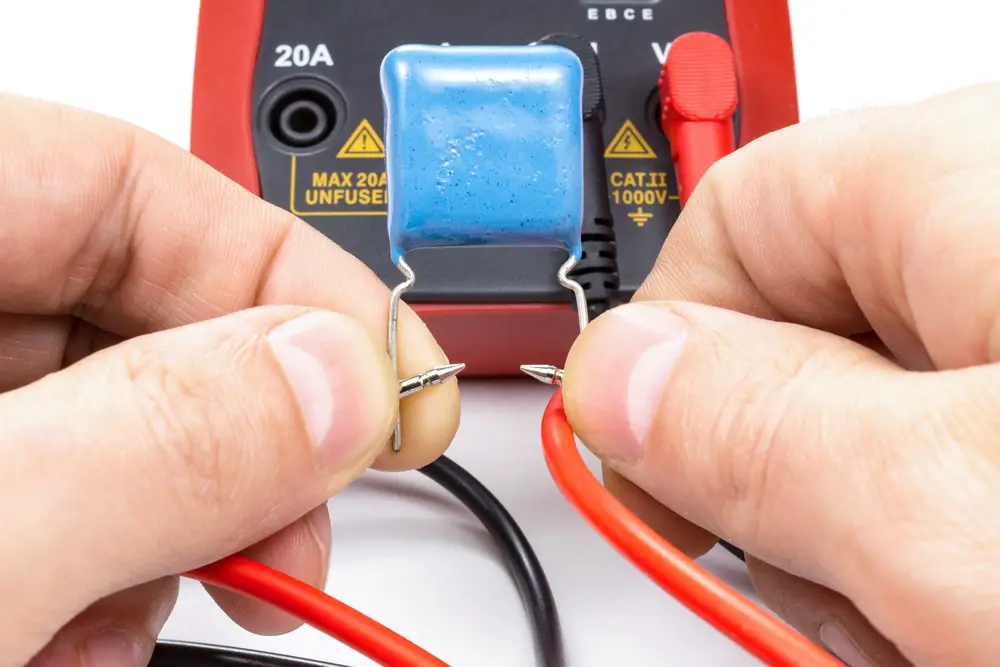
Capacitor Testing with a Digital Multimeter
Here, we have two ways to test a capacitor using a DMM.
(A) Testing a Capacitor with Capacitance Setting
- Detach anddischarge the capacitor from the circuit board.
- Take note of the voltage and capacitor rating shown on the capacitor’s exterior.
- Set the knob to capacitance settings.
- Connect the probes of your multimeter to the capacitor’s terminal. Connect the black probe to the negative terminal and the red probe to the positive terminal.
- Check the readings. The capacitor is considered good
if the reading is close to the value displayed on the capacitor. On the
other hand, the capacitor is dead if the value is below the capacitor’s
value.
(B) Testing a Capacitor without Capacitance Setting
- Similar to the digital multimeter with capacitance settings, you also need to disconnect and capacitor from its circuit and discharge it entirely.
- Set the knob to either resistance or ohms settings. Again, choose the higher range.
- In the case of electrolytic capacitors, connect the black probes to negative and the red probes to positive. However, put them either way if it is non-electrolytic.
- A resistance reading would be printed, so take note of it.
- Detach the probes from the capacitors. Repeat the process numerous times.
- The capacitor tells that it is working efficiently if all of the tests you have carried out show different results.
Safe Discharging of Capacitors: Why this Matters
Never forget or overlook the significance of disconnecting the capacitors from circuits. Your safety is of utmost importance. This also avoids potential damage to your test equipment as well as to the device which you are testing. Always make sure that those high or vast voltage capacitors are completely disconnected before soldering, taking measurement, or even touching circuitry.
Check Them Out: Need an Automotive Multimeter?
Now that you’ve safely discharged the capacitor don’t get overconfident yet. Some capacitors can leak, hence, being dead with a bleeding resistor. This underrated resistor might cause bleeder to go open circuit all through a detach series, which leaves some amount of energy.
Be particularly leery for a damaged lead capacitor that sits in a drawer. In some cases, these units tend to break off during testing and do not get thrown out, yet keeps charge to shock or kill years after. Whether you are testing the capacitor of your microwave oven, television, video monitor, or other appliance, ensure that the capacitor is discharged before starting the job.
Prepare to make your first capacitor testing a huge success with this simple guide!
