
A circuit breaker is an essential safety device which if you are like most individuals, most likely overlook its importance. However, it is advisable to always check on it not only when your home’s circuit trips and need to reset the switch so that the power is restored. For you to test whether a circuit breaker is working correctly, you need a multimeter.
Getting Started
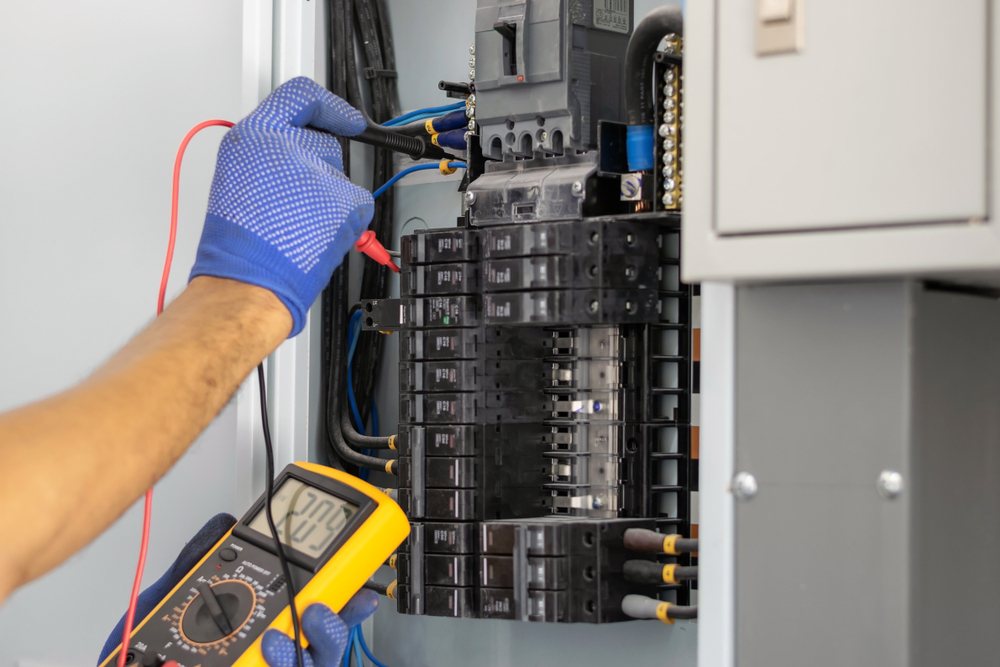
A multimeter is also referred to as a digital voltmeter or a volt-ohmmeter. It is used to determine if the circuit is using direct current (DC) or alternating current (AC) as well as inspect the voltage in the electrical circuit. Therefore, using a multimeter, you can test the circuit breaker and establish whether it is functioning correctly. This is important because if the circuit breaker is not working correctly, there is an increased possibility of an electrical overload which might result in a short or in other cases, fire.
Recommended: Top Multimeters for Auto Diagnostics
So, it is clear that knowing how to use a multimeter to test your home’s circuit breaker is vital and here are the steps you need to follow.
Step 1: Open the circuit box
First, determine the circuit breaker that you are planning to test since every breaker provides power to different parts of your home. Consequently, remove its protective gear by unscrewing numerous screws but the number varies depending on the electric panel’s size. Once you have removed the electrical panel box cover, you should take extreme caution not to touch the inside of the breaker or any of the wires because they will be live.
Step 2: Turn off the circuit breaker
Depending on the positioning of the circuit breakers, this usually entails pulling the ON/OFF switch down or towards the breaker’s center panel.
Step 3: Choose the ideal test positions
To confirm whether the circuit breaker is working or not, you should turn the dial so that it selects the AC volts which are typically abbreviated as ACV on the test meter selection options. If the test meter is not auto-ranging, you should choose a range selection which is higher than the voltage you want to test.
For example, when testing a 115V circuit breaker, use the 200 ACV. Additionally, you need to confirm that the test leads correctly plugged on your multimeter. The black test lead usually plugs into the spot below the multimeter that is marked “common” whereas the red test lead plus into the spot at the bottom of the multimeter marked “v”.
Step 4: Test the breaker
Single pole breakers have two wires coming out from below, and these usually are black and white wires. These wires connect to the circuit breaker mounting terminals that come with a recessed screw which clamps down the inbound wire tightly when you tighten it. Furthermore, there also is the double pole breaker that has three wires, that is the white, black and red all coming into it. The black and red wires on are live wires whereas the white one is a neutral wire.
Test the single pole breaker using your multimeter
When testing the circuit breaker while it is off, you need to place one multimeter test lead onto the electric panel box. This thus grounds the lug terminal that usually has numerous bare copper wires entering it or the neutral bus with many white wires going into it. Also, place the other terminal multimeter test lead onto the terminal screw for the inbound black wire. Subsequently, check the reading on your meter and the ACV should be zero since the circuit breaker is turned off. If it reads more than 2 volts, then your breaker is defective.
You should then switch on your circuit breaker, and if the ACV reading ranges between 110V to 125V, it is working appropriately. Nevertheless, if it read less than this voltage or nothing at all even when the breaker is turned on, then you need to replace your circuit breaker.
Test the double pole breaker using your multimeter
There is a slight difference when testing single pole breakers and double pole breakers. The reason for this is that two 115/120V legs of electricity are needed to total the 230V/240V supply that this circuit breaker supplies.
Therefore, you need to take the reading from the mounting terminals screws where the red and black wires join the circuit breaker. If the breaker is switched on and working correctly, the shown reading should be between 220V to 245V, and any other reading is a sign that it is faulty.
Safety precautions you should take when using a multimeter
You should always prioritize your safety when using the multimeter because you are dealing with hot wires; thus chances of electrocuting, shocking or burning yourself are relatively high. Therefore, when measuring across two terminals on the 230V breaker, you should hold both the probes using one hand. Doing this will prevent current traveling from one hand to the other, consequently hitting crucial body organs like the heart and causing them significant damage. However, this incident rarely happens, but when it comes to safety, it is wise you be proactive.
You Might Like: 5 Great Multimeters for Home Repairs
Always examine your multimeter as well as all its components before testing the circuit breaker. In case you detect any physical damage, loose connection or any other issue, you shouldn’t make use of the multimeter. Instead, you should consider buying another one or borrowing one. Furthermore, you can check with the multimeter’s manufacturer whether they have any proposal before using it.
Conclusion
Having read the article, you now know the importance of a multimeter, especially if you are an electrician or love doing DIY projects at home. Additionally, you also have an idea of how you can use it to test whether the circuit breaker is working or not and understand the importance of regularly checking if your breaker is working correctly.
Therefore, if you are testing your home’s circuit breaker, you get to safeguard your safety, and that of your loved ones since you will know if the breaker is defective hence needs replacement. Consequently, you will never be a victim of a fire or an electrical short because after you learn how to test a circuit breaker with a multimeter.
