
One of the vital components of today’s modern car engine management is an ignition coil. The engine cannot operate efficiently without a well-functioning coil. Nearly all the cars manufactured today depend on the coil for the production of the spark used for the engine spark plug.
The main purpose of the coil is to convert the 12 volts into thousands of volts needed to create a spa with enough power capable of jumping across the plug gap of the spark.
A malfunctioning coil can cause a lot of problems in your car engine. A failed coil can cause a decrease in fuel and power mileage. It can also cause the engine to misfire, rendering your car useless. Due to its close positioning on the right side of the engine, the harsh heat conditions and vibration caused by the operations of the engine can cause damage to the coil.
This may weaken the coil leading to the production of the less-sufficient spark that may hinder performance. It is strongly advised to carry out routine tests on your coil, To avoid such problems with your car engine, to avoid such problems with your car engine.
This article will assist you to know how to test a coil with a multimeter, to determine whether your coil is good or needs replacement to maintain the efficiency of your car engine. Below is a step-by-step process on how you can test coil resistance using a digital multimeter and an analog multimeter.
Testing a coil using a digital multimeter
Step 1
Ensure you have turned off your car, and have given the engine enough time to cool before you begin the testing process. You need to wear your safety glasses, then open the car hood. After that, disconnect the negative cable from the battery and place it safely to avoid contact with the battery terminals when carrying out the tests you need.
Step 2
Identify the location of the coil pack. This is a long black unit fixed directly on the cylinder head on the left side of the engine and attached to the spark plugs directly.
Step 3
Remove the coil pack from the vehicle, and use a ratchet to bolt out the pack. The removal of the coil pack is done to help you access the electrical terminals with ease.
It is advisable to refer to your service manual to find out specific instructions given by the manufacturer on how to remove the coil from the car. Generally, after you have disconnected it from the distributor wires, you will need to unscrew from where is mounted using a ratchet or a wrench.
Step 4
Research the resistance specification of the coil under test. The coil specifications are unique to every vehicle, which is in line with the electrical resistance within the coil. You can find these specifications in your vehicle’s service manual. You will know your coil is damaged if the coils’ actual resistance levels fall outside these specifications.
Step 5
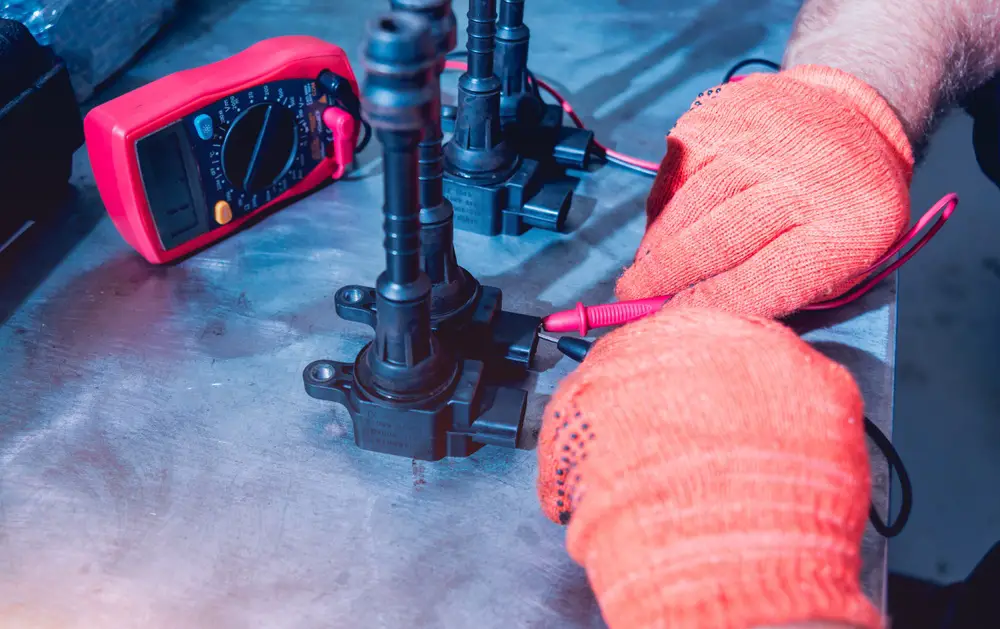
Carry resistance test on the primary coil. You do this by placing the lead of the multimeter on the poles of the primary coil. Usually, the distributor has three electrical contacts. Two are on either side and one in the middle. You need to turn on your multimeter and take one lead and attach it to each of the external electrical contacts.
The reading you find is the resistance of the coil’s primary winding. Specification for every coil, generally, most resistance of primary winding, will read between 0.7 to 1.7 ohms. If the reading you find is not within the given specification, it is always good to consult your car technician.
Step 6
Test the resistance of the secondary coil; you do this by placing the lead of your multimeter on the secondary coil. Attach one lead on one of the outer electrical contact, and the other to the central contact and record the reading.
The reading recorded is the coil’s resistance of the secondary winding. Generally, most resistance levels of the secondary winding will fall between 7,500 and 10,500 ohms.
Testing resistance using an analog multimeter
In the absence of a digital multimeter, you can measure coil resistance using an analog multimeter by following simple steps as outlined below.
Step 1
Remove the coil pack and place it on flat ground. Plug the probe into the multimeter’s pot. Usually, a multimeter has a number of sockets to carry out different tests on the probes. Ensure that you insert the probes on the right sockets to measure resistance.
Step 2
Select the required resistance range that will enable one to have the best reading from the multimeter. Commonly, the function switch of the multimeter is indicated with the maximum resistance reading.
You need to select the one where the expected resistance value will be below, but close to the maximum of the range. If you do this, you are most likely to get accurate resistance measurements.
Step 3
Zero the multimeter, which is done by placing the two probes together to produce a short circuit. Subsequently, adjust your meter to give zero ohms reading. Repeat the process of adjusting to zero is every time the range is adjusted.
Step 4
Take the testing on both the primary and the secondary winding of the coil. Place the probes of the multimeter into the poles of the primary coil. You do this by placing the probes on the outer electrical contact of the coil pack. The reading given by the multimeter is the coil’s primary windings resistance.
For the secondary coil test, place the lead of the meter on the poles of the secondary coil. You need to place the probe on the electrical contact of the meter one on the outer contact and the other on the middle one. Then the meter will give you resistance reading, which is the resistance level of the coil’s secondary windings.
Additional Info…
After you have done the resistance test, whether using analog or digital multimeter, you need to find out whether the reading you record fall within the specifications of your vehicle. You need to go back to the factory service manual of your car and compare the reading you find and what is in the manual.
Due to the importance of the coil in the car’s electrical system, if either the secondary or primary have fallen slightly outside the specification of your vehicle, you need to consider replacing them. This is because the readings show that your coil is either malfunctioning or damaged, and you don’t want to risk the danger that can be caused by a damaged coil.
