
It is one thing to know an ABS sensor and a whole different thing to know how to test it. For most people, having the ABS light on automatically means that you see a professional. However, this does not always have to be the case. You can comfortably test your sensor before looking for an expert to step in.
The entire brakes system, including the ABS, is considered one of the parts of a vehicle that an owner should try as much as possible to understand. By the end of this article, you will be able to diagnose your ABS and test it using a multimeter.
Understanding an ABS Sensor
Before you consider learning how to test an ABS sensor, it is essential first to understand what it is and what role it plays for your vehicle. An ABS in full is an anti-lock brake system. This is a standard system in the current automobiles and is considered an enhanced version of the braking system. It operates as a tachometer that calculates a wheel’s rotational speed and passes to the car’s ECM.
The ABS is located in the wheel hub for the new braking systems. The traditional system has it placed on the outside of the wheel hub in areas such as the steering knuckle. You will find it coupled with the ring gear, which is mounted on a brake rotor or drum.
Every wheel tends to have a different rotational speed. The ABS sensor records all rates for each wheel and sends the readings to the ECM, which determines the locking up status of the wheels. The ABS brake is faster in application compared to the traditional manual brakes. This is why, for some vehicles, when you quickly apply your brakes, you will hear a sudden grinding noise.
Given the importance and vital use of ABS brakes, you must understand how to test it properly.
How to Test an ABS Sensor with a Multimeter
When used over a long period or when the car is exposed to rough roads with a lot of debris, there is a high chance for the ABS sensor to fail.
It is thus essential to always check the sensors to make sure that they are in excellent condition whenever you are taking your car out for a ride. You will find the intervals you can use to test your sensors on the manuals.
The most common way to tell when there is something wrong with your ABS sensor is when the sensor lights up. Your traction control light will also light up if there is an issue with the ABS sensor.
The traction control light is found in the vehicle’s dashboard. When driving on a slippery road, if you lose your traction, this too might be a sign of a poor or worked up wheel speed sensor.
If you notice some of these dysfunctions, make sure you test your sensor and check the connector wires as well to make sure that you repair the dysfunctional right.
What You need During an ABS Sensor Testing
Before you go ahead to check if your sensors are working well, make sure that you are well protected. For personal safety, have your gloves, protective clothes and eye protection on. The gloves will keep the grease off your fingernails while they protect you from cuts and burns as well.
The eye protection will protect your eyes in the event that small particles are either blown up by the wind or pieces of mettle jump up when hammering. The work clothes will keep your daily garments in good condition, especially if you need to leave right after testing your ABS sensor.
You will need a couple of tools as well, which include the multimeter, a floor creeper, floor jack, ramps, tire jacks, battery charger, the test light, an engine code reader, brake set tools, mechanic set tools, among others. Not all cases will need all the mentioned tools, but it is more comfortable to have more than enough than being inadequate.
In this case, your multimeter will be the main item when checking out your tools’ list. A multimeter is, in some cases, referred to as a multitester or a VOM.
The multimeter is a multipurpose electronic testing instrument that can be used to determine the current, voltage, or resistance of the equipment. Standard multimeters use pointers to determine the readings where else digital ones will give you your reading directly in numerical form.
Getting the Readings
The three main parts of a multimeter are the display, the selection knob, and the ports. The display will often have four digits and can as well give a negative reading. Using the selection knob, you can set the multimeter to provide you with the reading for a selected unit, that is, either the current, voltage or resistance.
There are two probes which are plugged in the two ports of the multimeter. The COM, usually black, is connected to the circuit’s ground while the MAV resistance probe, maybe red, is connected to the current reading. Switch your multimeter to the voltage reading.
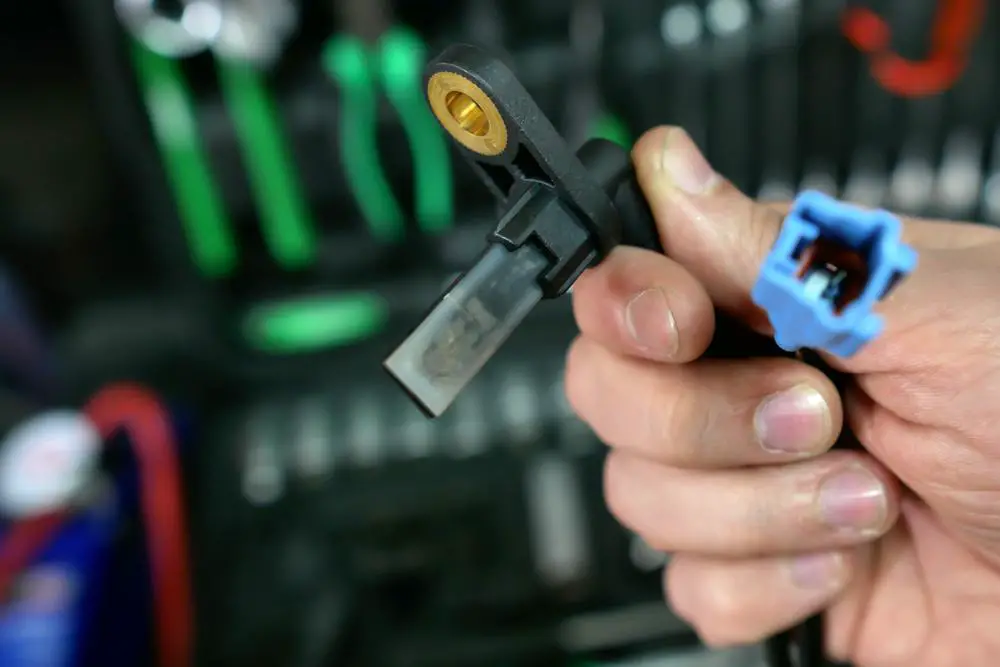
Identify the wheel speed sensor’s electrical connector along the wheel’s frame. Be careful not to use the pad wear sensor, which can easily confuse you. Once you find the connector, disconnect it from the sensor by removing the safety clasp and pulling it out gently. Use the probes of the multimeter to attach it to the connector.
Make sure that each of the two connections is apart from each other to get the right readings. Try as much as possible to remain stable while the probes and the connectors are connected so that your readings are not fluctuating.
Once the multimeter is set to the AC voltage reading, and you have made your connections, now spin the wheel or its hub to get a voltage reading. If you can’t get a reading, then it is likely that your sensor is not working and needs a replacement.
Also, check if there is an open circuit which might affect your readings. If there is one, repairing it should turn off the sensor’s light
Conclusion
If your sensor gets a reading, you should be good to go but be very attentive when driving off to see if further checking needs to be done. If your sensor is not working, make sure it is replaced as soon as possible as it affects the primary function of your car.
