
Checking and replacing blades is a criticalmaintenance procedure that should be carried out periodically. Most handplaners use blades that can be sharpened to restore their luster.However, for some planers, once the blades grow dull, they can only bereplaced.
Table of Contents:
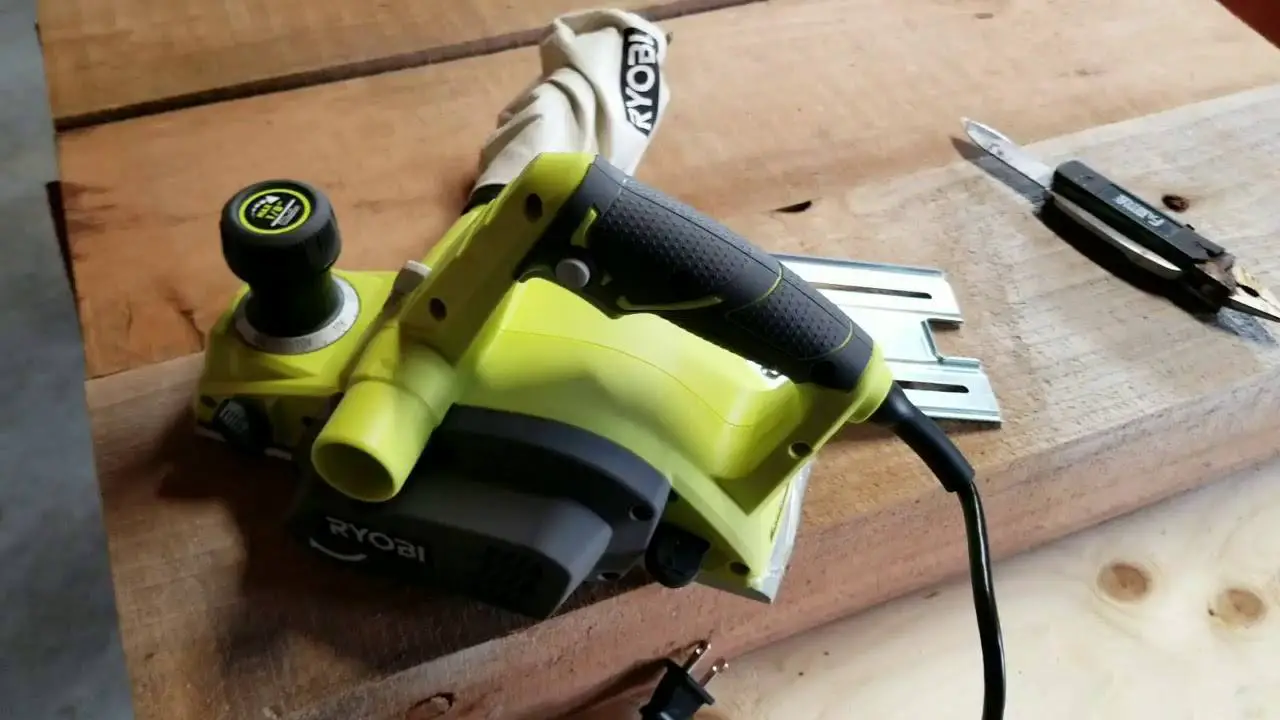
Ryobihand planers use such blades. They are reversible blades and can’t besharpened once they lose their sharpness. You can switch them over touse the sharp side, but once they become chipped or damaged, you canonly replace them. Sharpening such blades causes them to lose precisionand reduce in length.
The short blade may not grip the wood as well when smoothing surfaces or leveling joists.
Given that the blade plays a critical role in all planing jobs, working with a short blade can be strenuous and tedious. Note that the blades come in pairs hence the need to switch them out in pairs too. The procedure for replacing the Ryobi hand planer blades is somewhat different from regular hand planers. Here’s how:
Tools Required
- Ryobi hand planer
- New blades
- Vise
- Screwdriver or wrench
Buy the Right Blade
Besure to buy the right blade for the Ryobi hand planer. Ensure it is therecommended size and is the exact type as that of the manufacturer.This way, you are sure to retain the efficiency of the equipment andmaintain sharpness for an extended period. Blades made from substandardmaterials tend to get blunt fast and have a short life span. You can usethe codes engraved on the blade to identify the right blade from thelocal home depot.
Changing The Blades
Turn off the Planer
Itis a pretty basic rule for hand tools, especially one that uses blades.You need to turn off the device and unplug it from the power source.
Turn the Planer Upside Down
Secureit in an upside-down position and be careful not to damage the housing.If you are using a wooden vise, secure it in the device and tighten theclamp just enough to hold it securely. Avoid placing the tool in ametal vise as it may crack the housing.
Loosen the Screws
Youneed to loosen the three screws securing the blade. Be sure to inspectthe direction of the cut and the orientation of the tapered edges, soyou don’t injure your hands.
Thetapered edge of the new blades should follow the same direction as thedull blades, i.e., with the flat edge facing the cutting block and thetapered edge on the same side as the screw heads.
Remove the Old Blade from the Blade Holder
Thenremove the blades from the blade holder using the tip of thescrewdriver. If it is not easy to push the blade out of the holder evenafter loosening the screws, you can use a block of wood to break itloose. Make a short, sharp blow and pull it out using the screwdriver.You can also make a sharp blow using a small hammer to break it loose.
Insert the New Blade
Cleanany wood chips or sawdust that may have collected around the blade areaand install the new blade. Push it into position using a screwdriveruntil it is secure and retighten the three screws using the wrench. Thesame procedure applies when replacing the other blade.
Test the New Blade
Checkif the blades are fixed correctly and if they are tight enough. Then,reposition it and plug it to the power source. Use test planks todetermine if the planer works as required until you no longer observesnipe. If not, adjust the blade to achieve the desired length.
Maintenance Tips
- Store the hand planer at the right place. Inappropriate storage exposes the device to unnecessary damage
- Scrap off the rust before it builds up. You can use a unique abrasive material or penetrating oil
- Lubricatemoving parts: Ryobi hand planers have moving parts whose motion is aresult of the rotation of motors. Lubricating the moving parts reducesfriction which can cause the shaft to break or overconsumption of energyto overcome the frictional force
- Tighten the screws. Screws holding moving parts should be tightened regularly to avoid wreaking havoc
