
Fuel injectors usually play a vital role in spraying fuel into your car engine’s cylinders. From there, the fuel gets to mix with air, and is then compressed and then set off by a spark to produce the needed power.
If your vehicle’s fuel injector has an issue of any sorts, this can subsequently result in the destruction of your vehicle’s engine. Therefore, you can see that having a well-functioning fuel injector is vital, and there are numerous reasons why it might stop working correctly.
In this article, you will be taken through the steps you should follow to check the fuel injector pulse using a multimeter before you decide to make use of an injector cleaner. Consequently, you will be better placed to know whether or not it still is in proper working conditions. However, need a couple of essential kits to help you during this test including;
- A multimeter incorporated that has ohms settings
- Multimeter kit
- Googles to safeguard your eyes
- Gloves
Steps to follow when testing injector wiring using a multimeter
Step 1 – Make proper preparations
Before you can even start the test to check the injector pulse using a multimeter, you need to make sure you have everything in place. This includes having the right multimeter for the test as well as the necessary multimeter kit that is an ideal match for your car by corresponding to its petrol engine.
Some car engines cone integrated with plastic panels, which you should always remove before you even reach the fuel injectors. These panels are usually tightened using bolts and taken out using a basic socket set that includes an extension. After that, wear both your goggles as well as gloves to safeguard yourself from any possible harm you might be prone to when doing this test.
This includes dirt as well as other debris getting into your eyes and consequently making it difficult for you to see, whereas glass ensures you never touch any of the devices directly. Once everything is in place, switch off your vehicle and take out the keys from the ignition port.
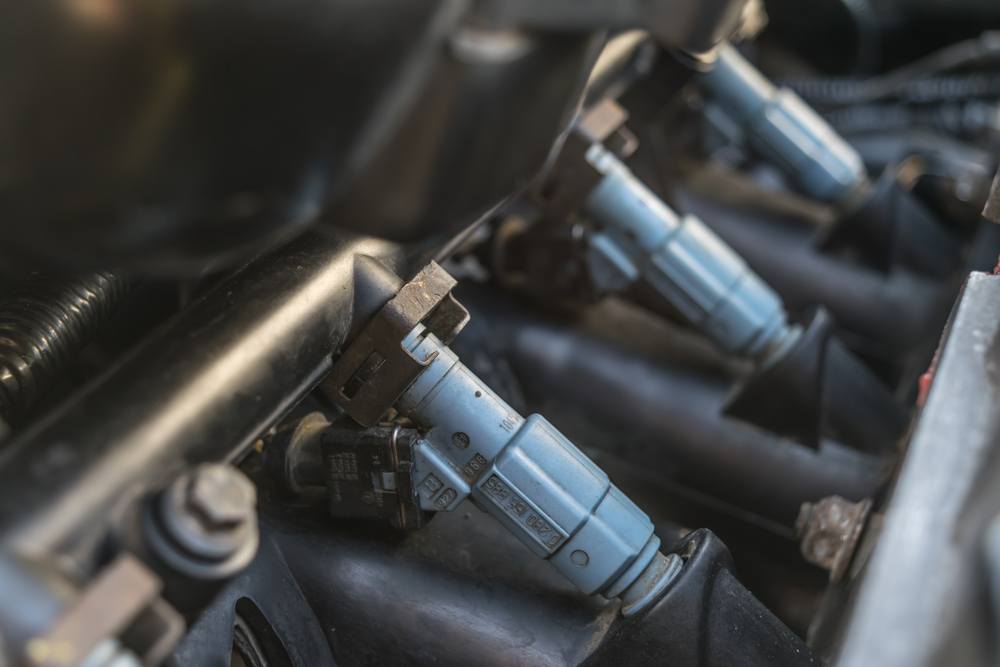
Step 2 – Find the injectors
Once you have everything in place, you can now dive right into testing the injectors. To do this, you need to open your car’s hood and then try and locate the position of the fuel injectors. If you are having a hard time finding them, you can always refer to your vehicle’s manufacturing module to make worse easier.
Typically, you will find fuel injectors on the intake manifold, and they are linked to each other using a fuel rail, with engines having a V style, that is, V6, V8, V10 incorporating two fuel rails. Additionally, half the total number of injectors is placed on either side of the motor.
You now should go ahead and take your multimeter and set it to ohms, as this is the desired measurement during this test. However, if your multimeter does not usually auto arrange, you then should go ahead and set the lowest level. Integrated into your multimeter are two wires, a red test probe wire as well as black earth wire.
Join the harness wires and, after that, have the red test probe wire inserted into the fuel injector solenoid, and then locate the kit’s acupuncture probe. For the black lead, you should connect it to the ground or earth source, with the frame of the car typically linked to a ground source. Subsequently, try and locate for an area below your hood that is unpainted where you should then connect the black lead.
You then should place over the wiring harness terminal the positive lead, and typically, the wiring harness has two terminals. It is at these terminals that you get to insert injector’s pongs. Afterward, choose the MSs Pulse on the multimeter. Consequently, press the trigger selection button and then move forward to press the multimeter’s negative meter. The readings displayed on your multimeter will initially be oL, but this will later stabilize as time passes, and you will get the real pulse reading.
Once you follow these steps, you will be able to find out what the issue is exactly, but you should have in mind it is not a must for the malfunction to be caused by an electrical problem. Therefore, you should take the subsequent steps if the resistance of the injector is normal to take out the injector and check the spray pattern, which is being produced on the injector tester.
Steps to follow when testing injector resistance using a multimeter
- Make sure you have the keys out of the ignition port since power is not needed for this test.
- Tale out the injector wiring harness. However, to do this, you might need to move a slide lock to be able to press down on the tabs that will allow you to take out the wiring harness.
- Set to DVOM measure ohms: Have your multimeter to the right settings that will allow the measuring ohms. Moreover, set it at its lowest range if the multimeter auto range is not incorporated in the multimeter.
- Test for resistance with DVOM: Put the leads of the multimeter on the prongs positioned on in the connector, while remaining cautious they do not come into contact with each other. Nowadays, most vehicles have high impedance injectors, and these typically range from 12 to 17 ohms. Moreover, the low impedance injectors located on the bigger and high-performance injectors, and usually produce much lower resistance of about two to five ohms.
- Repeat the same with every injector: Test all the injectors and see whether the resistance is within half an ohm from each other.
Conclusion
After reading through this article, you now have an idea of how to check the injector pulse with a multimeter. Therefore, regardless of whether you are planning to test injector resistance or injector wiring, you can now go ahead and do the test as expected and be able to make the correct diagnosis.
Consequently, you will be able to have an injector that is always functioning correctly, and this translates to your car running at its best every time you are on the road.
