
Fuses are vital safety gadgets which safeguard your car’s electric circuit from the excess flow of current or overload. Therefore, with a fuse in place, you do not need to worry about either an overloaded wire or the possibility of a fire breaking out.
Typically, each circuit comes integrated with its fuse and many bigger fuses that have high Amp rating project high-current or multiple circuits including radiator fan or electrical power steering circuits. Most modern vehicles feature a minimum of two fuses, with one located underneath the hood whereas the other is found within the car.
If you suspect that your vehicle’s fuse is blown, you need to make use of multimeter which measures fuse’s resistance. What are the steps to follow when testing your vehicle’s fuse? Well, read through this article where you be taken through the steps and everything else you need to do when testing car fuses with a multimeter.
Steps to follow when testing car fuses with a multimeter
Step 1: Turn off the engine
Before you even start using your multimeter to test whether or not the fuses of your car are functional, you need to confirm that the vehicle is turned off as well as the keys are out of the ignition port. Doing this is vital as it not only safeguards you from possible electrocution but also protects your car from further damage.
Step 2: Find the bad fuse with a multimeter
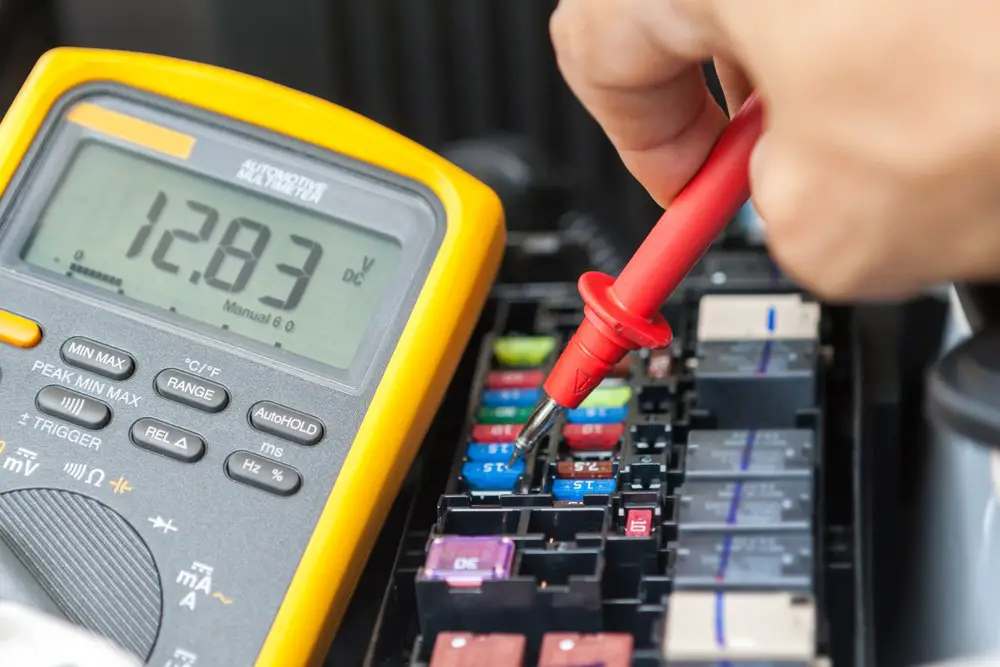
After confirming that your car is switched off, try and find the possibly damaged fuse using the multimeter. You should do this by heading straight to the fuse box, and you can use either the owner’s manual or a diagram that corresponds to showing your vehicle’s system.
Consequently, try and locate the fuse which matches the system which you suspect might be having an issue. For instance, in case the power door locks have stopped working, you then need to pull the corresponding fuse. After that, you should pull out the fuse, and you need to ensure you pull it straight out to avoid damaging or bending the prongs as you are doing this.
Step 3: Check the connection
Now that you have the fuse that you suspect might have failed, you should start by first inspecting it visually. If the fuse has a clear plastic, you should try and check whether the connection appears broken by any chance. However, this is not always possible, and in such a scenario, you then need to take out your multimeter.
To make use of a multimeter, you need first to switch it on and then take out the probes. Subsequently, set your multimeter to ohms as this will enable you to measure the fuse’s resistance. Place the probes into contact with each other to get a baseline reading and thereby get a rough idea on the number that you should get once you place them on the fuse. With this reading in mind, you now need to go ahead and connect the probes to the car’s fuse.
Step 4: Check the multimeter reading
You now need to go ahead and connect each of the probes to a prong, and you will get to see a reading. If the reading is close to that displayed when the probes came into contact with each other, then your car’s fuse is good. Nevertheless, if you do not get a reading, then this means that the fuse is damaged since current cannot pass from one probe to the other across the fuse.
To verify that the fuse is without a doubt blown, you should adjust the multimeter set to a setting measuring the current that is an arrow which has a line. Consequently, connect the prongs and probes in a similar manner, and if a continuous beeping sound is produced, the fuse is functional. However, if no sound is created, you can now confirm that the fuse is damaged.
Step 5: Replace the fuse
Once you have confirmed that the vehicle’s fuse is blown, you need to go ahead and replace it. This process is easy and straightforward since all you need to do is to purchase a new fuse that is identical to the damaged one and connect it. Nevertheless, if the fuse was still working, you then need to do further inspection into the possible electrical issue that might be causing you this considerable inconvenience.
Usually, testing the car fuse is often the first step most people take as it is a simple procedure that will only take you a few minutes. Additionally, you need to test every fuse that is found in a particular system to make sure that all of them are working.
What are the possible causes of the car fuse blowing?
The fuse plays an essential role in protecting the circuit from greater current than what it can handle. Thus, a blown fuse is a sign that of a short somewhere either between the ground and power wire or two wires.
Some of the most common causes of the fuse blowing are;
- The wire harness going into the liftgate or trunk lid breaks in at the position its meant to bend, subsequently shorting and popping the fuse connected to the brake lights or taillights.
- You installed a wrong bulb either in the taillights or headlights by mistake.
- A shorted accessory such as a cigarette lighter socket is connected into the power socket front’s accessory, or a metal object such as a coin falls inside.
- A wiring harness linked to a component found in the engine bag rubs through and subsequently blows a fuse.
Conclusion
If you wanted to understand how to test car fuses with a multimeter, reading through this article has provided you with some valuable insight into the steps you need to take. Subsequently, you will be in a better position to identify whether it is car fuses that are damaged or another electrical component.
Furthermore, you also now have an idea of some of the most common reasons why a fuse blows. Therefore, you are in a much better position to take preventive measures to ensure you do not expose the vehicle fuses to a higher possibility of getting damaged.
