Arduino is a popular open hardware development used by makers, hobbyists, and tinkerers to build and design gadgets that can interact with the world. This popularity among these different individuals has necessitated the demand to answer one of the most commonly asked questions – how do you include a file header in Arduino? If you’ve also been in such a situation, look no further.
In this article, you’ll be taken through an in-depth guide on the steps to follow when wanting to include a header in Arduino. Let’s not waste any more time and dive straight into what you need to do.
How Do You Add A Header File In Arduino?
The header is an essential component in Arduino, and there are two possibilities when opening it:
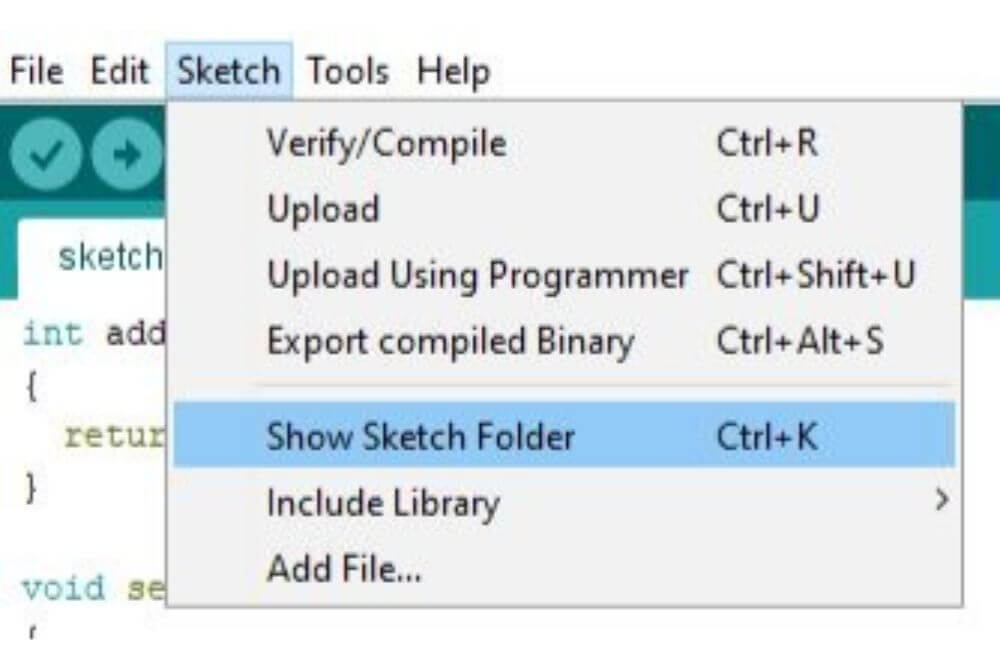
- The header file is a portion of the sketch. You can add the header file to the sketch with the use of the “New Tab” button (Ctrl+Shift+N) located below the “Serial Monitor” button. Upon clicking it, you’ll be requested to fill the filename with both “.hpp” or “.h” suitable options. Consequently, pick the table to allow for editing, plus you can add another header file by using the Sketch > File menu. By doing this, the file will be copied into the sketch directory:
- The header file is usually part of the library and can be created or edited with Arduino IDE. Therefore, it’s impossible to a file like this but you can decide to include by adding “#include ” or by the Sketch > Include Library menu. There are usually many header files in libraries, but it’s vital to #include the name for the main library, allowing the IDE to locate for the suitable directories.
Steps To Include Arduino Header File
Whereas making the header might seem like a daunting task, this isn’t usually the case. The header files to the Arduino library is a collection of CPP files that can be organized in a particular manner. You need to import it, use it, and that’s all. Once you learn how to design an Arduino library, you’ll be able to assist other Arduino developers in carrying out their projects and write reusable code.
Here’s an outline of the questions you need to ask yourself before starting to make an Arduino library:
- What will you call the library?
- What will be the purpose of the library?
- What do you wish to simplify?
Create A Folder
You should start by creating a folder on your computer that houses every file used for this project. Consequently, proceed to give the folder a similar name to the library, and for this illustration, we’ll use the name “FlickerMe.” It’s vital to ensure the naming is consistent through this whole tutorial while taking into account both lowercase and capital letters as they matter.
Create the Files
The next step will be creating files using a text-based editor such as Notepad2, PSPad, or notepad. This step entails:
- The C++ file (FlickerMe.cpp) library code that includes all of the functions.
- The header file (FlickerMe.h) containing the library function statements.
- Keyword.txt that’s typically used within Arduino IDE for syntax highlighting.
While you must write inside all of these files, ensure there’s a blank FlickerMe.cpp, FlickerMe.h, as well as keywords.txt files in the FlickerMe folder. This is a better routine that is going straight to first creating the header file.
The C++ File
Inside this file, you’ll find the functions of the new library. Consequently, you should proceed to drag all the useful Arduino code needed for the library to operate correctly with an Arduino. Whereas you still haven’t created a header (FlickerMe.h), make sure also to import that too. As a result, the first two lines need to be:
#include < Arduino.h>

# include
After doing this, proceed to the subsequent section, which is the “constructor” that’s responsible for building a FlickerMe object. With a FlickerMe object, you’ll be able to call every public function inside the FlickerMe library. Moreover, the constructor allows you to define the default constants or variables.
FlickerMe: FlickerMe (){_dPin = 13;}Do you wish to blink an LED on a different pin? If so, design a function setting a pin that you’re planning to use.
Void FlickerMe: : setOUTPUT (int dPin) {_dPin; pinMode(_dPin, OUTPUT;} After doing this, you’ll now be left with creating a beneficial part of a code. This entails creating a simple function that blinks an LED for a certain duration. There’ll be a set parameter for the function that’ll be used when setting the blink period.
The Header File
Using the header file, you’ll be able to make library function declarations. You should start by opening the “FlickerMe.h” file and the first thing to do is confirming the library is yet to be defined.
#ifndef FlickerMe_h
If the file isn’t defined, make sure to define the library:
#define FlickerMe_h
You should consequently give access to the standard Arduino constants and types.
#include “Arduino.h”
After doing that, start creating a FlickerMe class.
Keyword.txt
This file contains the keywords for a library that enables proper syntax highlighting. It’s an optional file and you can choose to omit it, but it highlights functions depending on keyword mapping or highlights your classes.
- LITERAL1: explains constants, for instance, LOW, HIGH.
- KEYWORD1 which elaborates classes
- KEYWORD2 specifies the functions and methods such as delay, digitalWrite, and analogRead.
- KEYWORD3, which states structures, for instance, loop, while an if.
It’s essential to confirm the use of one tab between the “KEYWORD” mapping and the keyword. According to our illustration, the KEYWORD here is FlickerMe, whereas “flicker” is the function, thereby making it KEYWORD2. Therefore, the keyword.txt file comprises of the following text:
FlickerMe KEYWORD1
SetOUTPUT KEYWORD2
Flicker KEYWORD3
Include An Example Sketch
It’s also recommended to have a sketch which offers an example of the library being used. This sketch gives some context and when planning to include a sketch in your library, make sure to observe these straightforward rules:
- Make an “examples” folder.
- Design an example sketch and add it to a folder with an identical name to the sketch.
- Add the sketch folder in the folder examples.

Conclusion
If you had no idea where to start when wanting to add a file in Arduino, reading through this article has provided you with useful insights. With these details in mind, you can now confidently go ahead and include a header file in Arduino without any hassle.


