
When working on an electrical project, checking on the amperage or the amount of electricity flowing through the circuit is critical. When measuring the amps, you will be able to determine whether something is pulling more electrical energy than average. Therefore, it is necessary to measure DC amps using a multimeter.
Understanding how to use or operate a digital multimeter is vital for the entire process. Since the current is among the basic electronic parameters, measuring the amount of current flowing in a circuit is essential to determine if it is working correctly. With a digital multimeter, you will be able to understand factors associated with current consumption. In this article, we shall be discussing how to measure DC amps with a digital multimeter.
Safety
When measuring DC amps using a digital multimeter, you should always maintain safety precautions. Low levels of amps can be dangerous. The most apparent hazard is fatal electrocution. Low amperage of approximately 50 milliamps is capable of causing heart arrhythmias as well as other long-lasting health problems. Before you start measuring DC amps, you should familiarize yourself with all the cautions spelled out in the digital multimeter manual.
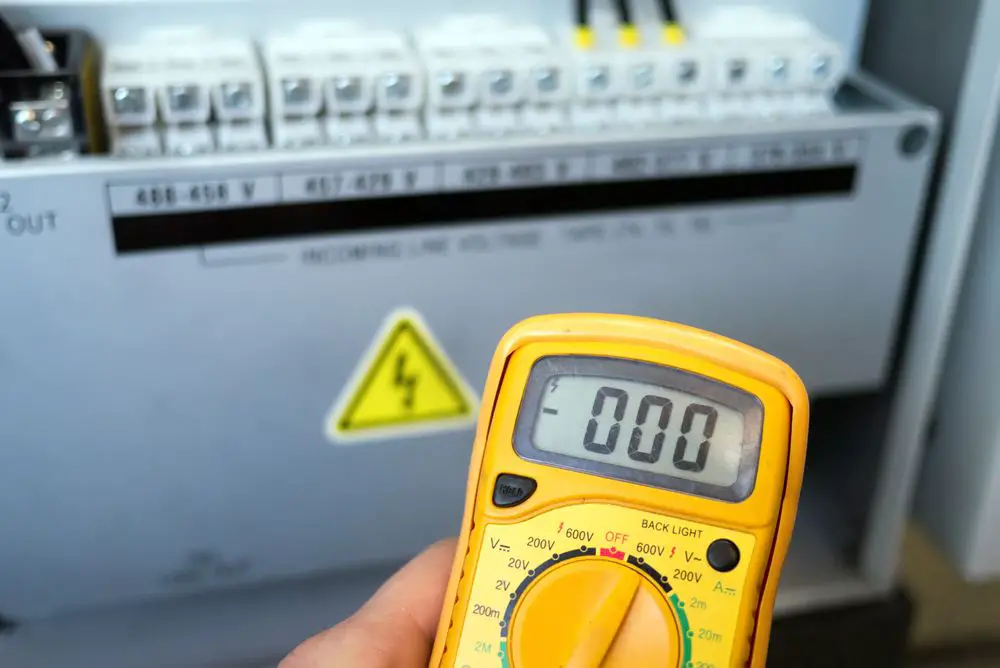
Familiarizing with the digital multimeter
Digital multimeters feature similar appearances. There is a blackjack available in the multimeter for the common lead, as well as three red jacks. One red jack is responsible for measuring voltage and resistance. While another red jack is responsible for measuring amps, and the last one is responsible for measuring milliamps and microamps. The amperage symbol on the digital multimeter is an uppercase A. The milliamps and microamps are abbreviated as mA and µA, respectively.
Most digital multimeter features a dial that selects various functions such as testing DC and AC voltage, resistance, and continuity. There are several settings that might be available on the dial of your digital multimeter, such as selecting specific ranges and measuring amperage.
Setting a digital multimeter range
A range is the level of amps you intend to test. When conducting a range test, it is advisable to start with the highest settings. This means that you should plug the red probe in your multimeter into 10A jack.
If your digital multimeter dial features a single setting for amps, you should set it there. However, most digital multimeters are auto-range; therefore, they are capable of selecting the right range when you begin testing. You should set the black test lead to the blackjack that is labeled as Common or COM.
When operating a multimeter that does not feature auto-range, it should feature a high and a low amp setting. You should set the dial at the 10A setting.
Measuring DC amps with a digital multimeter
Once you have familiarized yourself with the multimeter and understood how it operates, you can now try and estimate the DC amps. It is relatively easy to measure current using a digital multimeter. By following the following steps, you will be able to measure DC amps with a digital multimeter at ease;
- The first step is turning on the meter.
- Inserting the probes. Ensure you insert the probes into the right connections. Most meters, there numerous connections for probes. You should place the black probe on the one labeled common. The remaining probes should be connected to the correct socket in order to carry out the current measurement. At times there is a special connection done for measuring current, and at times there is a separate connection done for either low or high current measurement. You should choose the correct one for the current measurement you intend to perform.
- Correct measurement type. You should set the main selector switch on your meter to the right measurement type, which is current. Once this is done, you should set the range of measurements you intend to measure. When selecting the range, ensure to set it above the maximum range you anticipate to read as previously stated. DMM range can be reduced necessary. By choosing a high range while measuring the current, you will be preventing your meter from being overloaded.
- Optimal range. It would help if you optimized the range while measuring current. If possible, you should enable the leading digits not to read zero. By doing this, you will be able to read the highest and most significant number.
- Maximum voltage. Once you are through with reading your measurements, it is advisable to place your probes in the voltage measurement socket. When done, you should turn the range into the maximum voltage. This will help prevent any damage to your meter when accidentally connected without keeping in mind the range used.
Voltage measurement analysis
Voltage measurement is often taken in order to;
- Establish whether a voltage is present at a particular point
- Ensure that the level of voltage is at the right level.
Usually, AC voltage varies widely, which is between -10% and +5% of power source rating; however, it causes no problem to a circuit. Nonetheless, a slight variation in DC’s voltage can lead to trouble. The precise amount of DC’s voltage variation highly depends on the application.
Some DC applications do not allow large DC voltage variation. It would be best if you always referred to the manufacture’s specifications for a precise value in a circuit while taking as well as comparing DC voltage measurement.
AC and DC voltage measurement
DC measurements are at times taken in circuits that feature AC voltage; however, this differs with applications. To acquire maximum accuracy for a DC voltage measurement, you should consider measuring and record AC voltage first. Once this is done, measure the DC voltage by selecting the DC voltage range, which is equal to or greater than the AC voltage range.
Some digital Multimeters are capable of measuring and displaying the AC as well as the DC components of a signal. The digital multimeter will display the measurements in three different ways;
AC portion will be displayed in the primary display while the DC portion will be in a small secondary display.
DC reading can be displayed in the primary display as the AC goes to the secondary display. This is common in most digital Multimeters.
Combining the AC and DC value. The signal will be equivalent to the RMS signal value.
