
Doors are bound to bind and stick on entryways especially if they have been fitted incorrectly. Tightening the hinge screws may rectify the problem; but only temporarily. The best way to solve the situation is to plane the door to remove the excess wood, causing it to get stuck.
The ideal gap between the frame and the door is 1/8 inch on all sides; anything less means that the door has a thicker frame that needs to be shaved off. The plain old hand planer is the most suitable for removing the excess wood. The sharp-angled blade allows you to push it over the surface providing maximum control compared to an electric planer. Here’s how to plane the door.
Tools Required
- Hand planer
- Pencil
- Screwdriver
- Ruler
- Sawhorses
- Sandpaper
- Paint
- Wood sealer
Procedure
Identify the Part that is Sticking Out
Inspect the door to identify areas that show signs of rubbing. Places that need planning often have rubbed or discolored paint.
Picked For You: Our Top 5 Recommended Hand Planers for Doors
If the discoloration is mild, draw a circle around the area using a pencil. It helps you find it when planning. Alternatively, you can inspect the space between the door and the jamb. Gaps are smallest where the door is sticking.
Once you have identified the areas that need planing use a pencil and a ruler to draw a line between the points. It can be a short length, or the entire edge might need shaving.
Set the tip of the pencil and compass at 0.125 inches apart and extend it to the jamb to draw a straight line down the vertical edge of the door. Do it on both sides of the door, so the entire length is cut symmetrical.
Detach the Door from the Frame
If only a small section needs planing, you might not need to remove the door from the frame. However, removing the door provides maximum control and allows you to plane more extended portions. There are two ways to do this.
First, you can unscrew the hinges by taking off the screws from door face and leaving the hinges attached to the frame. If your door has removable pins, you can remove the door by unscrewing the hinge from the door using a pair of pliers. Use a pair of pliers to take the pins out, pulling the pins straight from the bottom.
Then, lay the door on a flat, stable surface. You can place it on a worktable or a sawhorse s as such surfaces allow you to exert adequate force on the door when planing.
Also, ensure the area you are working on is accessible. Secure the door using clamps or straps to prevent it from moving once you begin working on it.
Choose a Suitable Plane
The bench plane is the most suitable for smoothing out surfaces around the edges of a door. A block plane may also come in handy if you are working on a small section of the door.
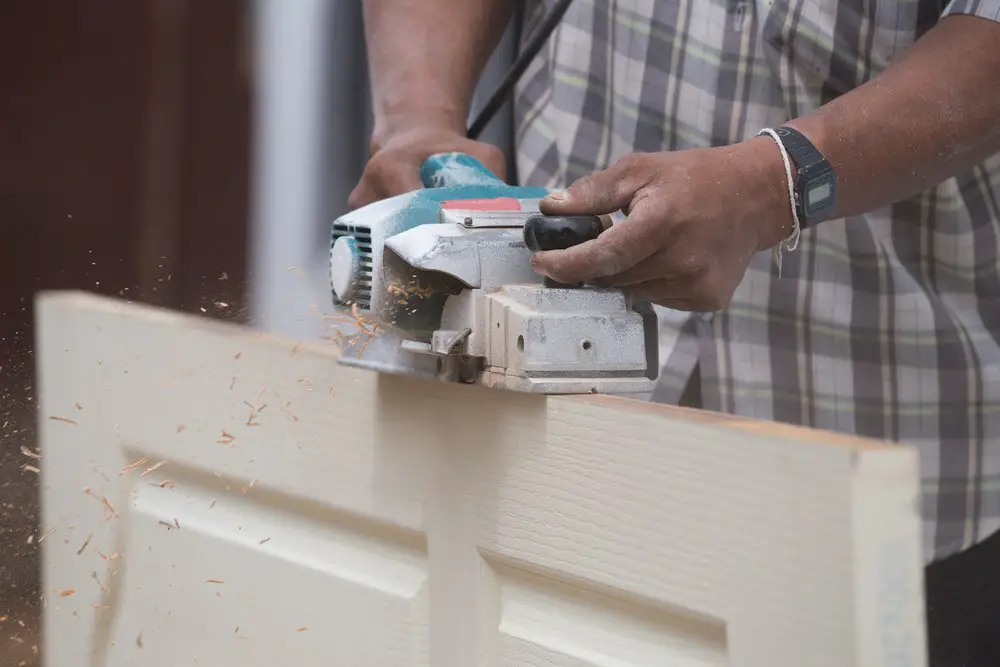
However, if shaving off more than 0.125 inches consider using an electric planer. It makes the task easier, but you need to be cautious to avoid creating gouges.
Adjust the Plane
Ensure the plane is adjusted to a suitable angle to remove the right amount of wood. If not, fine-tune it by adjusting the wheel beneath the handle of the plane.
Planing the Surface
If you are planing a vertical edge, shave the surface following the wood grain. Most doors have grains running from the top to bottom, allowing you to plane the surface in this direction.
You Might Like: Our Top 5 Recommended Hand Planers for Doors
However, if working on a horizontal edge, work toward the centre from the outer side. Following this direction creates smooth cuts instead of rough and chunky cuts. Apply light pressure on the planer to avoid shaving off the excess wood.
Sand the Surface
Sand the planed section to remove any large grooves. Start with rough sandpaper and finish off with a fine one to create a smooth surface. Be sure to take as little wood off the surface.
Repaint the Surface
If the door is painted, you need to recoat the surface with paint. If it is stained, apply stain on the planed surface and ensure it blends with the existing stain. Follow it up with a wood sealer to protect it and create a smooth finish.
