
When buying an Electric planer, you need to choose between two devices: a power hand planer and a stationary machine. The handheld power planer is a choice device for many woodworkers as it planes both wide and narrow surfaces. A stationary power planer, on the other hand, is suitable for small boards only.
Most stationary planers have a 12-14 inch planes which are great for planning small sizes of wood surfaces. Wide boards, however, need devices with large planers or those that make it easy to maneuver hard-to-reach areas. We look at how to plane wide boards using the electric hand planer:
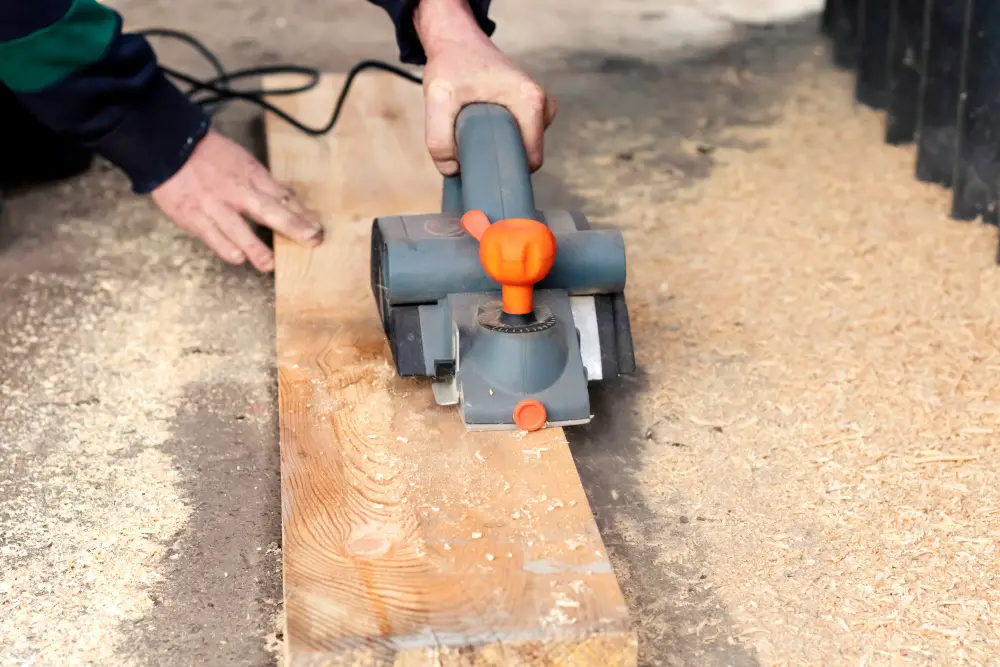
How the Plane Works
The device is similar to a jointer as it has blades attached to the cutter head, which rotates up to 20,000 rpm. Its hand grip is also used to adjust the depth of the instrument by turning the planer backward and forward to move the front soleplate up and down. The wood removed is equal to the difference in elevation between the front and the rear shoe plates of the device. When using an electric hand planer:
- Rest the front sole of the plate on the wood and don’t allow the blade to rest on the wood. Turn on the planer and allow the motor to attain full speed before relieving it into the wood
- Keep your feet steady and comfortable when making a complete pass on the piece of wood
- Avoid overreaching, i.e., allowing the blade to go through the other side of the wood. It may cause the wood to snipe as the front show drops off at the end
- Apply the same pressure on the planer when smoothing the surface. It keeps the tool steady and helps you when planing at the end of the piece. Even pressure ensures that the piece is cut uniformly
- Move the planer slowly. This is because the speed at which you push the device determines how deep you plane the surface
Planing a Wide Board
Tools Required
- Electric planer
- Safety goggles
- Marker pen
- Sandpaper or belt sander
Procedure
Setting the Board
Place the board on a flat, stable surface wider than the board you are working on. Ensure the board is stable when planing into high spots. This is particularly important if the board is cupped. It ensures the board has an upward facing bend that keeps the workpiece stable.
You also want to identify the high spots. This step helps you plane the surface from end-to-end, so no side is higher than the other. Next section of the board to ensure the entire surface is planed. If working on a 48-inch coffee table or kitchen table, for example, divide the surface into four 12-inch sections.
Divide the sections individually using a marker pen and ensure each of them is as flush as possible. It reduces the amount of time you spend hand planing the entire surface and sanding the board. If the wood is still too thick or wide for planing, consider ripping it into small pieces, planing each section individually, and joining them back into a single piece.
Plane the Board
Here you need to plane the board using the markings made in the previous step. Flatten the board in stages to ensure there is no tension on the wood as it may cause it to change shape. You need to shave off 75% of the wood on each side.
Allow the Board to Settle
Allow the board to settle for a day or two before reworking it. This period allows the board to release any tension and resume a natural shape.
Sand the Board
Sand the surface to ensure it flattens evenly and look and feels better. You may also use a wide-belt sanding machine to achieve a near-perfect finish or the usual belt sander. A belt sander works just as well as a sanding machine as it creates an incredibly smooth finish on the board.
Safety Tips
- Wear safety goggles when working on the board to prevent flying shavings from harming your eyes
- Switch off the tool before changing blades
- Fasten the screws locking the blade
- Avoid putting the planer down when the edges are still running
- Hold the planer using both hands
- Place the board on a flat surface without bumps
