
A compressor is a component that plays the vital role of increasing the efficiency of a unit as well as prolonging its lifespan. Typically, it contains both a motor that has a run and start windings. The purpose of the motor is to turn the pistons that compress the refrigerant within the system.
This is all possible thanks to the high-pressure load that the piston generates as it is starting up, and consequently, the motor makes use of its start windings to attain its maximum speed. Furthermore, the amperage load that the air conditioning compressor uses while starting burns all the loosely fitting wire terminals. In case any run capacitor fails, this increases the chances of an amperage draw when the compressor is on the run and start phase.
Aw, Poor Compressor…
So how can you know your compressor is malfunctioning? This is a question many people to ask themselves, and in this article, you will be taken through the step by step guide on how to use your multimeter to test a compressor.
Some of the signs that your AC compressor is failing to cool your home include;
- A jump in your electrical bill
- When the air conditioning compressor is worn out.
- Reduction in the generation of fresh air
The above points are the early signs of showing you something in the system has gone wrong and needs to be fixed immediately.
Steps to follow when testing your compressor using a multicenter
- First, you need to confirm that your AC condensing unit circuit breaker is turned off from its electrical sources. It usually is located in the electrical panel next to the building’s electric meter, with the right circuit breaker uses an air conditioner (AC). Doing this is essential as you will be safeguarding your safety, which you need to look after at all times when dealing with electricity.
- Using the appropriate screwdriver, open your condensing unit electrical panel as well as its entire cover. The location of the electrical panel is usually mounted to the side of the condensing unit at the point where wires make their way to the unit. However, in case the fan’s unit is mounted on the compressor’s cover, you will have the responsibility of removing screws attaching the cover in position and switch the cover to the side of the unit. The fans usually use elongated wires that permit good access to the compressor without any disconnection of wires.
- Examine the compressor’s capacitor, and you can find this at the electric panel of the condenser. Usually, capacitors have an oval shape, and its terminal wires exit its lid, and you should be keen to observe whether the capacitor has a leaking or swollen leads. If it has, you then have a task at hand of replacing it with the same replacement model of the capacitor. Moreover, it would be best if you always took note of the replacement capacitors as they need to have an identical voltage rating.
- Using a needle-nose pliers pull wires from the compressor capacitor’s wire terminals. Check if the wires from your condenser’s contactor connect to the capacitor terminal indicated the label (Com) and if the wire from the compressor attaches to the capacitor’s (Herm) terminal.
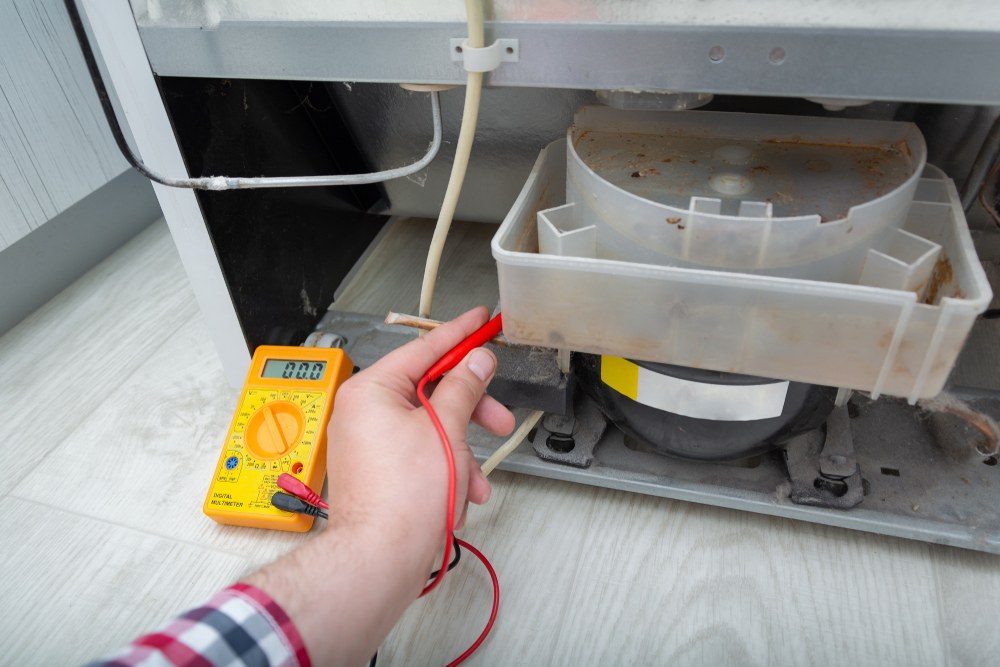
- Set your multimeter to its appropriate settings. Go ahead and hold your multimeter lead on each capacitor terminal and make a comparison on the multimeter readout to the capacitor’s capacitance rating. The multimeter reading value must always remain within 10% of the capacitor’s rating. In case it is not within 10%, then you have to replace the capacitor immediately. After you are done, remember to return the condenser’s wire to its correct spots on the capacitor.
- On the side of the AC compressor’s wire terminal coverslip, a fitted screwdriver into its small slot, and then lift the cover of the compressor using a screwdriver.
- Check the wire compressors attached to the capacitor’s wire terminal. If the terminals are electrocuted, replace using a compressor terminal repair kit. Furthermore, follow strictly follow the instructions indicated on the repair kit as you replace the terminal cover.
- After replacing the condenser’s compressor cover, retain your screws by tightening the cover using the appropriate screwdriver.
- Switch on your multimeter to the amperage settings. Compress the multimeter amp-robe over black-colored wire resulting to the compressor’s popular terminal.
- On the condenser’s identification label, find the ratings of condenser’s ‘RLA’ and ‘LRA.’ Therefore, the condenser’s tool run amperage ratings are usually given by Rated Load Amps (RLA), while the Lock Rotor Amps (LRA) evaluations give your condenser a maximum quality startup amperage.
- After that, turn on the condenser’s circuit breaker and observe the multimeter displayed results, which should be approximately the condenser’s LRA rating. However, when the compressor is on its maximum speed, your multimeter reading value should drop to your condenser’s RLA rating then switch off the condenser’s circuit breaker. Using a hard-start capacitor across a compressor’s run capacitor terminal connects a hard-start capacitor all over the compressor’s run capacitor terminals only if the multimeter startup reading value is above the condenser’s LRA ratings. Therefore, if the hard-start capacitor fails to fix the extraordinary LRA readout, make a point of replacing the compressor. So, if the compressor’s RLA readout seems to be high check, your system’s for a high refrigerant level, and if the compressor has a maximum RLA readout, check out your system for a high refrigerant level. On the other hand, if your compressor has a minimal RLA readout, examine your system for a low refrigerant level. In case the compressor shows no sign of amperage, the defrost circuit board and the contractor need to be fixed.
Conclusion
From the above information, you now have an idea of how to go about testing a compressor with a multimeter. Therefore, thanks to this useful information, you no longer will struggle to inspect your compressor whenever you suspect it is not working as expected. However, it would help if you always were very cautious when doing this always since your safety should always be prioritized.
