
In areas with no access to electricity, campers out in the middle of nowhere, or just travellers, solar panels are the most used to meet their electrical needs.
The solar panel offers an affordable source of electricity and is environmentally friendly. The solar panel being passive energy gatherers, they are challenging to identify if they are faulty. Unlike other electrical devices, that one can diagnose by just touching and looking at them, a solar panel best way to diagnose is by testing/ measuring their Amps and volts.
It is advisable to check the power output of your solar panel before installing them. For solar panel measuring, the main two things to consider in identifying the power output of your solar panel is the voltage and the current.
Things to do and have before testing your solar panel
- You need to have a solar panel
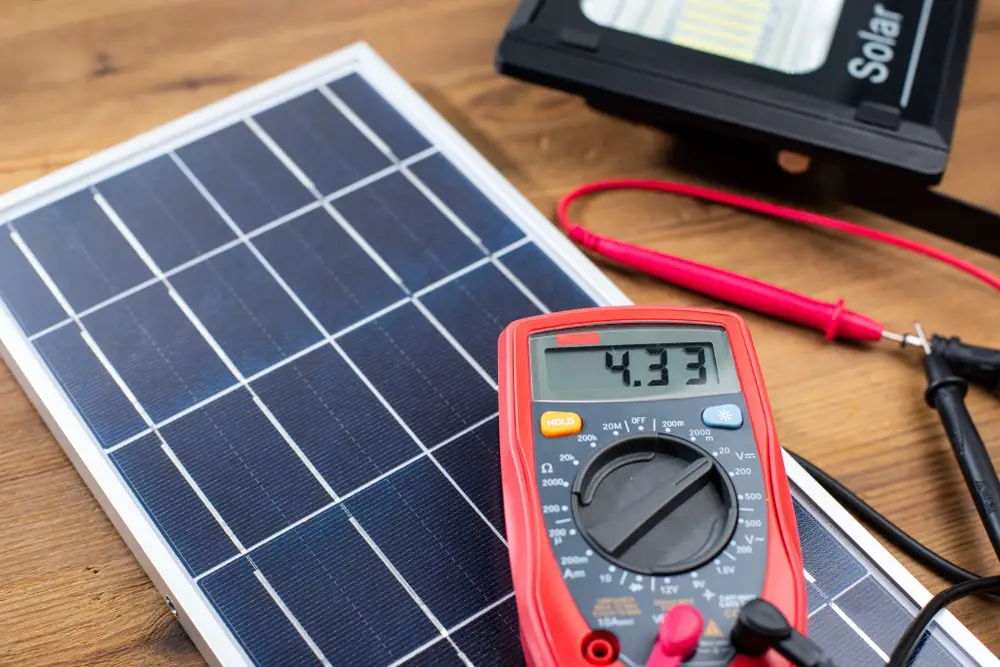
- A multimeter, preferably a digital multimeter that can measure both current and voltage
- Understanding/ learning the current and voltage of your solar panel.
- You need to know how to use a multimeter
- Suitable sunlight weather for best results
Measuring the volts and amps of your solar panel using a multimeter
In this test, a multimeter will be the best tool to know the volt and amps of your solar panel. There are two types of multimeters; analogue and digital multimeter. The latter is preferred as it has more added qualities.
While using a digital multimeter, there are two main styles of multimeter used in testing amps and volts.
1. Switched multimeter
In this type of multimeter style, between ranges, you manually switch to get the best and accurate readings.
When you use switched multimeter, you need to select the most appropriate multimeter function. For voltage measuring, you will need to set the DC voltage or DC amperage.
2. Auto range multimeter
In this type of multimeter, it automatically switches between ranges for accurate readings.
How to test solar panels for volts using a digital multimeter
- The first thing to do is place your solar panel outside in direct sunlight.
- Next, you need to set your digital multimeter to volt settings (DC)
- The next step is to ensure that you select a voltage range that can display the possible maximum voltage of your solar panel in an open circuit. For example, if your solar panel is 20 volts rated, your digital multimeter should be set to a reading of 200 volts for an accurate reading.
- The next step is to connect the black probe to the COM labelled port, and the red probe to the V/mA labelled port.
- You then need to touch your solar panel to the multimeter probe. You need to match their polarity, for example, red to red and black to black. This way, you will have an accurate solar panel voltage reading.
How to test solar panel amps using a multimeter
- The first thing to do is place your solar panel outside in direct sunlight.
- Next, you need to set your digital multimeter to amps settings (DC)
- After that, you will need to set your multimeter to the highest amperage sensitivity to avoid blowing the digital multimeter’s fuse.
- After completing the test, you will find the power output of your solar panel to around 21 volts and five amps
After knowing the volt and amps of the solar panel, then it becomes very easy to calculate the wattage. This is achieved by multiplying them.
Amps x Volts=watts
Another way to test your solar panel using a multimeter is by:
1. The first step is by gathering all your resources
In this step, you will have to make sure you have all the required tools. These tools and equipment are;
- A solar panel
- Two multimeters, one to measure current while the other to measure voltage
- A resistance box
- Wires, most preferred are short length
- A spreadsheet
2. The second step is hooking up all these equipment and tools
In this step, you need to connect your solar panel in a parallel circuit with the multimeter and resistance box also connected in the same circuit. Make sure that you have set the load to ‘open.’
3. The third step is pointing your solar system towards sunlight
While testing your solar panel, make sure to do so on sunny days. As for days when there is little to no sun, a halogen lamp is the most preferred. This is so because, of all the artificial light, a halogen lamp gives off radiation similar to the sun though in small quantities. The demerit in using a halogen lamp is that their heat normally damages the solar panel with time.
While positioning your solar panels, make sure to place them towards direct sunlight and avoid shadows and shades.
4. The fourth step is measuring non-load voltage
While the load resistance is open, you need to take the voltage readings of your solar panel output. This is usually the maximum voltage your solar panel cell will produce under direct sunlight.
5. The fifth step involves measuring short circuit current
This process is normally optional. The purpose of this measurement taking is to identify your solar panel cell maximum current provision. While your load is still open, you need to change your digital multimeter to test current. To this process, you will have found out the maximum current and maximum voltage your solar panel can produce.
6. The sixth step usually involves sweeping the load as you record the voltage and current
This process is where all the work begins. The first thing you do is change your load from open to resistance. Do this while your load box is set to maximum resistance. The data points you need to record are;
- Resistance setting
- Current
- Voltage
After recording the above data, you will need to switch the resistance to the other lowest value and also record the results. You need to do this until you have recorded all resistance setting values. Your recording should give you a trend in voltage dropping as resistance drop.
