
Ovens are one of the most used cookers in every kitchen. Being multipurpose equipment, the oven is a preferred choice by many. This being said, ovens commonly get issues or problems. Among the most affected part of the oven is the element.
What is an oven element?
An oven element is a heating component that creates heat energy from electrical energy. This is usually achieved through the resistive process (also called Joule heating). Electric current encounters resistance as it is passing through the oven element, thus producing heat.
Commonly, most oven heating elements are manufactured out of a coil, strip of wire or ribbon that produce heat. Oven heating elements usually contain electric current that flows through the oven’s coil, ribbon, or cord and then gets hot. The oven element then converts the passing electrical energy to heat, which spread outward to every direction.
Symptoms associated with a faulty oven element.
1. Nothing in your oven works, or if working, they work intermittently
2. A single burner does not heat
3. A single heater only works intermittently
When testing the resistance of the oven element, there are different multimeters types that will assist you at the same timework efficiently for this type of test. However, you are advised to make sure you invest in a multimeter that will work to give you long-term service and a multimeter that has broad functionality range available.
Preferably, the Fluke digital multimeter brand is the best of the entire multimeter in the market, though they are the most costly.
HOW TO CHECK AN OVEN ELEMENT WITH A MULTIMETER
1 – Preparation
The first step should be to prevent or avoid any electrical shock; this can be avoided if you unplug your oven, or you could also turn off the electricity from the electrical panel service.
2 – Detach the oven Elements
In an electric oven, there are usually two heat elements:
1. The first one is usually located on the top, and is often the main element,
2. The second one is generally located to the bottom and is generally used in broiling.
These oven elements are either bolted on or screwed, so you need to use the correct tools to unfastened them. Normally held in place by support brackets, you will be forced to unscrew them.
3 – Remove the oven Elements
In this third step, you will need to pull your oven’s elements forward in order to expose their wiring, which is usually attached. It is advisable to be very careful as you detach or disconnect the wiring from oven elements so that you can avoid bending or damaging anything and avoid the wires from falling back and out of your sight and reach.
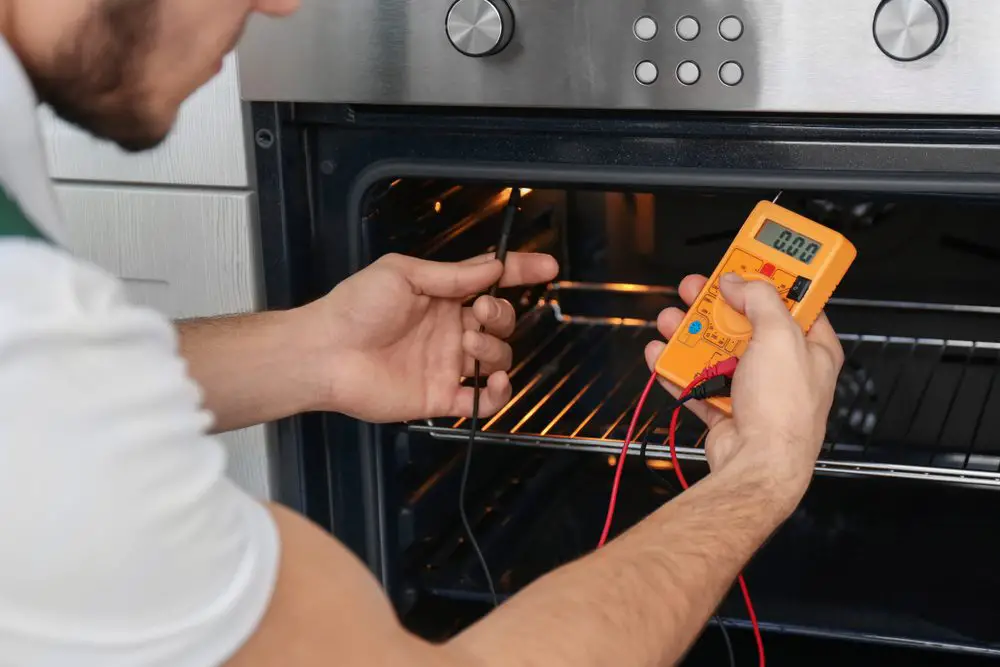
4 – Checking the Elements
Having completed in taking your oven elements out, this fourth step involves checking them. You need to set your digital multimeter to read resistance times one. Next, you need to touch the digital multimeter’s probes to the wire terminals of the oven elements.
Your digital multimeter should display an even reading. After that, you need to place your digital multimeter one probe to the wire terminal and the other digital multimeter probe on the oven element. The meter needle of your multimeter should remain and not move. If the multimeter’s needle moves, this means that you are required to replace the heating element because they are faulty / malfunction.
To test your oven element for continuity, its appliance is first disconnected from any power. After its appliance is turned off from the power and are can be worked safely, your oven element has to be separated/isolated from the electrical circuit. This is achieved by removing one or two wires that are connecting. After all, this has been done; you can hold a continuity tester’s leads or ohmmeter against all every element terminal.
Knowing the exact element of your oven element is usually not important because it does not normally change in its time span unless it becomes completely open (show resistance that is infinite) when shorted to ground or defective. For those who are curious, most ovens’ large cook top surface burner is normally reading about 27 ohms, and a small one reads 45 ohms. An oven’s broil or bake element’s resistance will mostly read about 20- 40 ohms regarding its wattage.
How to replace an oven element
Before you start replacing your oven element, it is essential to identify specific things;
1. The first thing is the oven manufacturer,
2. The other is the number of your oven model or the oven’s element part number. This information can be found in the packing of the new part, which you will have to counter check with if they match.
It is always essential to consult the owner’s manual, and you need to refer to the manufacturer’s instructions.
First step
The first step to being safe involves turning off the power mostly at the breaker box or unplugging the oven.
Second step
The second step is to unscrew or remove all the screws, which are securing the oven’s element to the oven. After removing the screws, you need to pull your oven five to six inches from the back wall.
Third step
This third step will involve removing all the screws, which are holding the oven wires on to the prongs of the element. NOTE; it is essential also to take care so that you note how the wires had been attached so as to know how you can reattach them as they were.
Fourth step
In this step, you install your new element. You need to attach the wires to the element as they had been connected before. Secure your new oven element to the oven’s back wall.
Fifth step
After installing the new element, plug your oven back, then return switch the breaker to the position “ON.”
Sixth step
The final step should be to test your oven. You might see a little smoke as the factory coating burns out.