
Grounding refers to a connection to the earth that acts as a harbor of charge. Usually, a ground wire offers a conducting path to the earth that is independent of the usual current-carrying path in any electrical appliance. As standard electrical codes will require earth on a system; older homes might fail to have earthing.
To assess if your wires are correctly grounded, you should plug in wires from a light bulb into outlet ports and check if it will light up. For further tests, you might consider using a multimeter; this will give the correct reading. Therefore, we shall be discussing how to check ground wire with a multimeter in this article.
What is grounding?
Grounding, also known as earthing, is a process in which discharged electricity from any outlet or appliance is transmitted into the ground rather than to someone who came into contact with a faulty wire accidentally. Grounding is an essential way of ensuring that no one will be electrocuted whenever electricity is discharged.
Steps for checking ground wire with a multimeter
Step 1: Set voltage type
Ensure that your multimeter is set to measure AC voltage. Multimeters are ideal for testing various electrical components from current to voltage and resistance. When using an analog multimeter, you should turn the dial to letter V with wavy lines.
However, for digital multimeter maneuver through the settings until you come across AC voltage. Once you locate it, the select cutoff value that is highest for the voltage on your digital multimeter. By doing this, you will be able to get the most accurate reading. For multimeters without cutoff values, you should set it to the AC voltage setting and commence on the test.
Step 2: Attach leads
On your multimeter, there are two probes with different colors; red and black. At the end of the red lead, attach it to a port on your multimeter that is labeled with Ω, V, or +, whereas the black lead should be plugged into the port labeled – or COM. You should always avoid swapping these leads since you can lead to a short circuit to your multimeter. Furthermore, you should always avoid using leads with cracks, exposed wires, or damaged to prevent electrocution while using the multimeter.
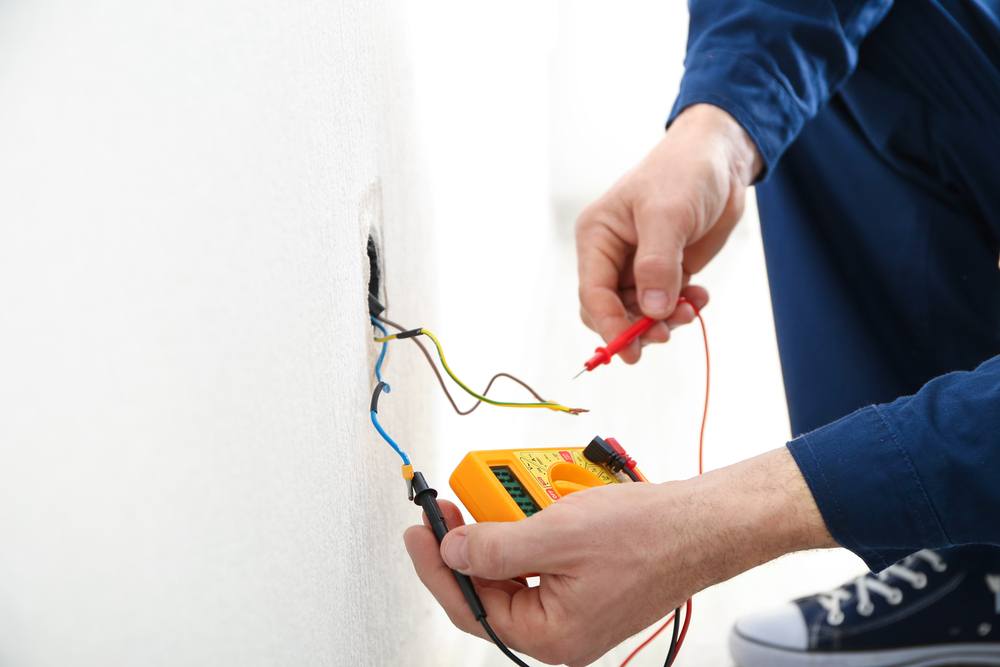
Step 3: Check reading
You should take a reading while the leads are in a live port and a neutral port of an outlet. Ensure you hold the leads on the insulation wrappers around them to prevent any shock while working. Take the end of the red probe and push it into the live port on your outlet; this is usually the smaller port. Take the black probe and push it into the neutral port; this is the largest and longest port in your outlet. Once this is done, check the voltage reading on your multimeter and then write it down.
It would help if you began by testing your multimeter on an outlet that works so that you can figure out how a normal reading should be. However, the ports in which you attach the probes might differ depending on the plug you are using.
Step 4: Analyze & record
You should consider checking on the voltage when you insert the probes that are inserted to earth and live ports. From the neutral port, take the red probe out and place it inside the earthing port carefully; this is usually a U-shaped or circular hole at the bottom or top of an outlet. Check for the reading in your multimeter and see the number of volts that travels between them. You should write your reading so that you can have a comparison.
If your house is equipped with earthing, the reading should be equal or within 5 volts when compared with your first reading. Moreover, when the reading between the live port and earthing port is close to 0, your outlet does not have any earthing. This indicates that your house is not connected and it is not equipped with earthing.
Step 5: Compare Readings
Check for voltage between your earthing port and the neutral port of the outlet. To do this, you will have to place the red probe in a neutral slot while the black probe is placed in the earthing port. There will be a small number of volts reading on your multimeter; compare it to the previous readings you had done. You should as well write down the third reading to understand the amount of electricity that is going between the ports. If your house is not equipped with earthing, there is no need for testing neutral and earthing ports.
Step 6: Calculations
Calculate the total leakage from your outlet and check if it is below 2V. Leakage is the total amount of volts that is being transferred from the earthing port to an outlet. You should then subtract your first reading, which was live to neutral from your second reading, which was live to the earthling.
Once you solve this, you should sum up the number of volts from the third reading, which was neutral to earthing. If the result is above 2V, then your ground wire might be a fault. Otherwise, your outlet will be safe for use. If you have a faulty ground wire, it is best to contact a licensed electrician to come and assess your entire electrical system and diagnose the issue.
You might consider using a lightbulb in checking for ground wire in a socket. To do this, screw 100-watt bulb into the base socket and two wires connected to the lamp. Take approximately ½ inch or 1.3 cm from each wire’s end on the base.
Once this is done, push the wires on the bottom into the neural and live ports in your outlet. Ensure that the cables are plugged into the earthing port and live port to see if your bulb will light up. If your bulb fails to light up, this indicates your outlet is not equipped with earthing.
Conclusion
Usually, a correctly done ground wire will discharge electricity from things such as faulty wire and transfer it to the ground directly. When the ground wire is not done accordingly, electricity will go through anybody in case of an accidental electrical discharge. This is why having a well-grounded house is essential.

Step 3 the larger port is Neutral. Smaller is Hot
Editorial error. We will fix it.