
Running a test on wires using a multimeter is very easy, so long as you have the appropriate skills and knowledge. The main reason for testing wires is to examine continuity between the two ends of your wire. However, this is only possible when you make use of a multimeter, as this helps you in doing a continuity test.
Therefore, when testing for continuity in your wires, stick two terminals of the multimeter against the two ends of electrical energy. Running this test is very vital in case you are to either repair or install an electrical device or component in an appliance, fuse, car, or outlet since poor continuity might cause significant damage through fires or shocks to your entire electrical devices.
What to do?
Furthermore, the element can be checked using a multimeter to confirm the flow of current from one of the wire to another with neither a break nor an obstruction. Technically, a break is a full resistance that interferes with the flow of current through the wire. Therefore, it is always advisable you switch off the breaker on the signal that you are running the test on to avoid any possible severe damages.
Here are the steps you need to follow.
- Make sure you disconnect the wires that you are planning to test for your safety, as well as to prevent any damage to the electrical equipment.
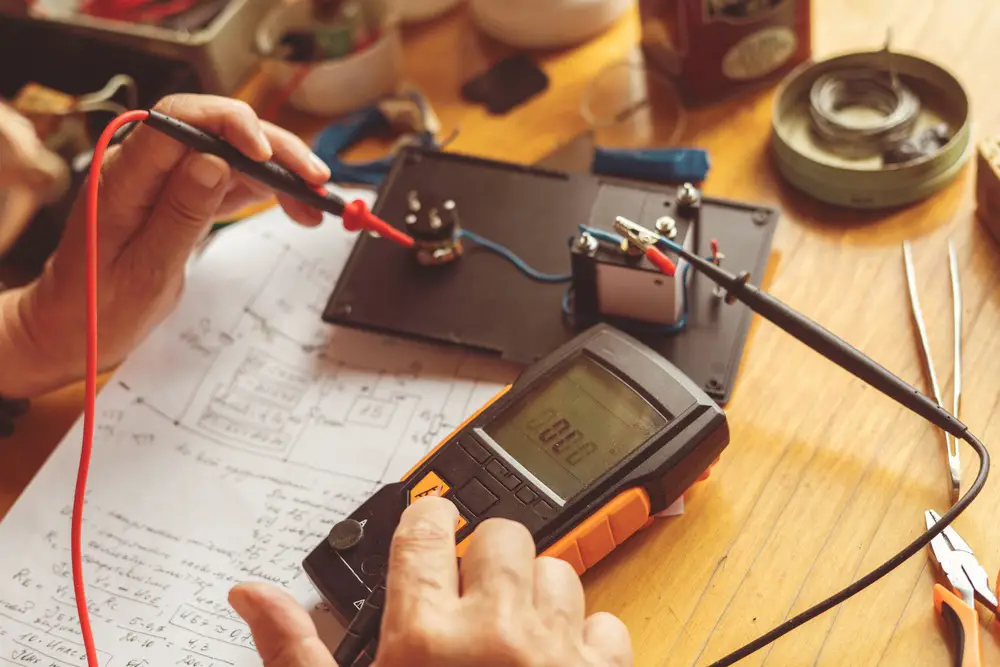
- Connect the red and black terminals of your multimeter to the corresponding slots, with the front of the multimeter having several holes for the terminals. Subsequently, plug the red cord in the slot with a label for measuring amperage, voltage, ohms to measure current and the black cord in a slot labeled (COM), which stands for common, and this is the ground. Additionally, it would be best if you ignored the port with the 10A labeling, as this is used to measure maximum current. You must note that the red probe stands for active current while the black terminal is the ground, especially if you are examining voltage, and there is no difference amongst the cords. The visible metals at the end of the red, as well as the black cord, are referred to as terminals; they are meant for measuring electrical currents.
- Switch on the dial on your multimeter for continuity setting, and this is usually located at the bottom right side of the dial. However, the sign for continuity differs depending on your model and brand, though the continuity mode has a diode sign that is triangular with an alignment on its right side. Furthermore, it also has a symbol similar to a sound wave. However, if you are not sure about it, you should confirm from your manual to get the proper details and information. Moreover, if your multimeter lacks a continuity setting, you can still do a continuity test on the wires by turning the dial down to the minimal number of resistance mode. You should take note that resistance is measured in ohms.
- Touch the metal parts of your multimeter’s terminal together to make sure it works. This is for confirmation, and for continuity, settings touch your two terminals together continuously holding them in position. If the reading displayed on your multimeter is under 1, this means your multimeter is functioning accordingly. Likewise, even if the reading displayed is 0, this is still okay since when the signal is good, the multimeter will typically produce a beeping sound. This is usually an assurance that the continuity setting is functioning accordingly.
In most cases, if there is no beeping, you will probably get a maximum reading value, which will require you to go back to your settings and examine the dial for assurance purposes that you are in the right settings. Moreover, you will also have to confirm the ports in which your terminals are plugged. Lastly, you are required to replace your terminals before referring to your manual script on how to reset your multimeter. - When testing for an electrical signal, ensure you turn off and then unplug the device you want to test. This is because it might be dangerous to run a continuity test as active electrical signals flow through the wires, outlet, or even sour of power. Thus, you should ensure there is absolutely no flow of current during the entire process of testing. Nevertheless, it would help if you took note that some electrical devices such as radios, car systems, and hot tubs usually store charge even after you switch the power off. Therefore, you need to wait for at least 1 hour before you start conducting the test. Subsequently, place the black terminal on the first end of the wire and confirm that the metal piece at the end of your terminal maintains constant contact with the wire being tested. Afterward, place the red terminal on a different part of the wire, and this will probably connect the two terminals using a wire. The current would then be spontaneously transmitted to the other terminal hence displaying a reading.
- Wait for the number to stabilize and then examine the reading being displayed to get your resistance. Usually, the number displayed on your multimeter is not always stable, so you should wait for about 3-4 seconds while maintaining the two terminals in position to get an accurate reading.
- You need to understand the readings being displayed on your multimeter, and it may either correct or incorrect, depending on your multimeter settings. If it displays a reading of 0, then continuity is excellent. However, the reading below 1 indicates an excellent continuity but not perfect continuity, and this could be a sign that the dirty, but it is still safe to use such a wire. However, if the number is greater than 0, this means your battery is faulty and most likely going to die. Additionally, if the reading is higher than 10 ohms, you then should know you have a poor continuity, with this meaning that the resistance is higher than expected, and the wire needs to be replaced. Therefore, you are not supposed to use the wire unless it is fixed properly.
Conclusion
Having read through this comprehensive article, you now know how to make use of a multimeter to test a wire. Therefore, you are better-placed to know whether or not a wire is damaged beyond repair and needs replacement, with this important to ensure the proper running of your electrical equipment.
